Microsoft Entra ID
Configure a Microsoft Entra ID (formerly Azure AD) application so the platform can sign users in over OIDC. Follow these steps, then bring the resulting Discovery URL, Client ID, and Client Secret to your deployment.
Audience: IT (the enabler)
Replace <YOUR_HOSTNAME> below with your deployment's hostname (the URL where
the application is reached).
What you'll collect
By the end you'll have three values to configure on your deployment:
| Value | Where it comes from | Environment variable |
|---|---|---|
| Discovery URL | The Endpoints blade (OpenID Connect metadata document) | AS_API_OIDC_SERVER |
| Client ID | The Overview blade (Application (client) ID) | AS_API_OIDC_CLIENT_ID |
| Client Secret | The Certificates & secrets blade (secret value) | AS_API_OIDC_CLIENT_SECRET |
Step 1: Register the application
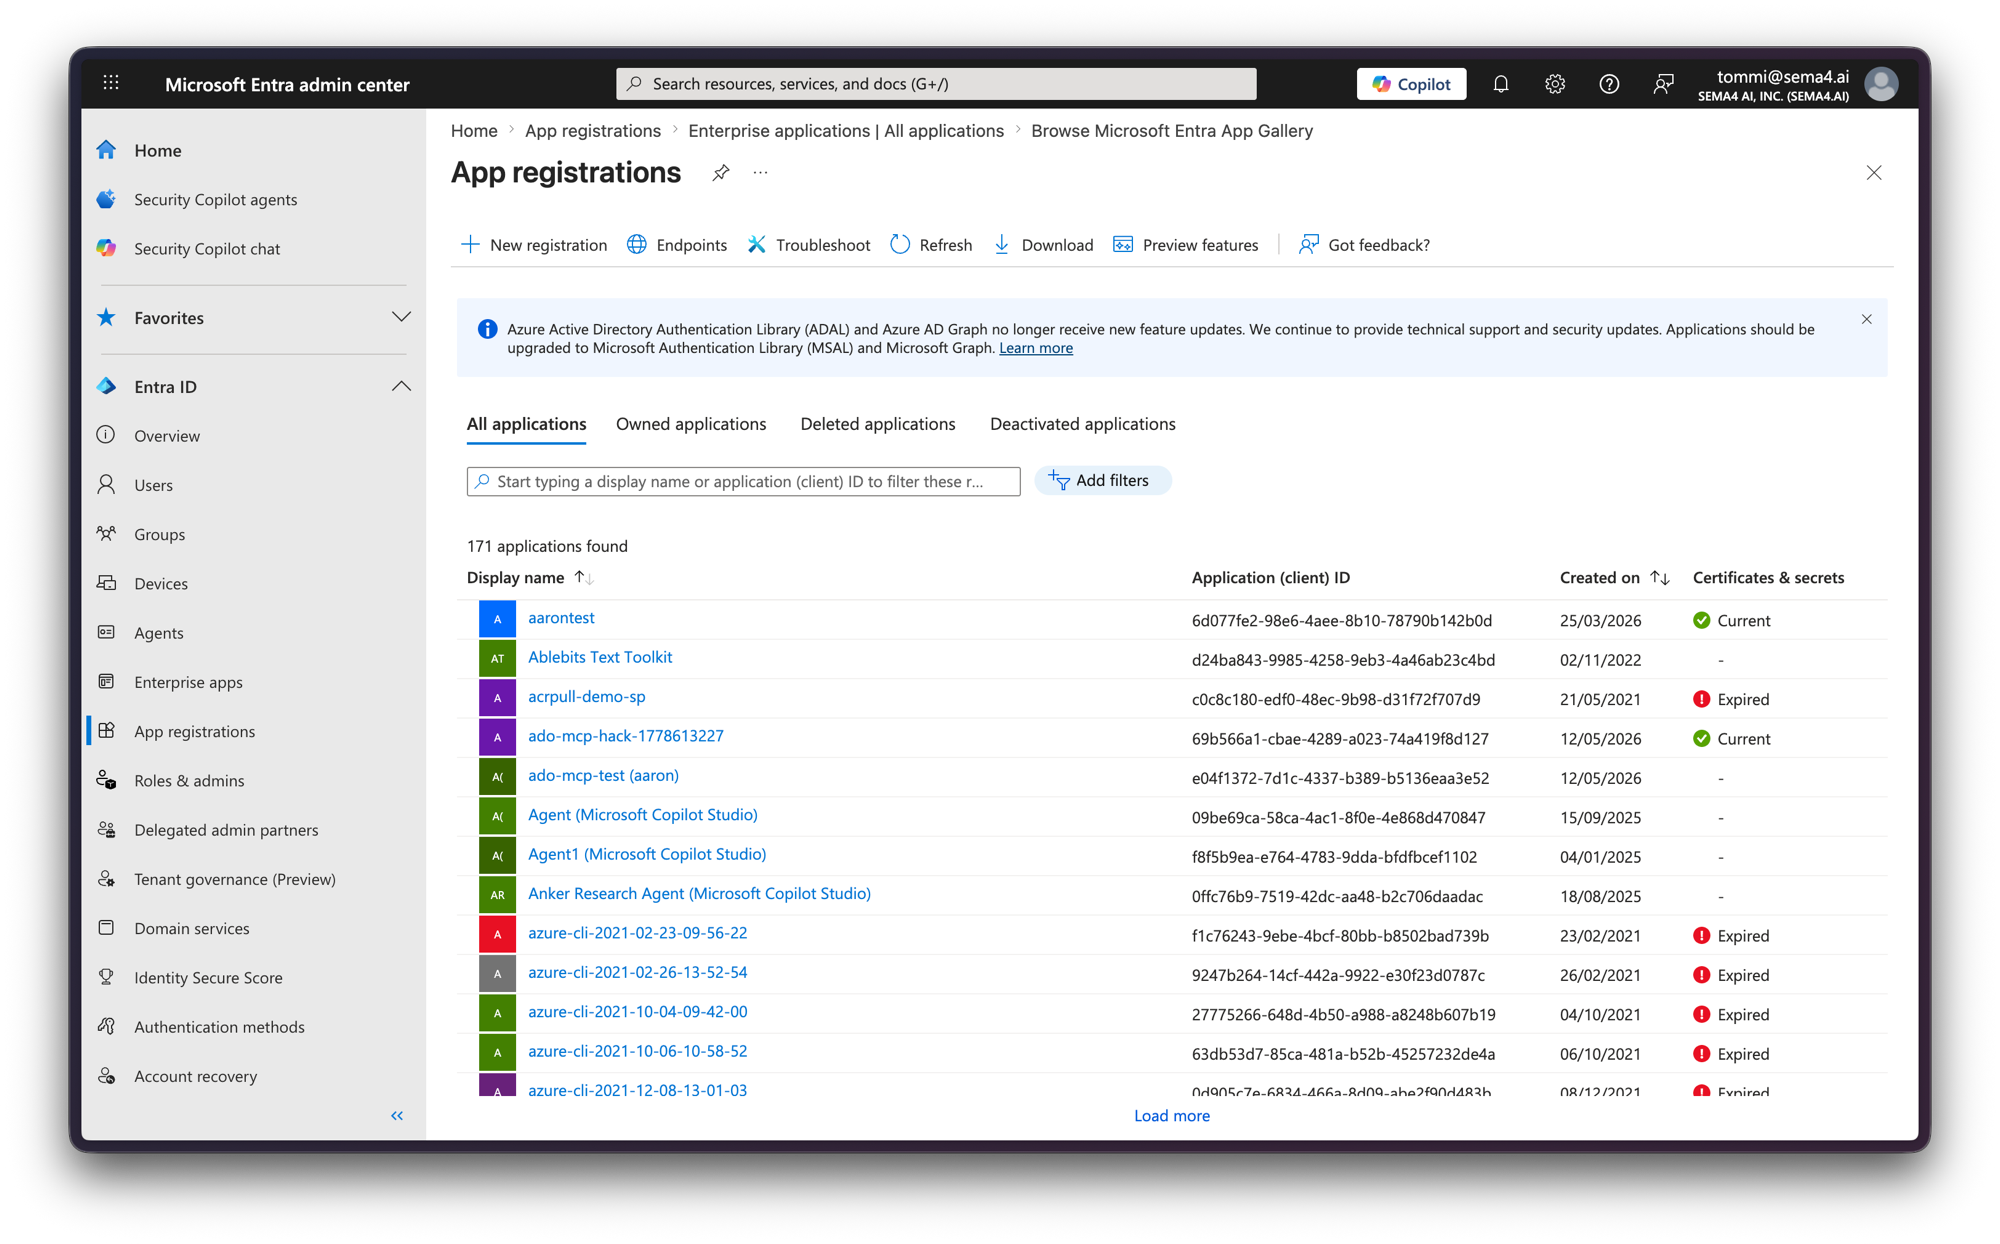
- Sign in to the Microsoft Entra admin center (opens in a new tab).
- Navigate to Identity > Applications > Workflow registrations and click New registration.
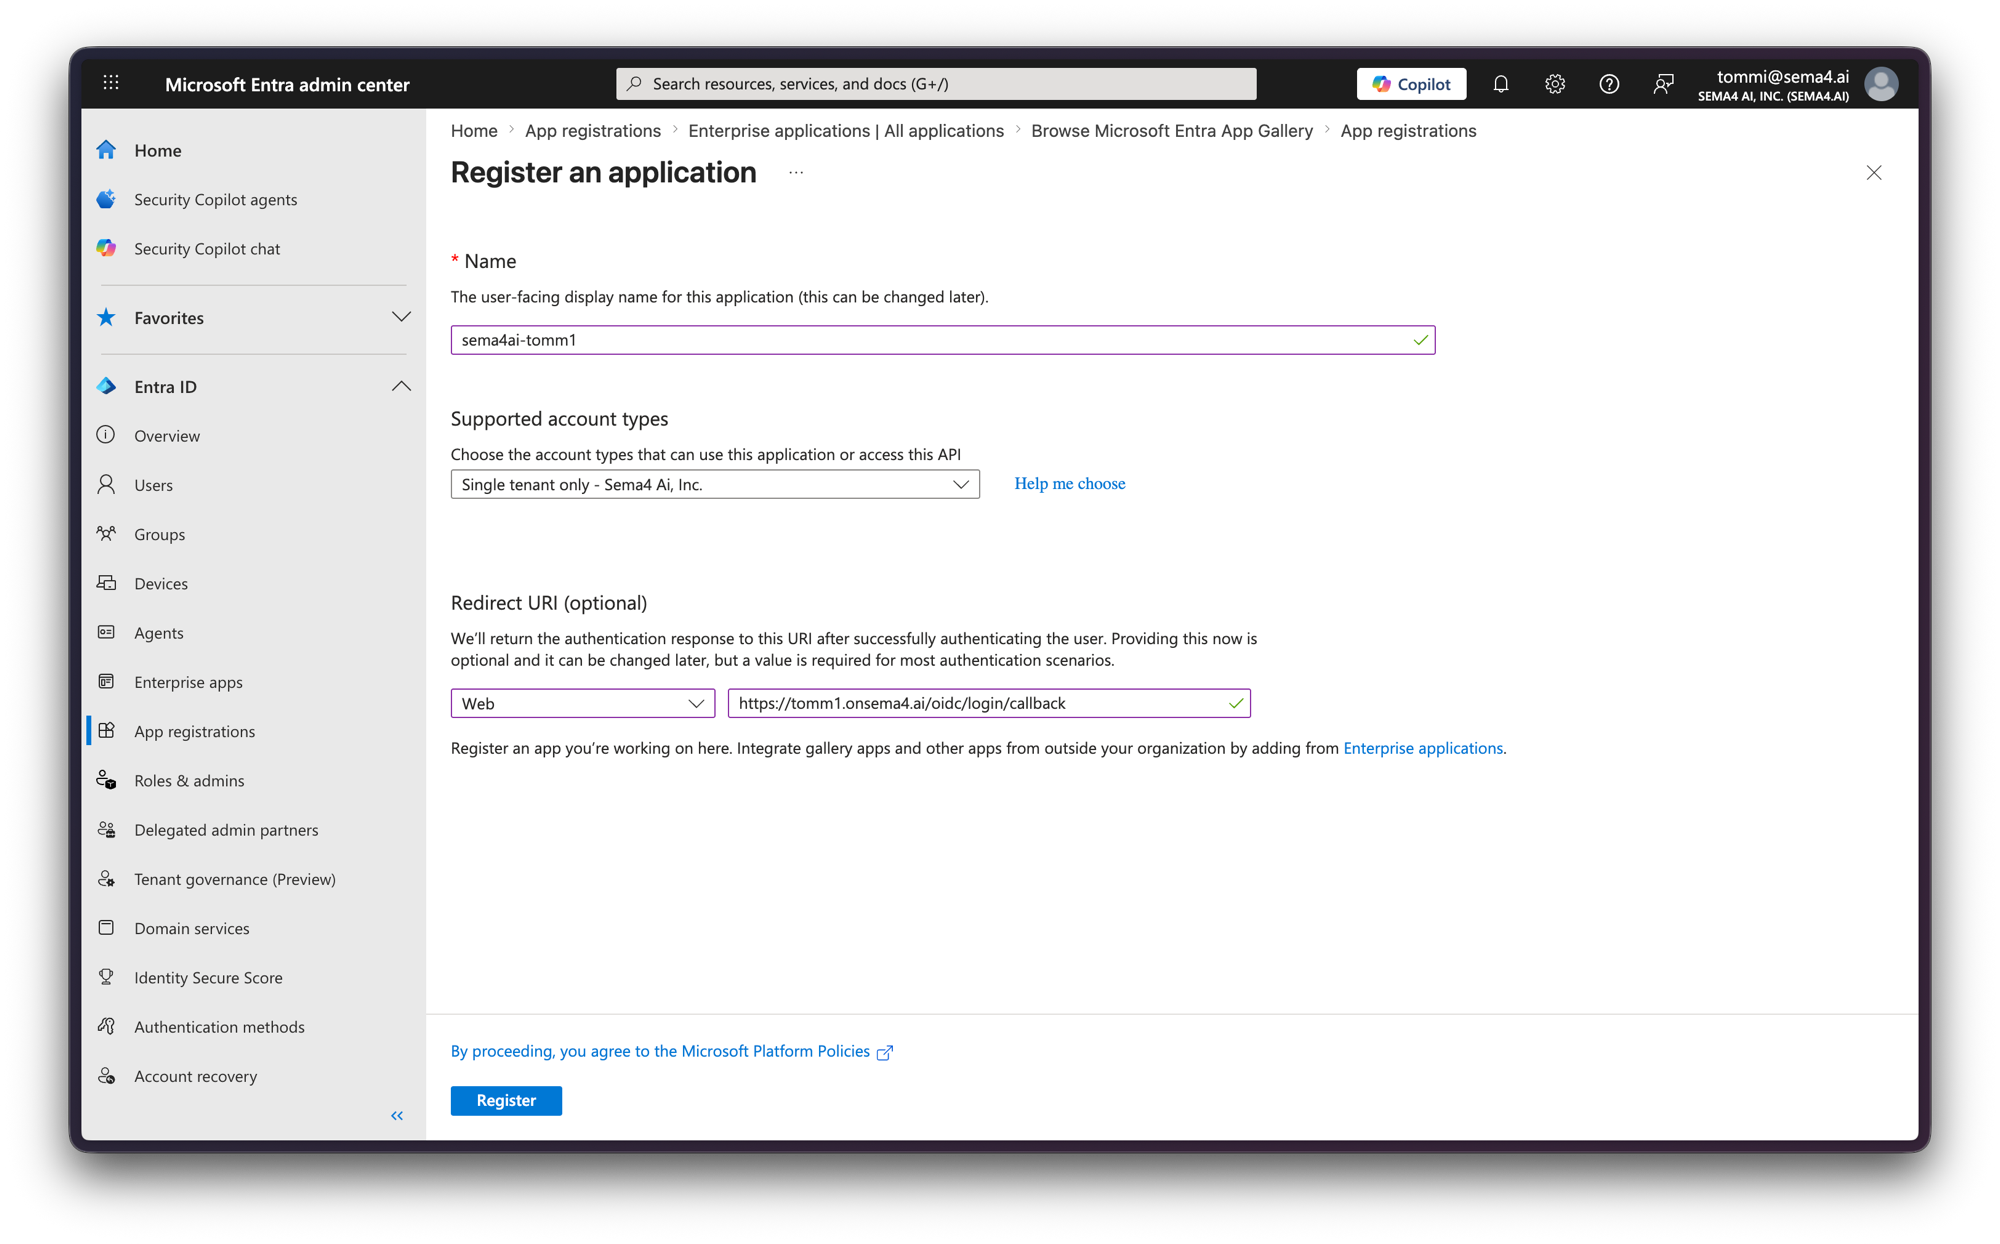
- Provide a name for your application (for example, "Sema4.ai Agents").
- Under Supported account types, select Accounts in this organizational directory only (or as required by your company policy).
- Click Register.
You can set the initial Web redirect URI here during registration:
Step 2: Configure authentication settings
Open the Authentication blade and add a Web platform configuration with these URLs:
- Redirect URI:
https://<YOUR_HOSTNAME>/api/v1/auth/callback - Front-channel logout URL:
https://<YOUR_HOSTNAME>
Then open the Branding & properties blade and set the Home page URL to https://<YOUR_HOSTNAME>/login.
You don't need to configure token types or scopes here. The application requests what it needs.
Step 3: Capture the application credentials
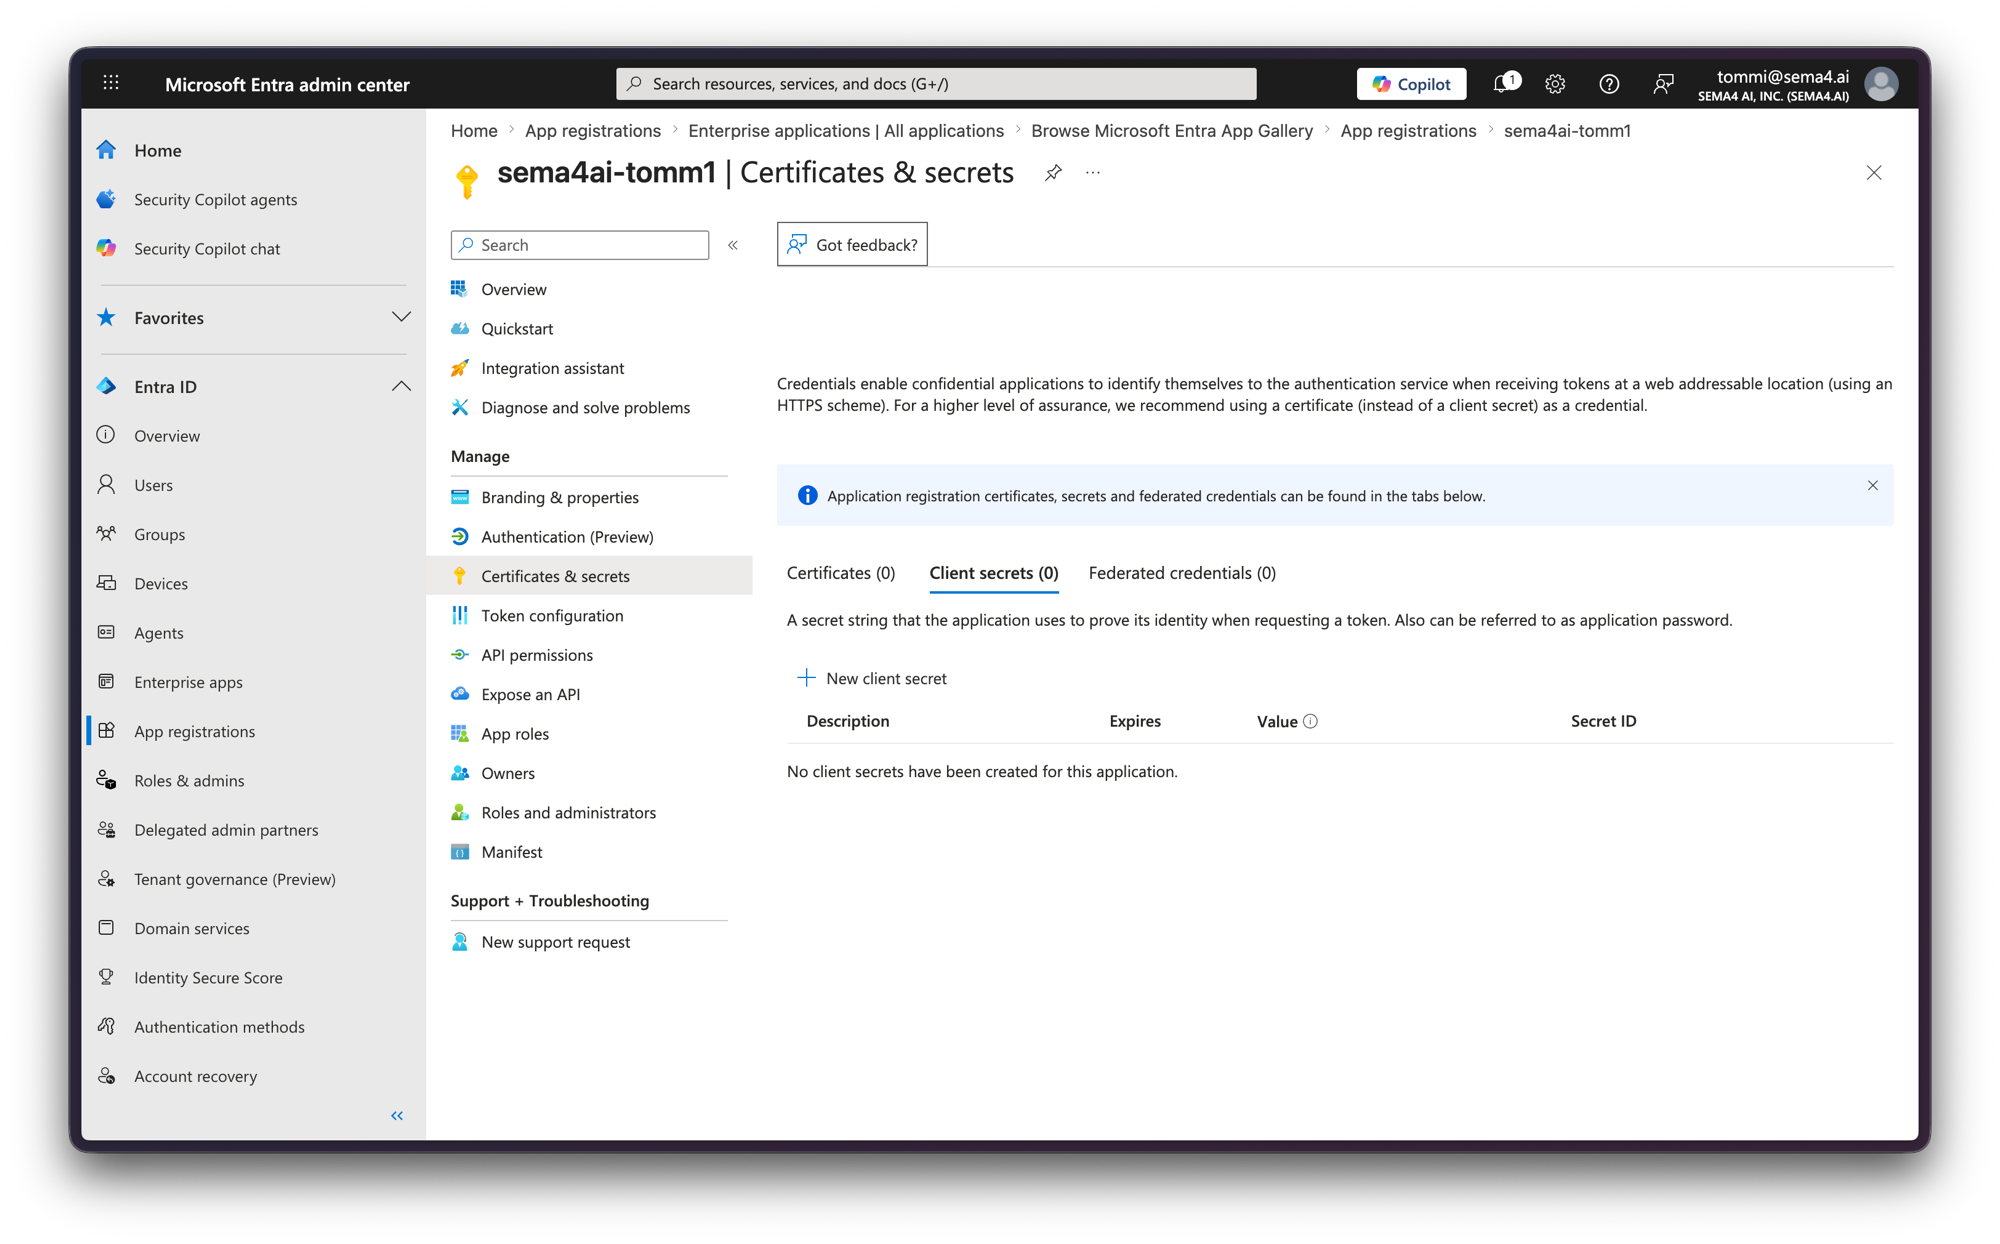
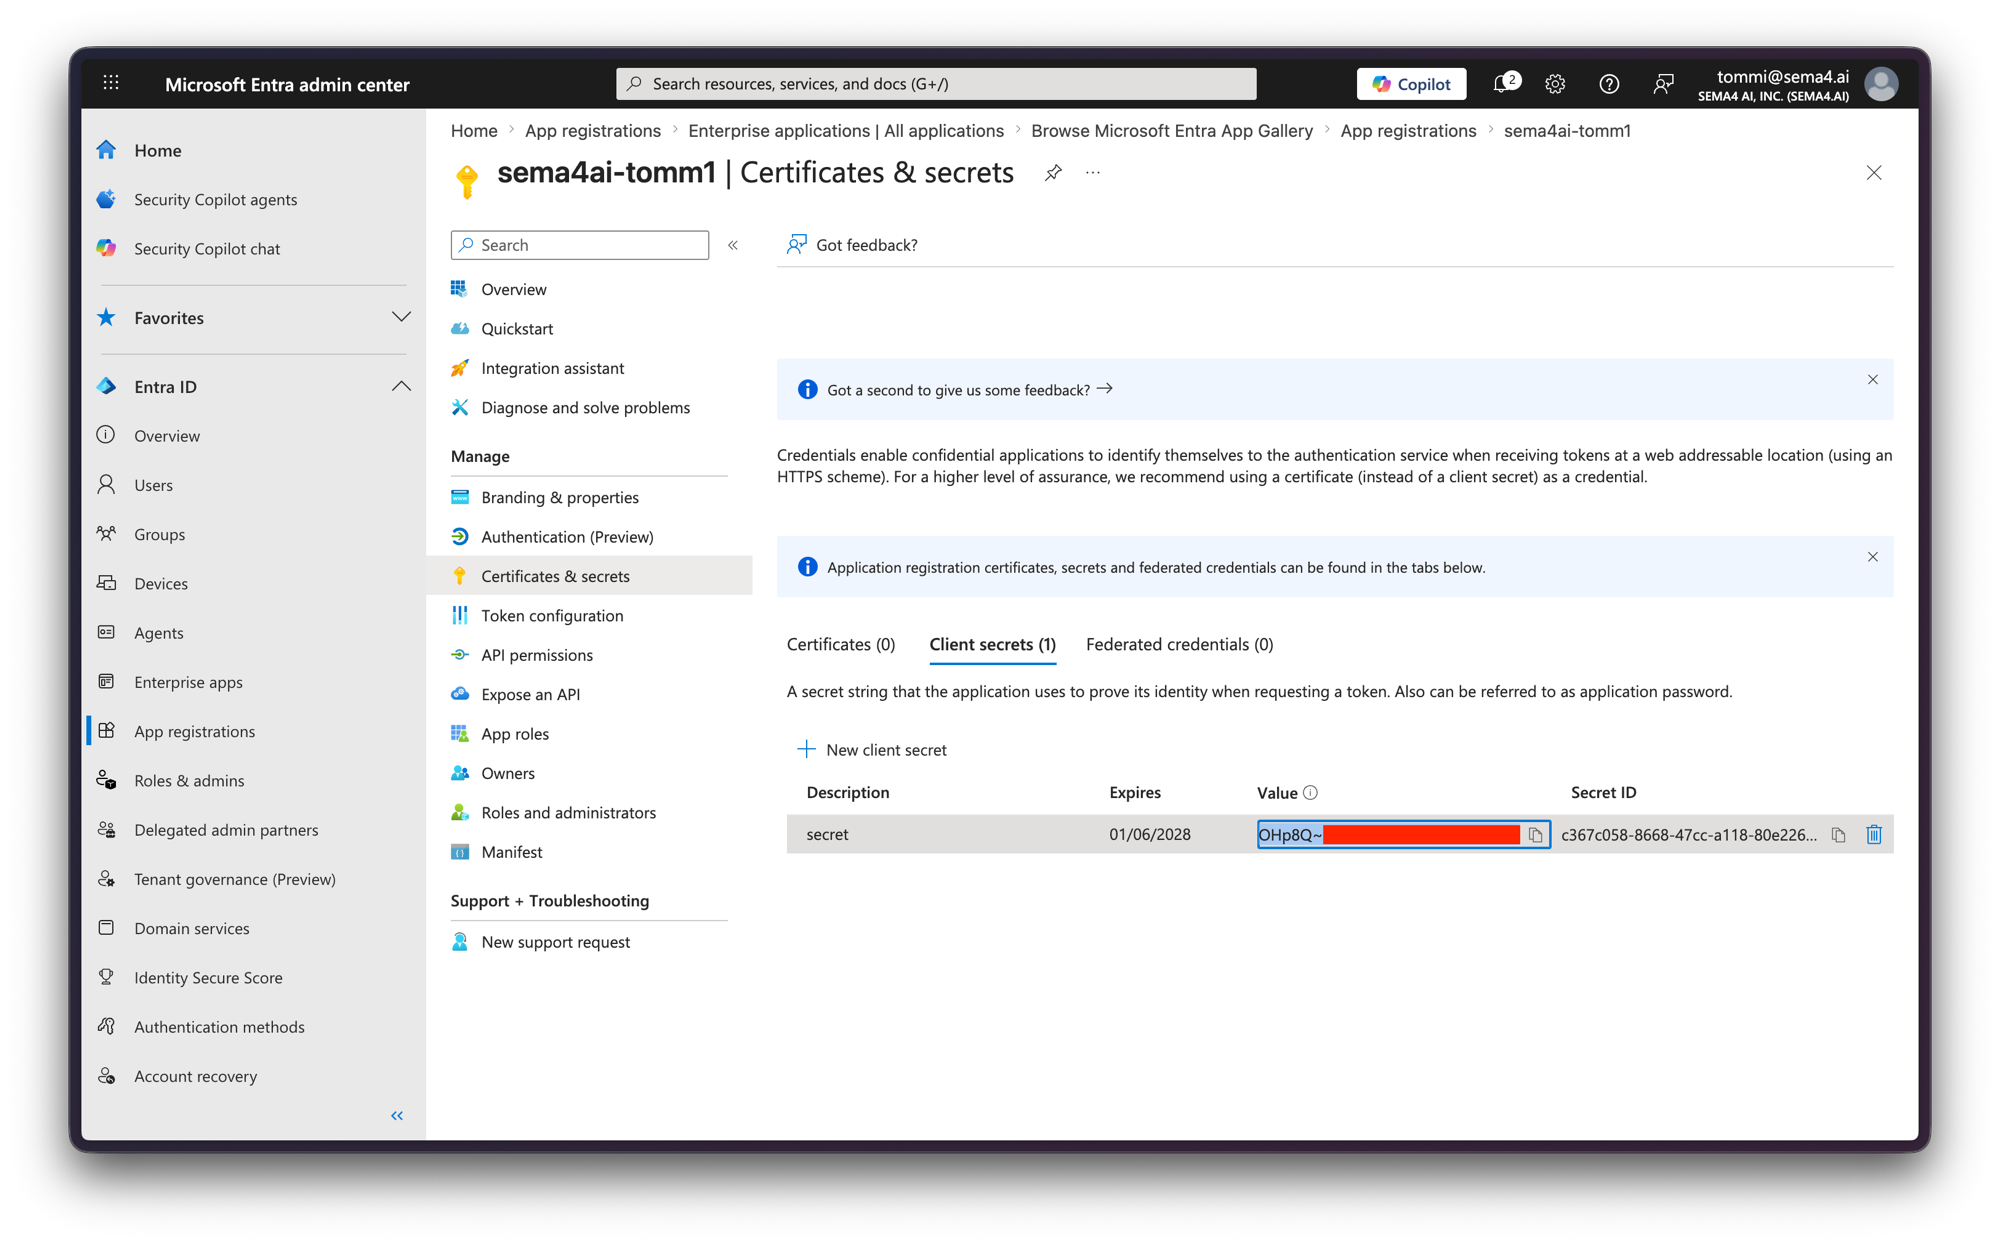
- Go to Certificates & secrets, click New client secret, and copy the secret Value (this is your Client Secret →
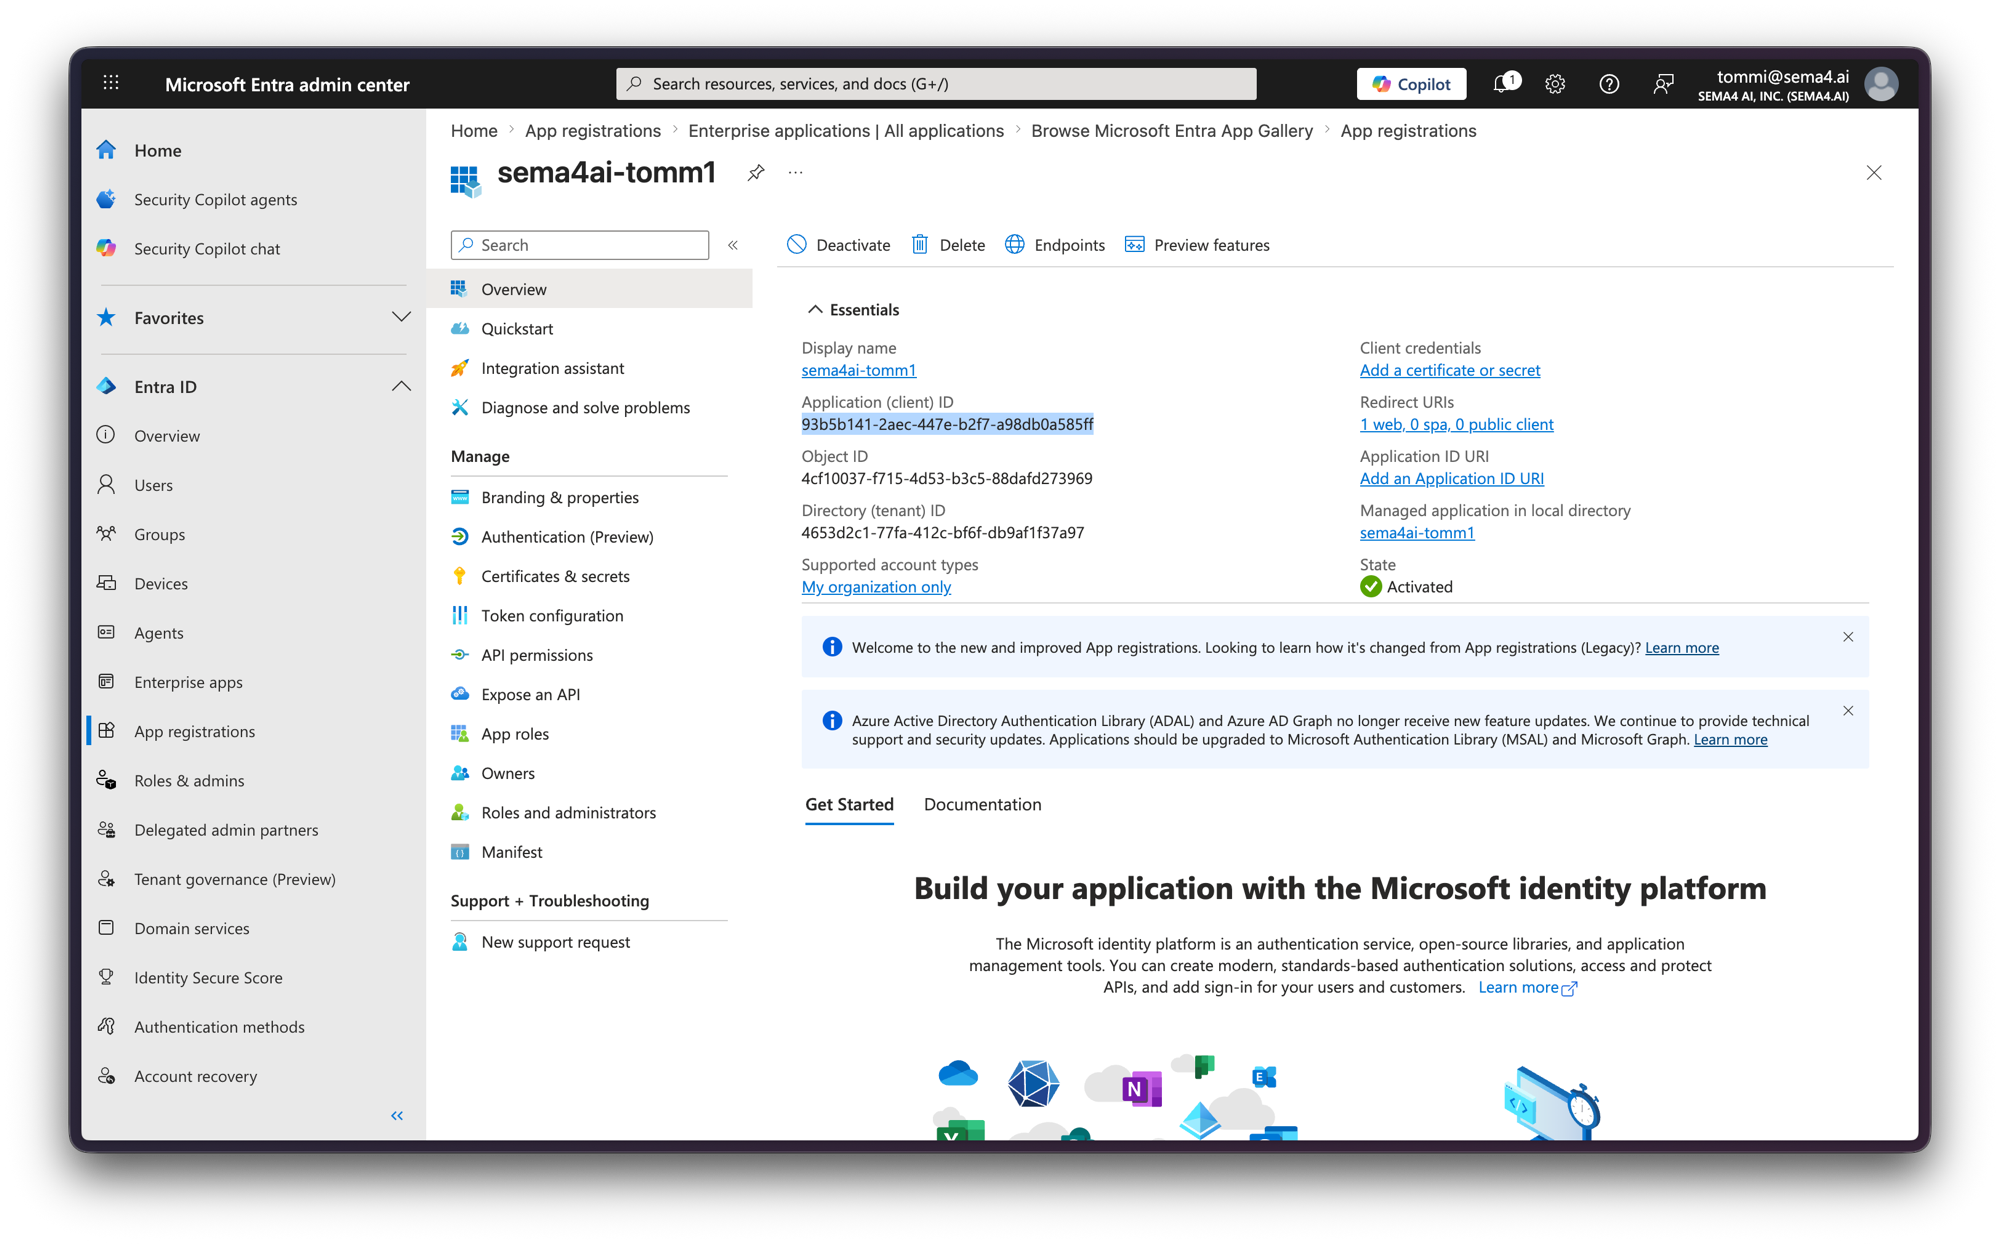
AS_API_OIDC_CLIENT_SECRET). Copy the Value column, not the Secret ID. - On the Overview blade, copy the Application (client) ID (your Client ID →
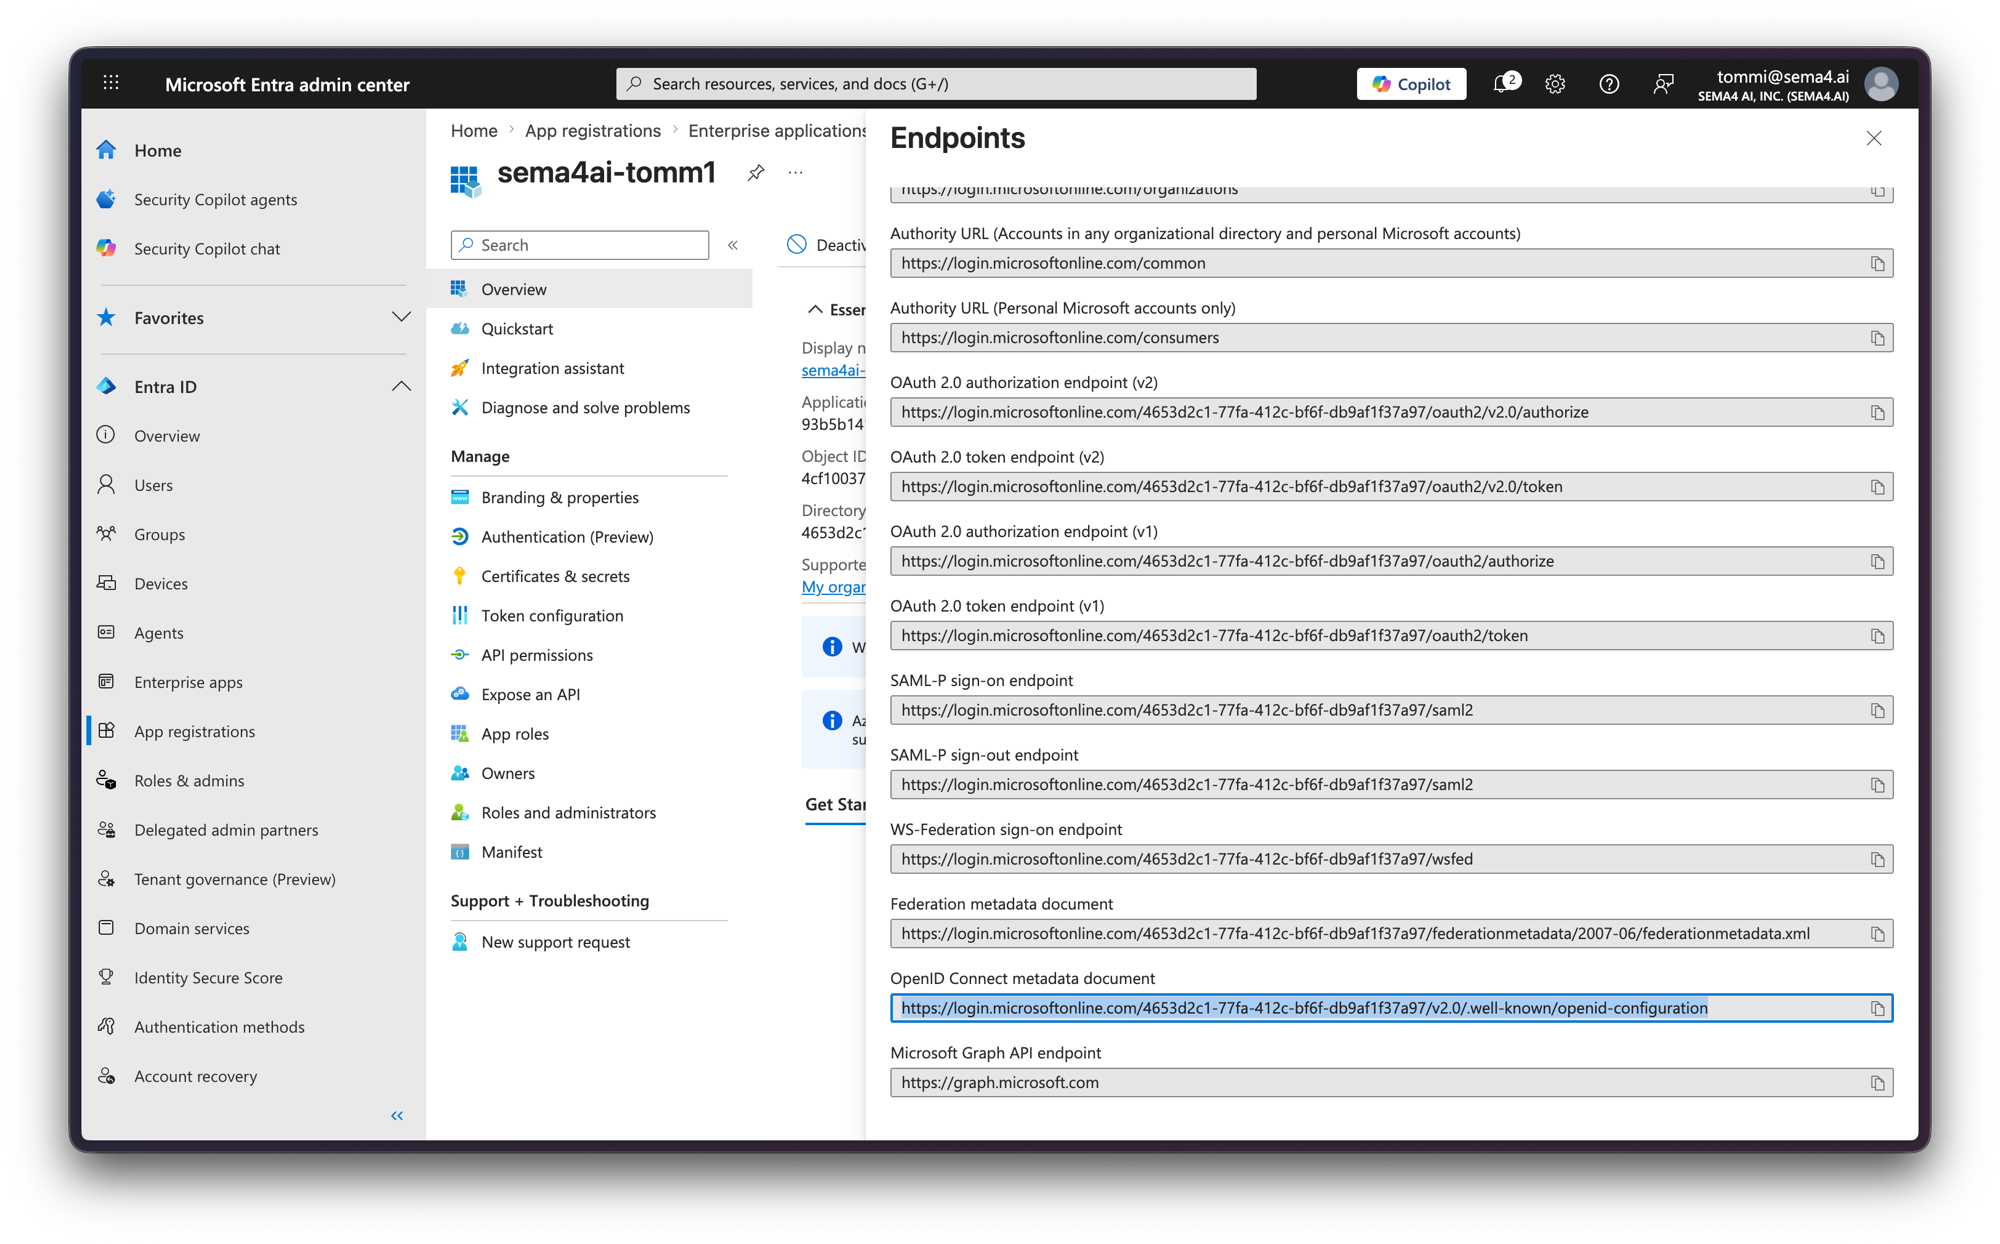
AS_API_OIDC_CLIENT_ID). - Open the Endpoints blade (the Endpoints button at the top of the app registration) and copy the OpenID Connect metadata document URL. This is your Discovery URL →
AS_API_OIDC_SERVER.
Step 4: Restrict who can sign in (optional)
By default, any user in your tenant who can complete sign-in can access the application. To limit access to specific users or groups, use the matching enterprise application:
- Go to Identity > Applications > Enterprise applications and open the application (same name as your registration).
- Under Properties, set Assignment required? to Yes and Save.
- Under Users and groups, click Add user/group and assign the users or groups allowed to sign in.
With assignment required, only assigned users and groups can authenticate; everyone else in the tenant is blocked at login.
Assigning individual users works on any tier; assigning a group to the application requires Microsoft Entra ID P1 or P2.
Step 5: Finalize
You now have the three values from the table at the top of this page:
- Discovery URL (
AS_API_OIDC_SERVER), for examplehttps://login.microsoftonline.com/<TENANT_ID>/v2.0/.well-known/openid-configuration - Client ID (
AS_API_OIDC_CLIENT_ID) - Client Secret (
AS_API_OIDC_CLIENT_SECRET)
Set these on your deployment when you install the application. See Single sign-on and identity for where they go.