Set up Google client app for OAuth2
This guide walks you through setting up a Google OAuth2 client specifically for your organization.
You'll learn the difference between a public OAuth client app and an internal one, and receive step-by-step instructions for enabling necessary APIs, configuring a consent screen, and creating credentials to be used in Studio and Control Room.
Public and internal OAuth client apps
Google offers two types of OAuth client applications: public and internal.
-
Public OAuth Client App: Designed for wide use by the general public, this type of app is available to anyone with a Google account. Public apps must undergo a verification process by Google, which can be time-consuming and involves ensuring the app complies with Google’s policies. Sema4.ai does not yet provide a public OAuth2 client application for Google, but we do offer one for Microsoft.
-
Internal OAuth Client App: Restricted to users within your organization, this type of app is ideal for internal tools and applications. Only members of your Google Workspace domain can use the app. Internal apps do not require the extensive verification process that public apps do, making them quicker to deploy and manage.
We recommend using an internal client app and demonstrate the creation of one below.
Steps to set up Google OAuth2 client
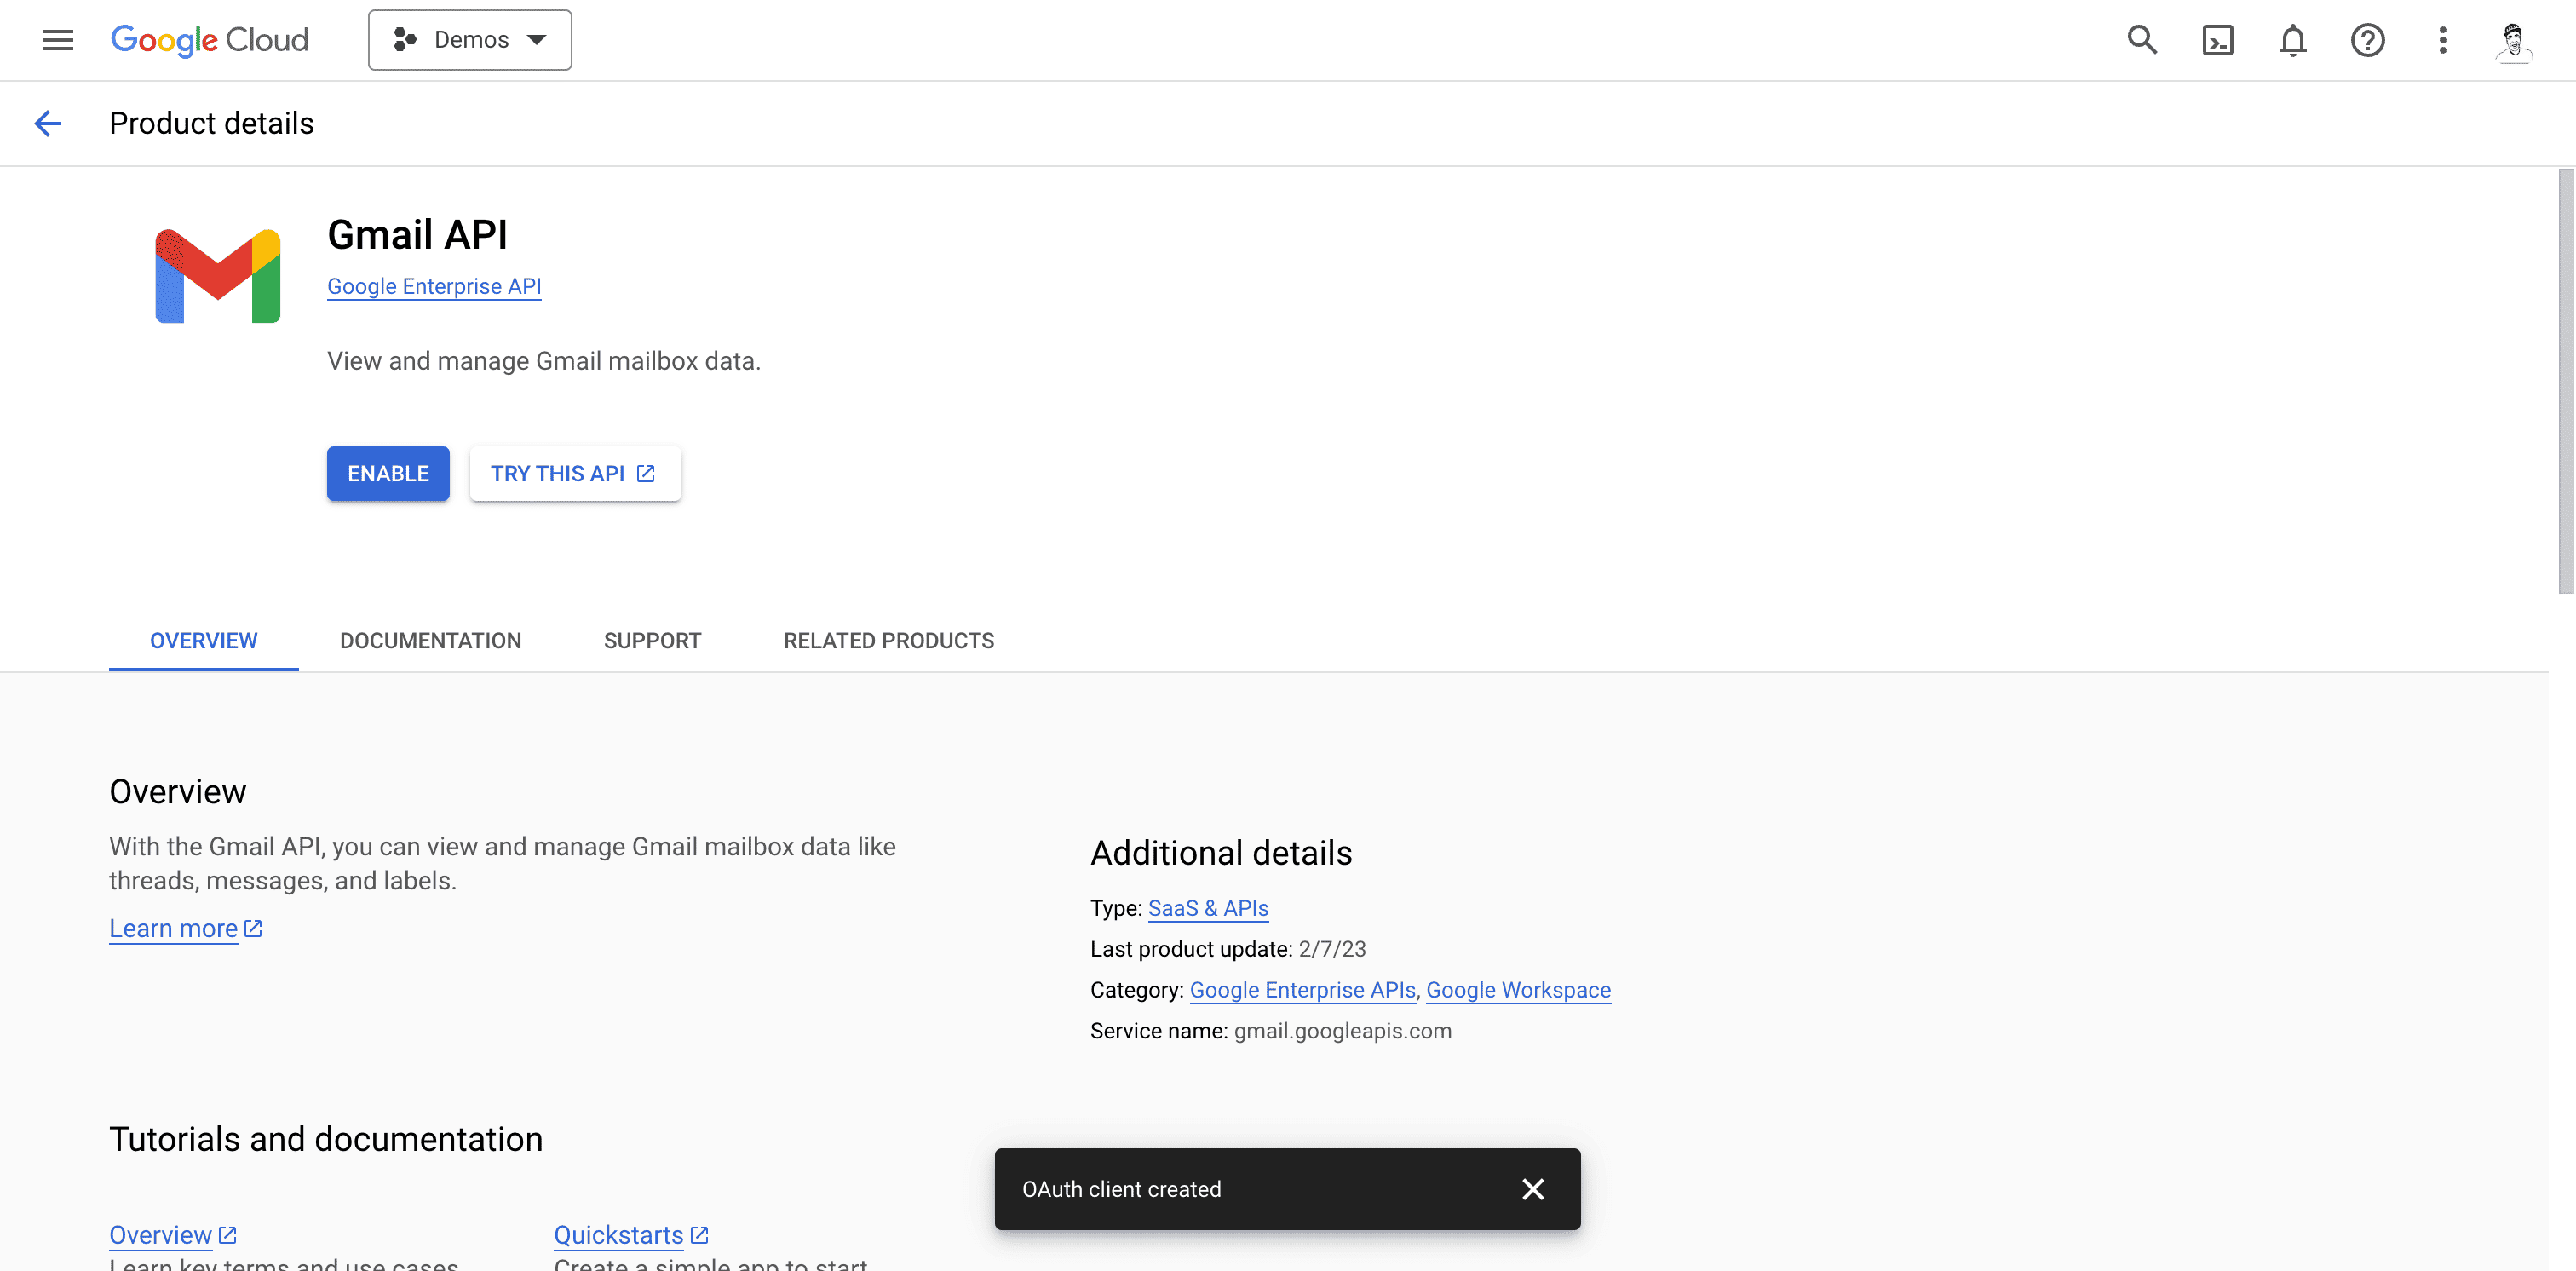
Enable APIs
To allow your application to interact with Google services, you need to enable the necessary APIs. The exact APIs you need will depend on the specific actions you plan to use with your agents. Here are some common APIs you may need to enable:
- Google Sheets API (opens in a new tab)
- Google Drive API (opens in a new tab)
- Google Calendar API (opens in a new tab)
- Google Docs API (opens in a new tab)
- Google Mail API (opens in a new tab)
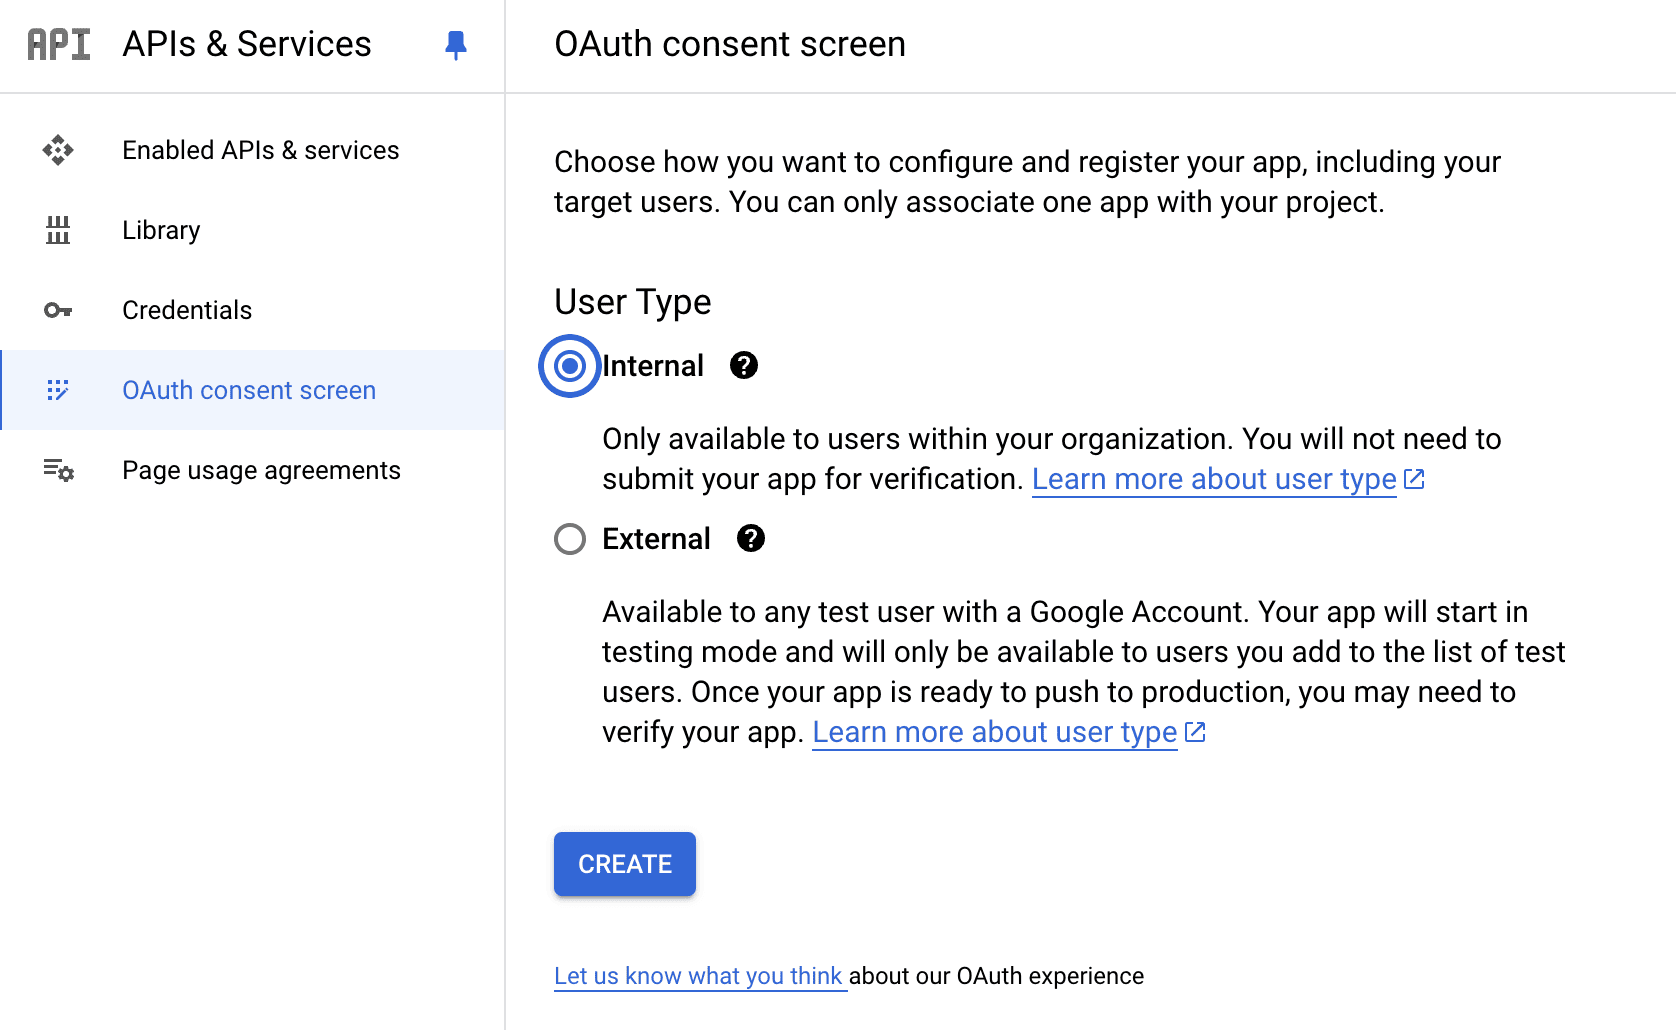
Configure a consent screen
You need to configure the OAuth consent screen (opens in a new tab) to define how your app will request access to user data.
User type
Choose Internal. This means the app will only be available to users within your organization.
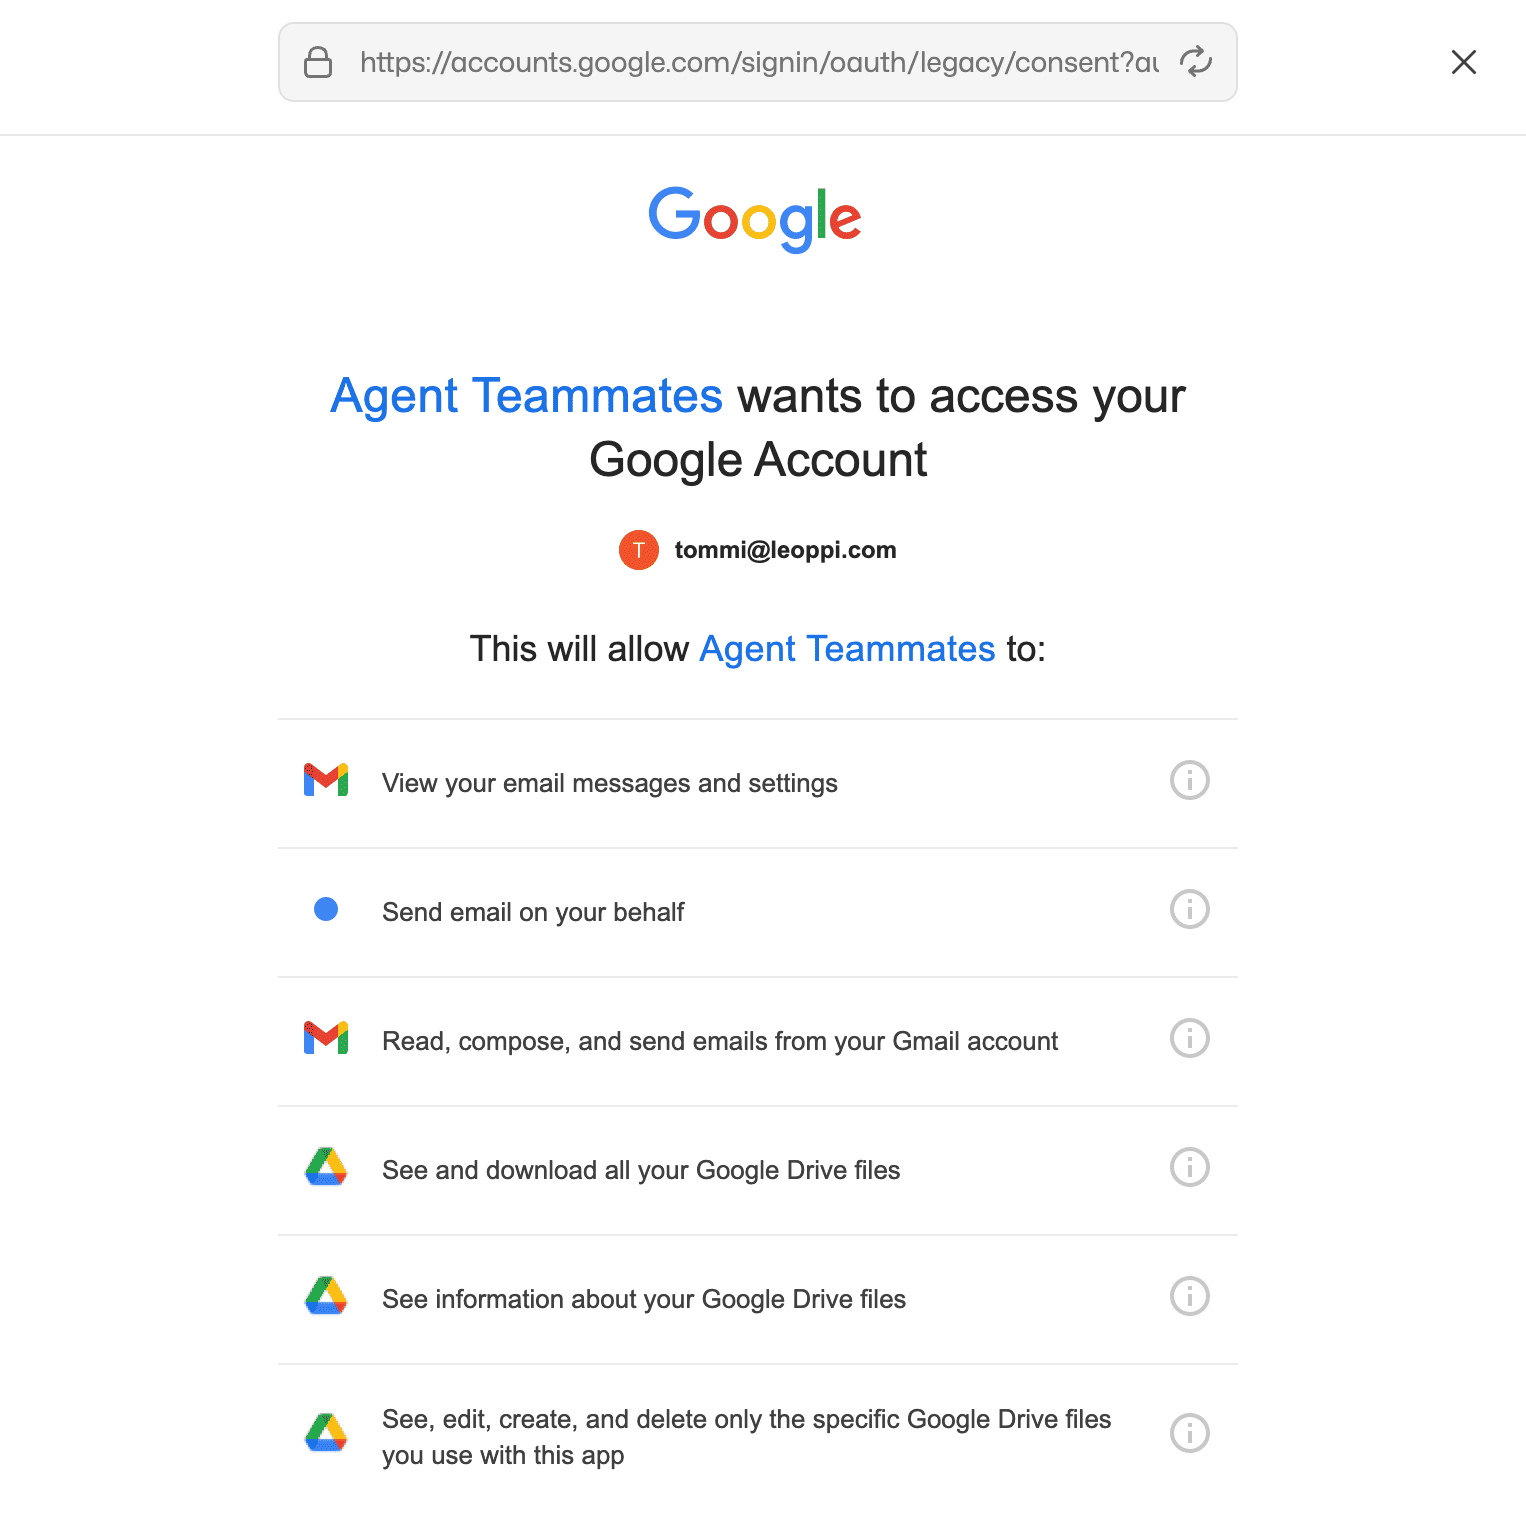
App information
Fill in the necessary details such as the app name, user support email, and developer contact information. These details will be displayed to users when they are asked to grant permissions to the app. Ensure the consent screen is clear and informative. Below is an example of what the consent screen might look like for the users, where "Agent Teammates" is the name of the app:
Scopes
Copy and paste the necessary scopes the action needs. Look for the required scopes in the documentation of the action package you use.
The easiest way is to paste the scopes in the "Manually add scopes" section.
Scopes define the level of access your application requires. For example, using the Google Drive API may need the https://www.googleapis.com/auth/drive scope to work with the Drive files.
Below is a list of all currently supported scopes for easy copy/pasting:
https://www.googleapis.com/auth/calendar.events
https://www.googleapis.com/auth/calendar.readonly
https://www.googleapis.com/auth/drive.readonly
https://www.googleapis.com/auth/documents.readonly
https://www.googleapis.com/auth/drive.metadata.readonly
https://www.googleapis.com/auth/drive.file
https://www.googleapis.com/auth/gmail.send
https://www.googleapis.com/auth/gmail.readonly
https://www.googleapis.com/auth/gmail.modify
https://www.googleapis.com/auth/spreadsheets
https://www.googleapis.com/auth/drive
For more details, refer to this Google support article (opens in a new tab).
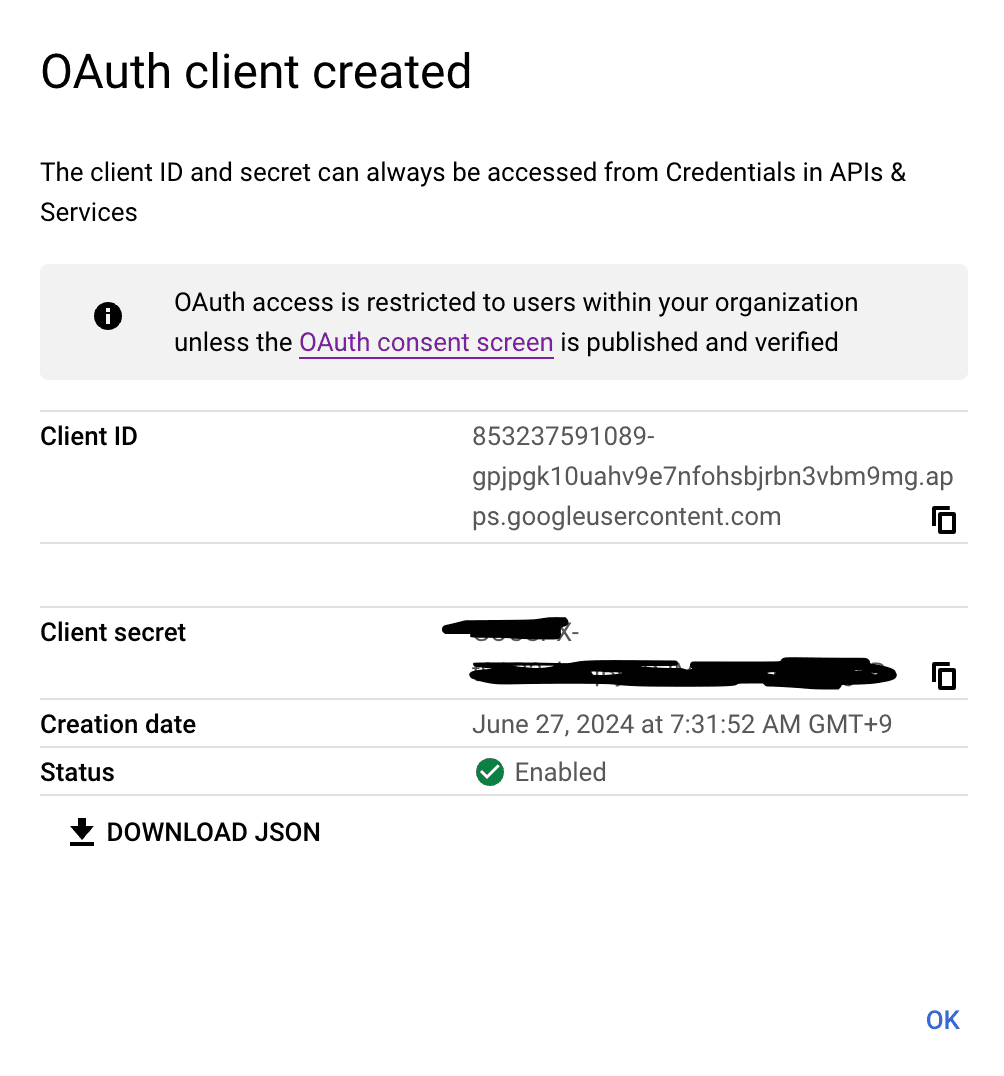
Create credentials
- In Google APIs & Services, go to Credentials.
- Click Create credentials.
- Select the OAuth client ID option.
- Select the app type:
- For use in Studio, use
Desktop app. - For use in Work Room, use
Web application.
- For use in Studio, use
- Type a name for the credential.
- In the case of a Web application, fill in the required details.
- Click Create.
For the Web application type, you need to provide the correct redirect URL. This is the URL from which the authorization request comes when Work Room users connect the app to their account.
The redirect URLs for Work Room can be found in the Control Room when creating the OAuth2 client, please note that there might be many of them, depending on the number of workspaces you have.
The redirect URLs for Studio are:
http://localhost:61080/sema4ai/oauth2/
http://localhost:61081/sema4ai/oauth2/
https://localhost:61080/sema4ai/oauth2/
https://localhost:61081/sema4ai/oauth2/
Once you have created the credentials, you will receive a Client ID and Client Secret that look like this:
Read the Google support article (opens in a new tab) for more information.
Add credentials to Studio
See the guide on setting up OAuth2 clients.