Build a Knowledge Base
Sema4.ai Knowledge Bases allow you to create a semantic layer over your enterprise data, enabling AI agents to access and reason over unstructured content like documents, emails, and chat history. This guide will help you build your first Knowledge Base using the Sema4.ai SDK. This guide walks you through the steps to build a Knowledge Base (KB) using the Sema4.ai SDK. You'll define the KB schema, connect it to storage, insert your data, and verify that it’s ready for use with agents.
Prerequisite: Make sure you have the Sema4.ai SDK and Sema4.ai Data Server extensions installed in your VS Code or Cursor environment.
Start from the Knowledge Base template
You can scaffold a working KB setup using the "Create Action Package" in VS Code or Cursor.
- Create a folder for your KB project and open it in your editor.
- Use the command palette (Cmd or Ctrl + Shift + P) and select
Sema4.ai: Create Action Package - Select
Use workspace folderoption to create the package in the current folder. - Choose the
Data Access/Knowledge Base - Give agents access to knowledge basetemplate when prompted.
This will generate a project with:
data_sources.py— define Postgres and pgvector connectionsmodels.py— request/response models for KB interactiondata_actions.py— query and insert handlers with@querypackage.yaml— for configuration of your action packagescratchpad.sql— useful for Creating and testing your KB
Create a vector storage target (e.g., pgvector)
Before you can define a Knowledge Base, you need a place to store its embedded content.
When you use the Knowledge Base template, your data_sources.py already includes placeholders for defining your storage connection:
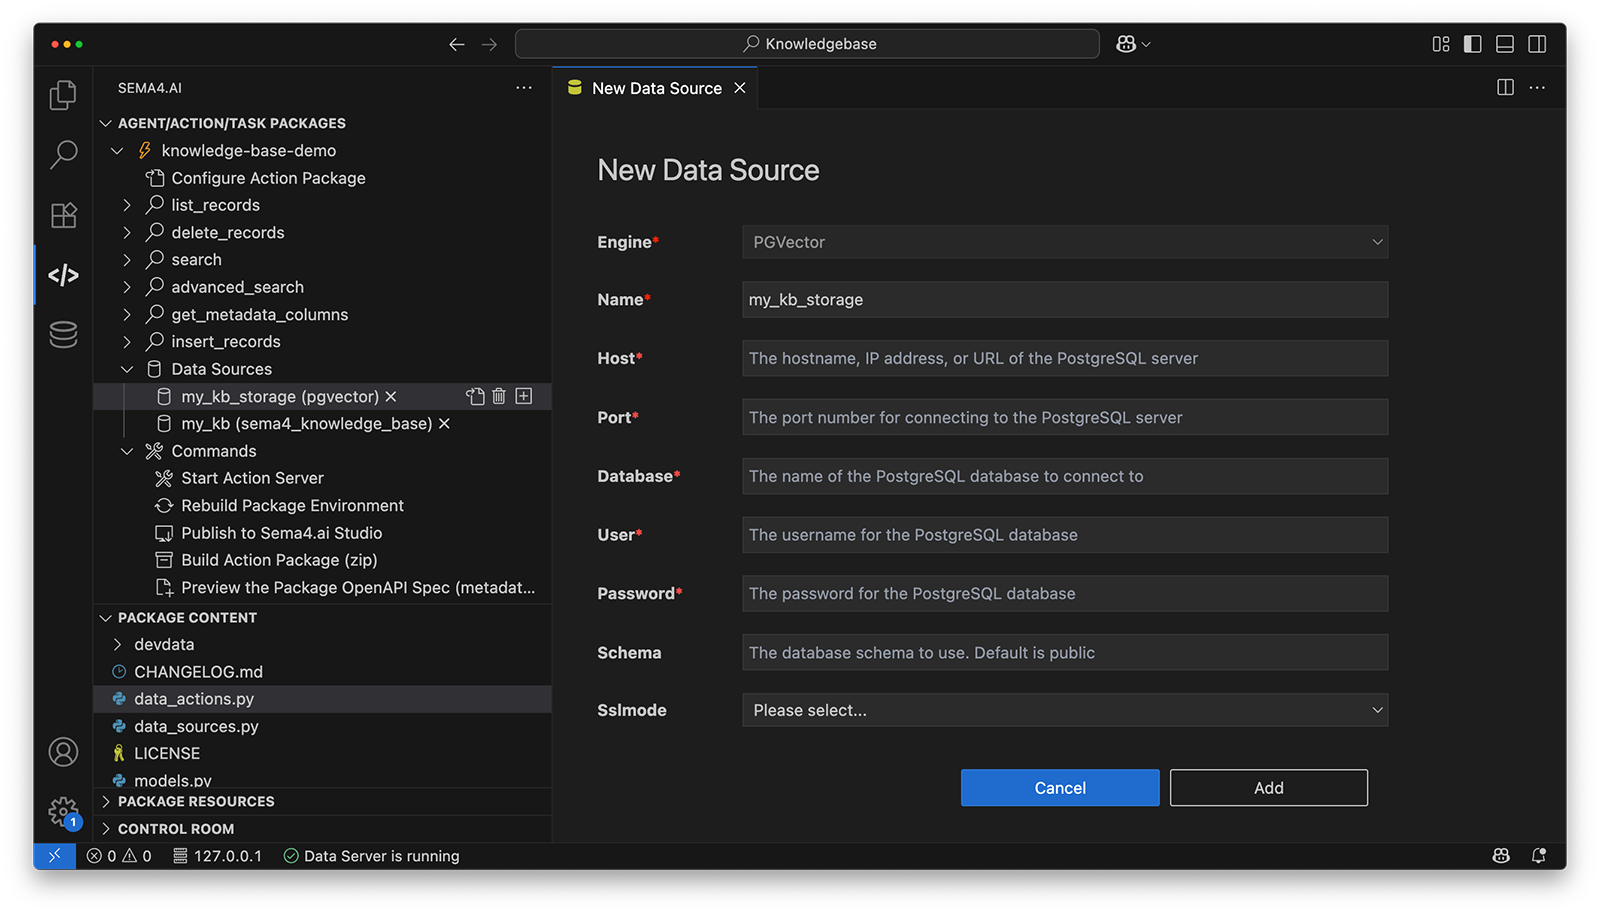
DataSourceSpec(
        name="my_kb_storage",  # Change this to your PGVector Database name
        engine="pgvector",
        description="Data source for storing knowledge base content embeddings",
    )
You can configure this visually using the Sema4 SDK extension .
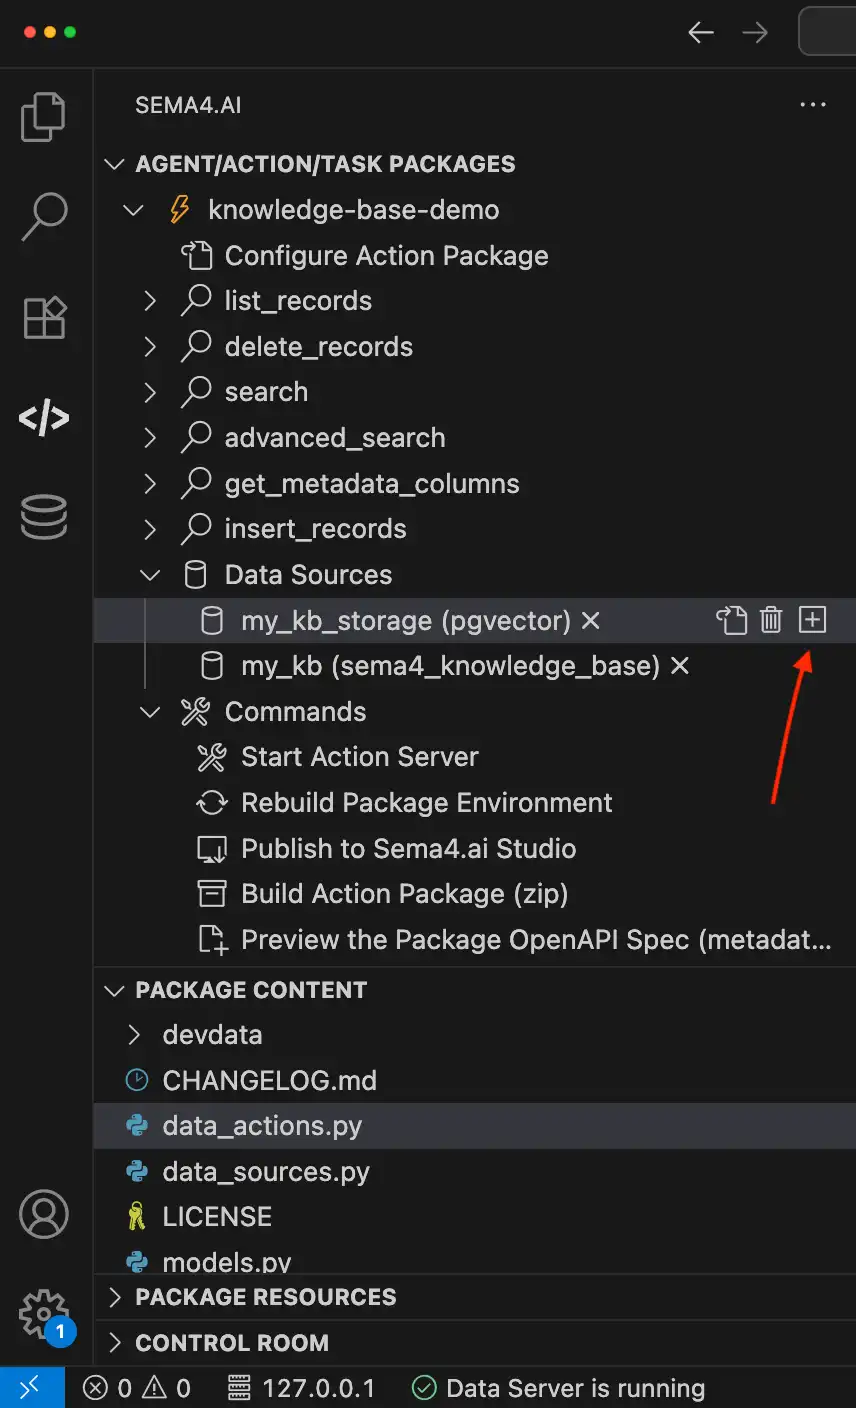
- In your action package view, locate the
my_kb_storageentry under Data Sources - Click the ➕ icon next to it to open the “New Data Source” dialog
- You will see
PGVectoris preselected as the engine - Fill in your PostgreSQL connection info:
- Host, Port
- Database, User, Password
- Optional: Schema and SSL Mode
This is where your embedded knowledge will be stored after ingestion. You can reuse the same pgvector store across KBs or create a dedicated one per use case.
Define your Knowledge Base
Similar to how we configured the storage target, we now define the Knowledge Base itself. You can do this via the Sema4 SDK extension or directly in SQL.
- Locate your Knowledge Base entry under Data Sources
- Click the ➕ icon next to it to open the “New Knowledge Base” dialog
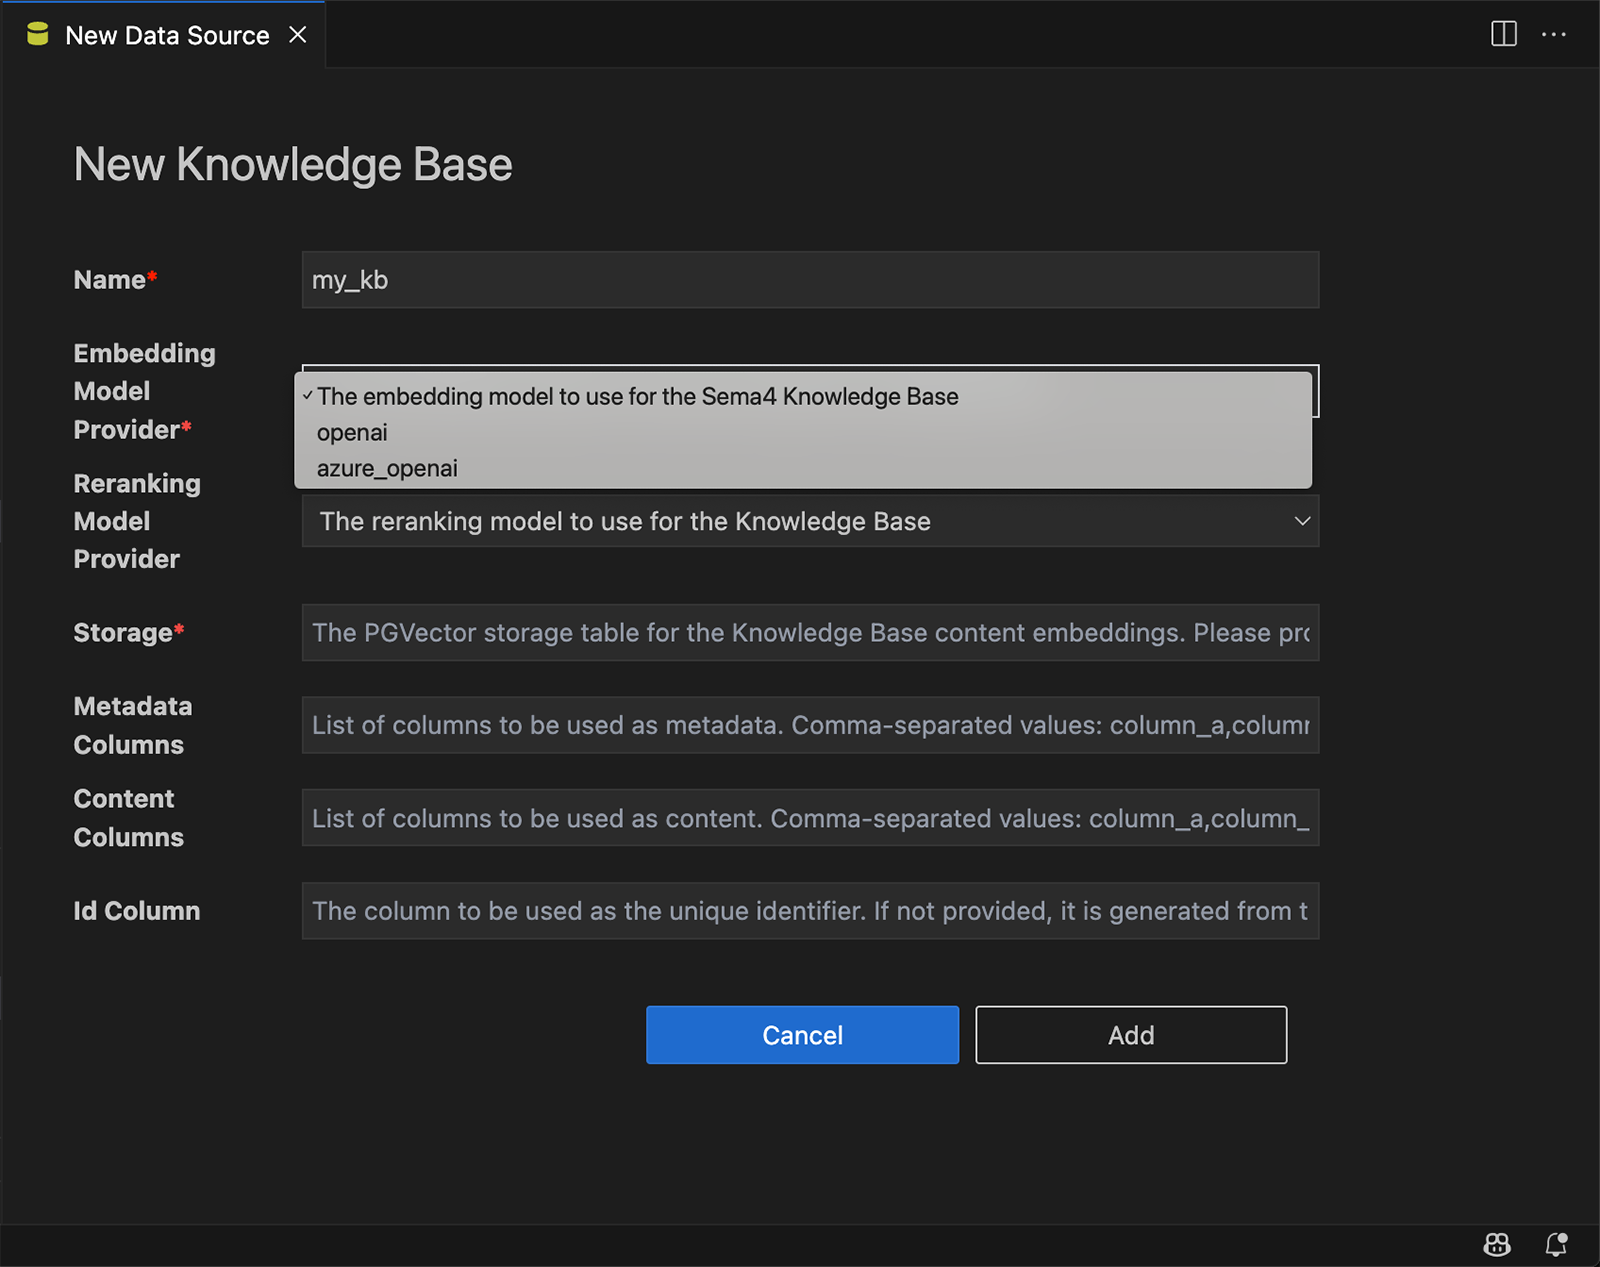
- Select your embedding model (Currently OpenAI and Azure OpenAI are supported) - This is used to convert text into vector embeddings
- For example,
openai/text-embedding-3-largeis a good choice for general-purpose embeddings
- For example,
- Optionally, you can add a reranking model
- This is useful for improving search results by reordering based on relevance
- Choose the storage target from Step 1
- Map the following columns:
content_column— the main text content to be embeddedmetadata_columns— additional fields to store with each record (e.g., title, topic)id_column— a unique identifier for each record (e.g.,doc_id)
- Click Add to finalize the Knowledge Base definition
If you prefer SQL, you can define the Knowledge Base directly in scratchpad.sql:
CREATE KNOWLEDGE_BASE customer_support_kb
USING
  embedding_model = {
    provider: "openai",
    model_name: "text-embedding-3-large"
  },
  storage = my_pgvector.kb_embeddings,
  metadata_columns = ['title', 'topic'],
  content_columns = ['content'],
  id_column = 'doc_id';
Insert data into the KB
Once your KB is defined, insert content into it. This triggers automatic semantic indexing (embedding).
You can insert the data using SQL Insert statements in scratchpad.sql or use the insert_records action in data_actions.py that is part of the template.
Ensure that your data matches the schema defined in the Knowledge Base including the content and metadata columns.
    columns = ["id", "content"] + available_columns

    placeholders = (
        ["$id", "$content"] + [f"${col}" for col in available_columns]
    )

    sql = f"""
    INSERT INTO sema4ai.{data_source.datasource_name} ({', '.join(columns)})
    VALUES ({', '.join(placeholders)})
    """

    # Execute each record as a separate statement with parameters
    for record in req.records:
        params = {
            "id": record.id,
            "content": record.content
        }

        # Add metadata values to their respective columns
        if record.metadata:
            for column in available_columns:
                params[column] = record.metadata.get(column)

        get_connection().execute_sql(sql, params=params)
Verify the KB and inspect data
After insertion:
- Use a test query to confirm embedding and retrieval
- Preview metadata and top chunks
Again, you can use the scratchpad.sql file to run a test query or use the list_records action in data_actions.py to fetch and inspect the data.
SELECT id, relevance
FROM customer_support_kb
WHERE content = 'How do I reset my password?'
LIMIT 5;Once data is inserted, it’s ready to be queried by your agent. No separate embedding step required.