Deploy and manage agents in Team Edition - Control Room
This guide will help you get started with deploying and managing agents in Sema4.ai Team Edition.
Team Edition Control Room is very similar to Enterprise Edition Control Room, but it is optimized for getting started quickly and deploying agents in Snowflake.
For in-depth guide on the entire lifecycle of agents in Control Room, please refer to our Manage Agents guide.
The Team Edition allows you to import and run AI agents that can analyze your data, answer questions, and automate workflows by leveraging both Snowpark Container Services and Cortex AI, all while keeping your data secure within your Snowflake environment.
Accessing the Control Room
- Your administrator will provide you with a URL to access the Control Room. The URL looks something like this
https://some-letters-here.snowflakecomputing.app - Open the URL in your web browser
- TIP! Bookmark this URL for easy access later on
- Log in using your Snowflake credentials (Single Sign On)
Some of the key features in Control Room are:
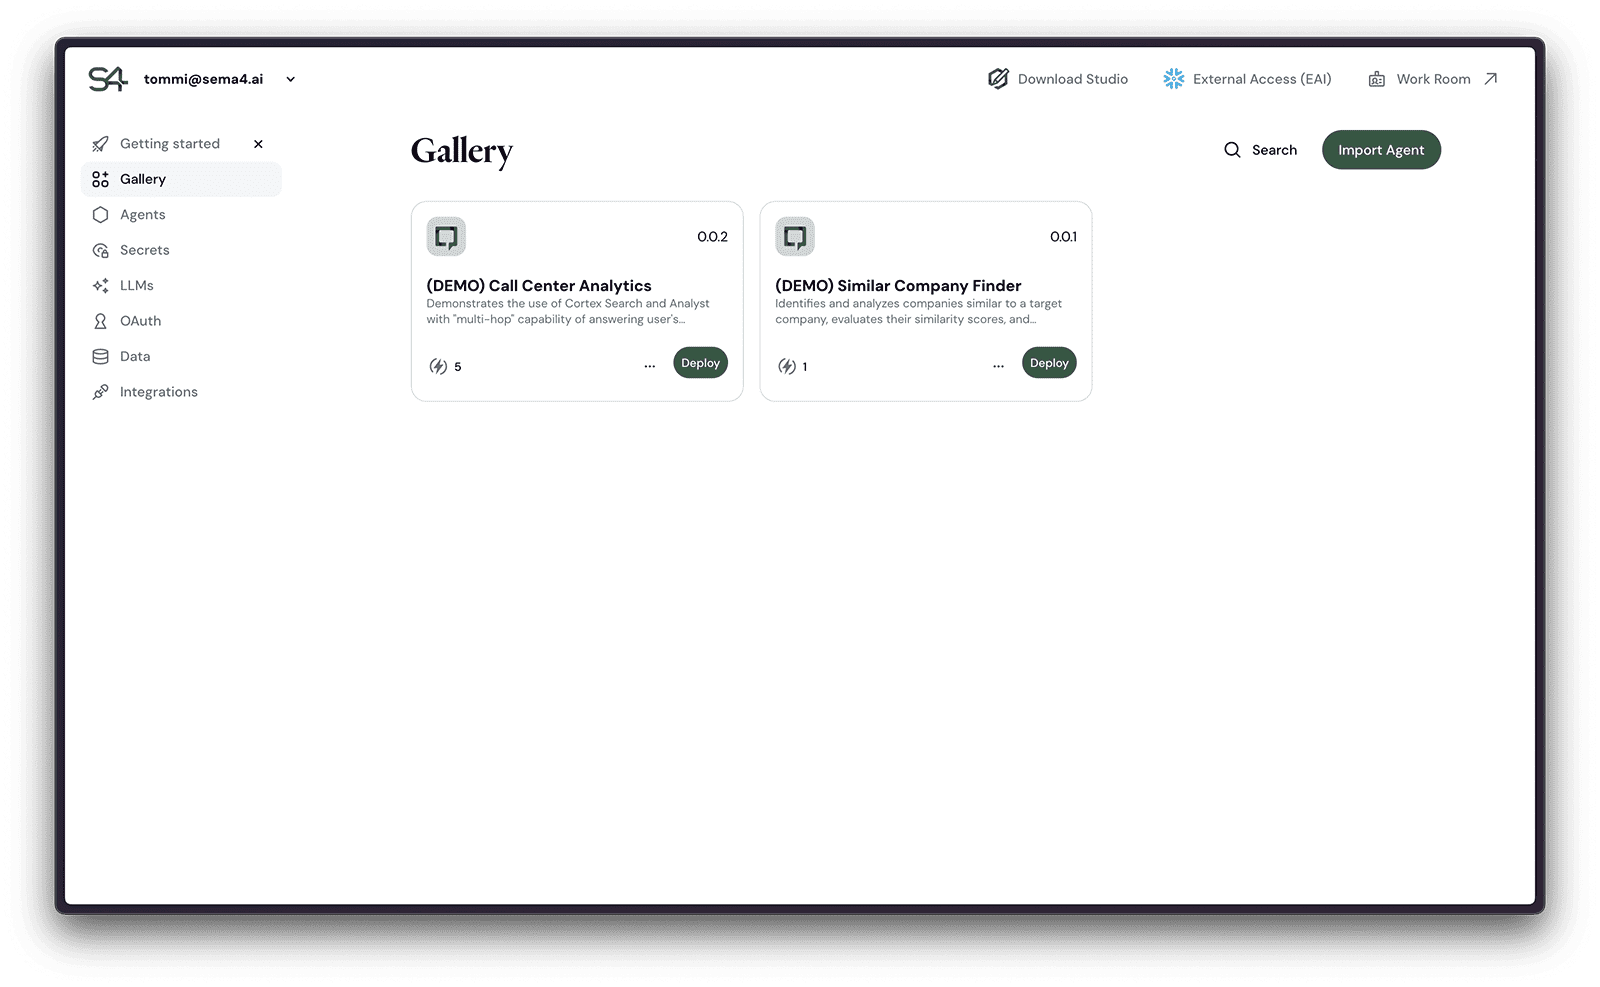
- Gallery - Agent projects that your team has created in Sema4.ai Studio and published to Snowflake. Note that these are not yet deployed to any compute.
- Agents - Agents that are currently deployed and ready to be used. Each agent has it's own details page.
- Secrets - Securely stored secrets (like API keys, passwords, etc.) that are used by the actions in the agents.
- LLMs - LLMs that are available in the Control Room. Cortex AI is the default LLM provider in Team Edition, but you can also use other LLM providers like OpenAI.
- OAuth - Your organization's OAuth client configurations, for example for authenticating to Google, Microsoft, etc. services.
- Data - Stored connection parameters for data sources, like Snowflake databases, external databases, etc.
- Integrations - External service integrations for example to observability platforms, private pypi repositories, email sending etc.
Workflow Overview
Following diagram show the key steps of publishing and deploying an agent on Sema4.ai Team Edition. These steps will be discussed in detail below.
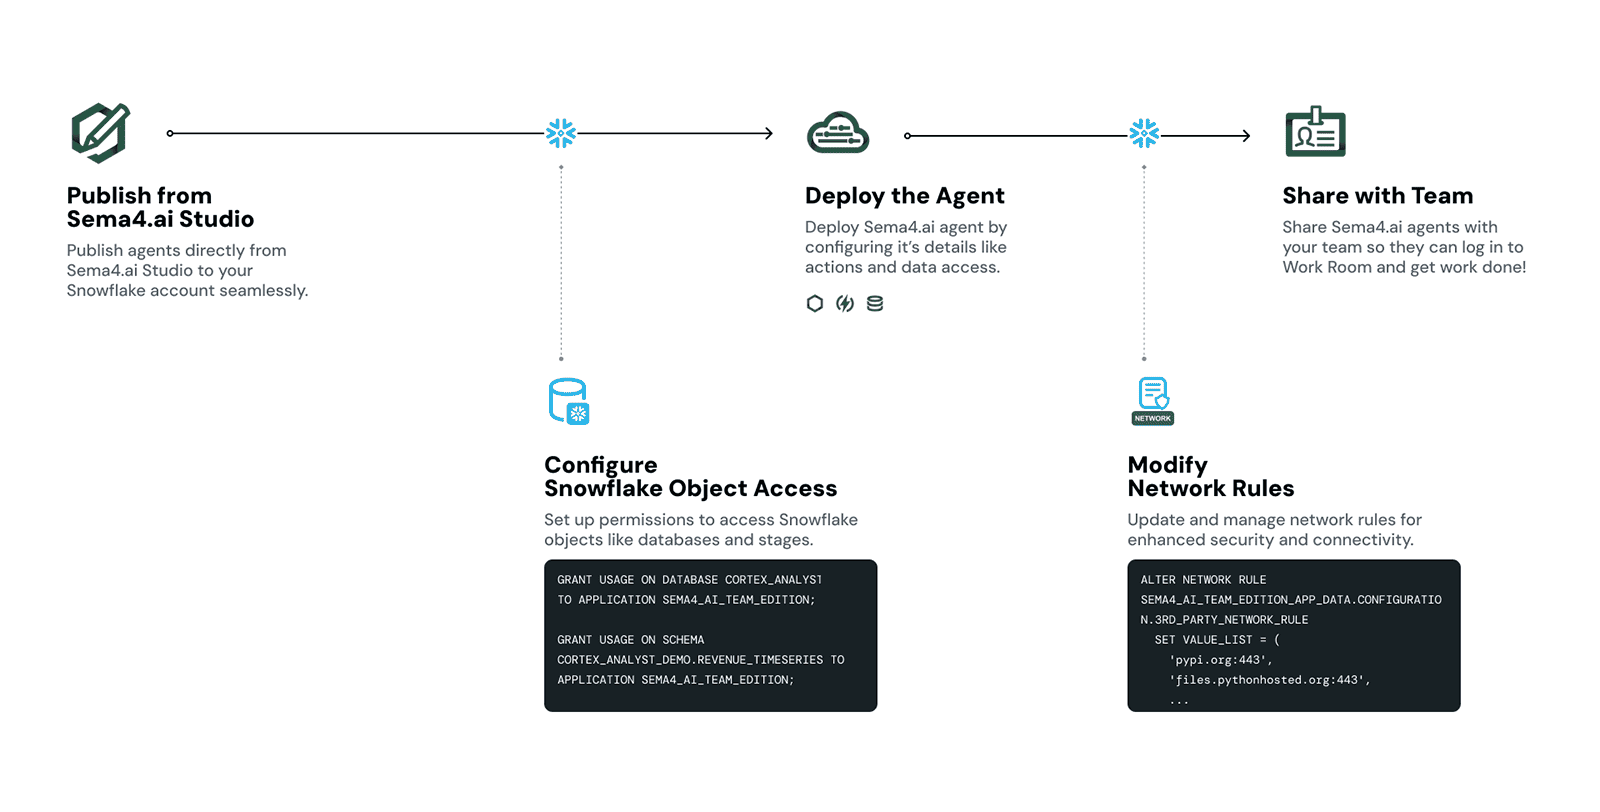
Publishing an agent
Publish means that an agent is uploaded to Control Room's gallery, where it gets validated and made available for deployment. You have two options here - from Studio or via a zip file.
Publishing from Studio
When Studio is linked to your Snowflake account, you can publish an agent from Studio by clicking the ... button in agent view and choosing Publish from the menu. You will be asked to review the version number of the agent, and then publish.
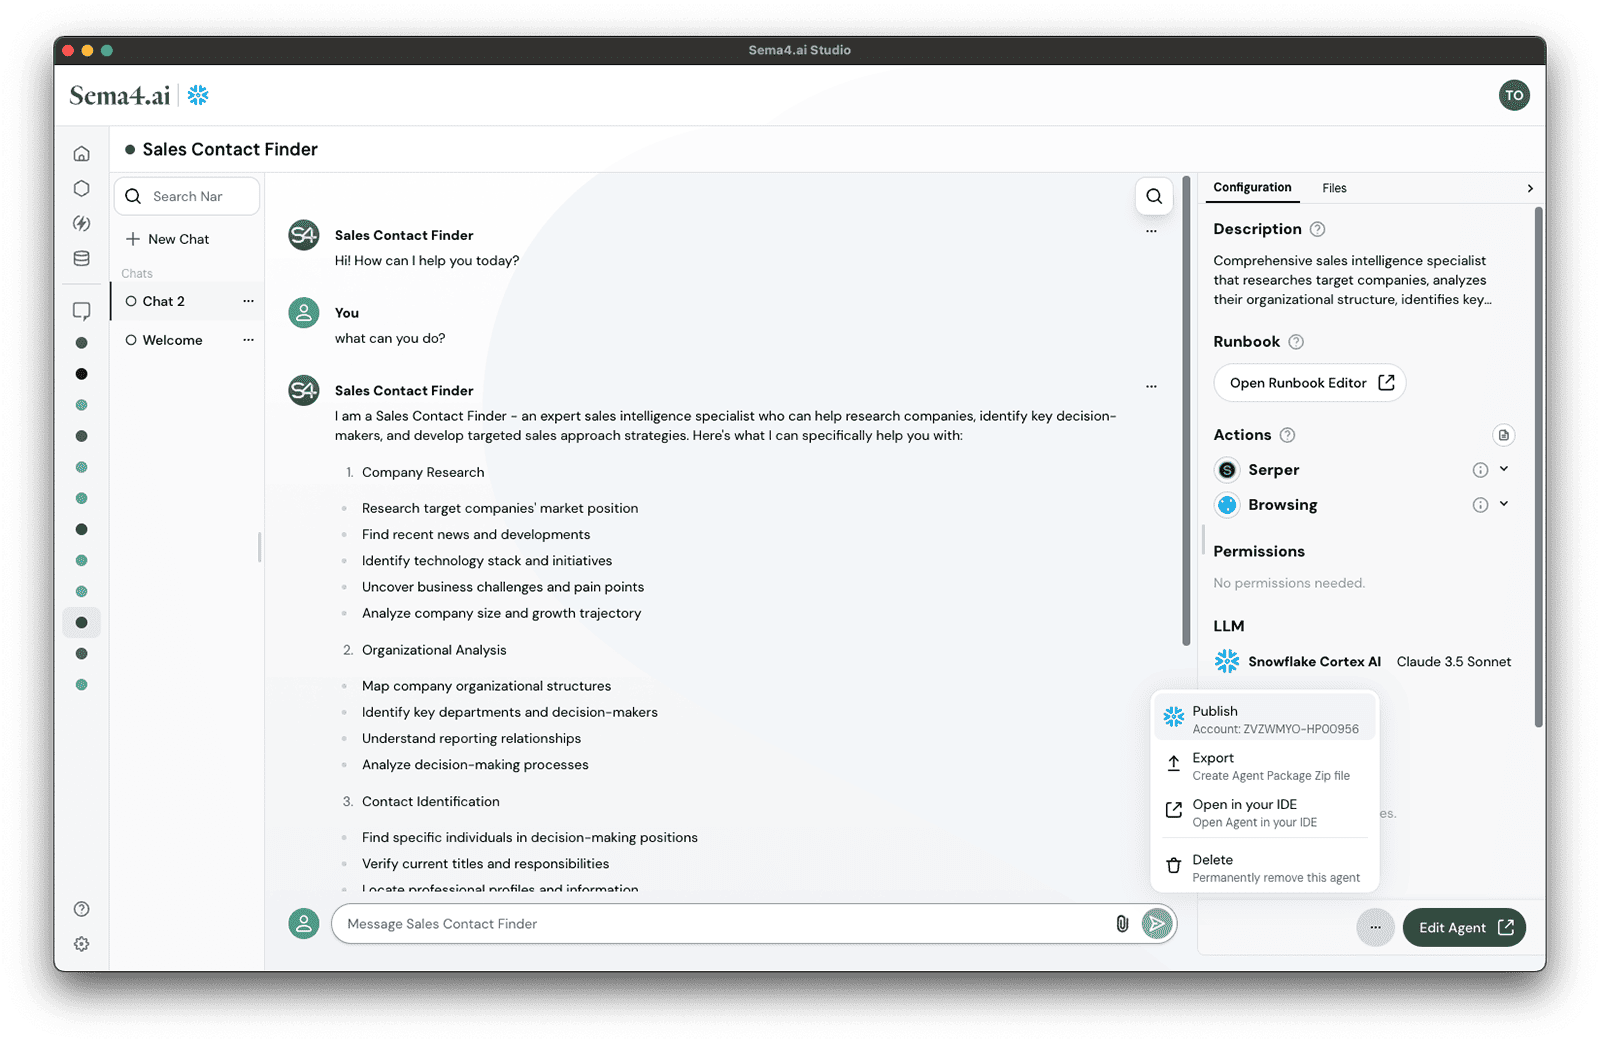
Publishing takes a few minutes to complete - depending on the complexity of the agent.
Importing a zip file
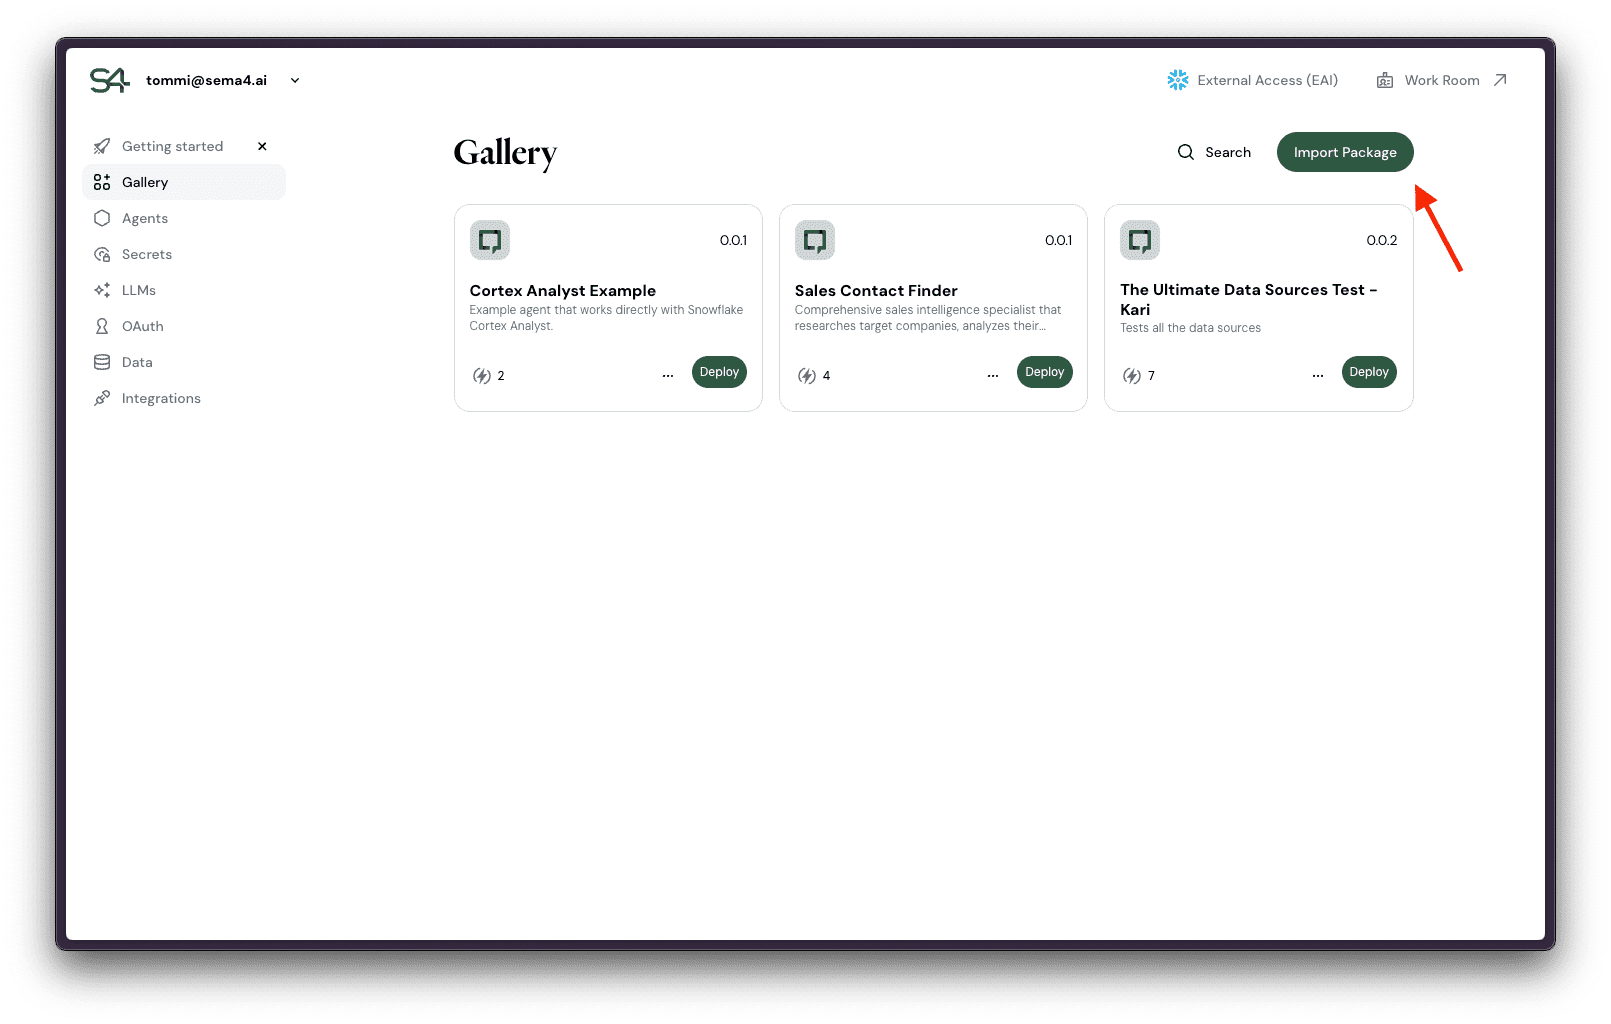
You can also import an agent from a zip file straight from the Control Room. This is useful if your colleague has sent you an agent package and you want to import it.
- In Control Room go to the Gallery tab
- Click Import Package button
- Choose a zip file to import with the file picker and hit Open
You will see a progress indicator as the agent is validated, and once successful, you'll see the details of the agent - ready to be deployed!
Deploying an agent
Deploying an agent means that the agent is deployed to a compute within Snowflake Snowpark Container Services and made available for Work Room users to use.
Agent deployments and configurations are explained in detail in the Deploy Agents guide that is shared between Team Edition and Enterprise Edition. We'll cover just the basics here.
Update Snowflake object access
If your agent is requiring access to any Snowflake objects, you need to update the access for the agent. You may need an administrator to help you with this. Follow the instructions in the Admin Guide.
Start deployment
Begin the deployment process by clicking the Deploy button next to any agent in the Gallery.
Review agent details
First step shows you the agent details you are about to deploy. Click Continue to proceed.
Configure the agent
Now you can edit the name and description of the agent as well as to choose the LLM connection. In Snowflake Team Edition, Cortex AI is the default LLM provider. Click Continue to proceed.
Actions and MCPs
If agent has actions or MCP servers that require secrets, you need to configure them here. Best-practice is to use stored Secrets (using Save Secret link) instead of providing one-off values.
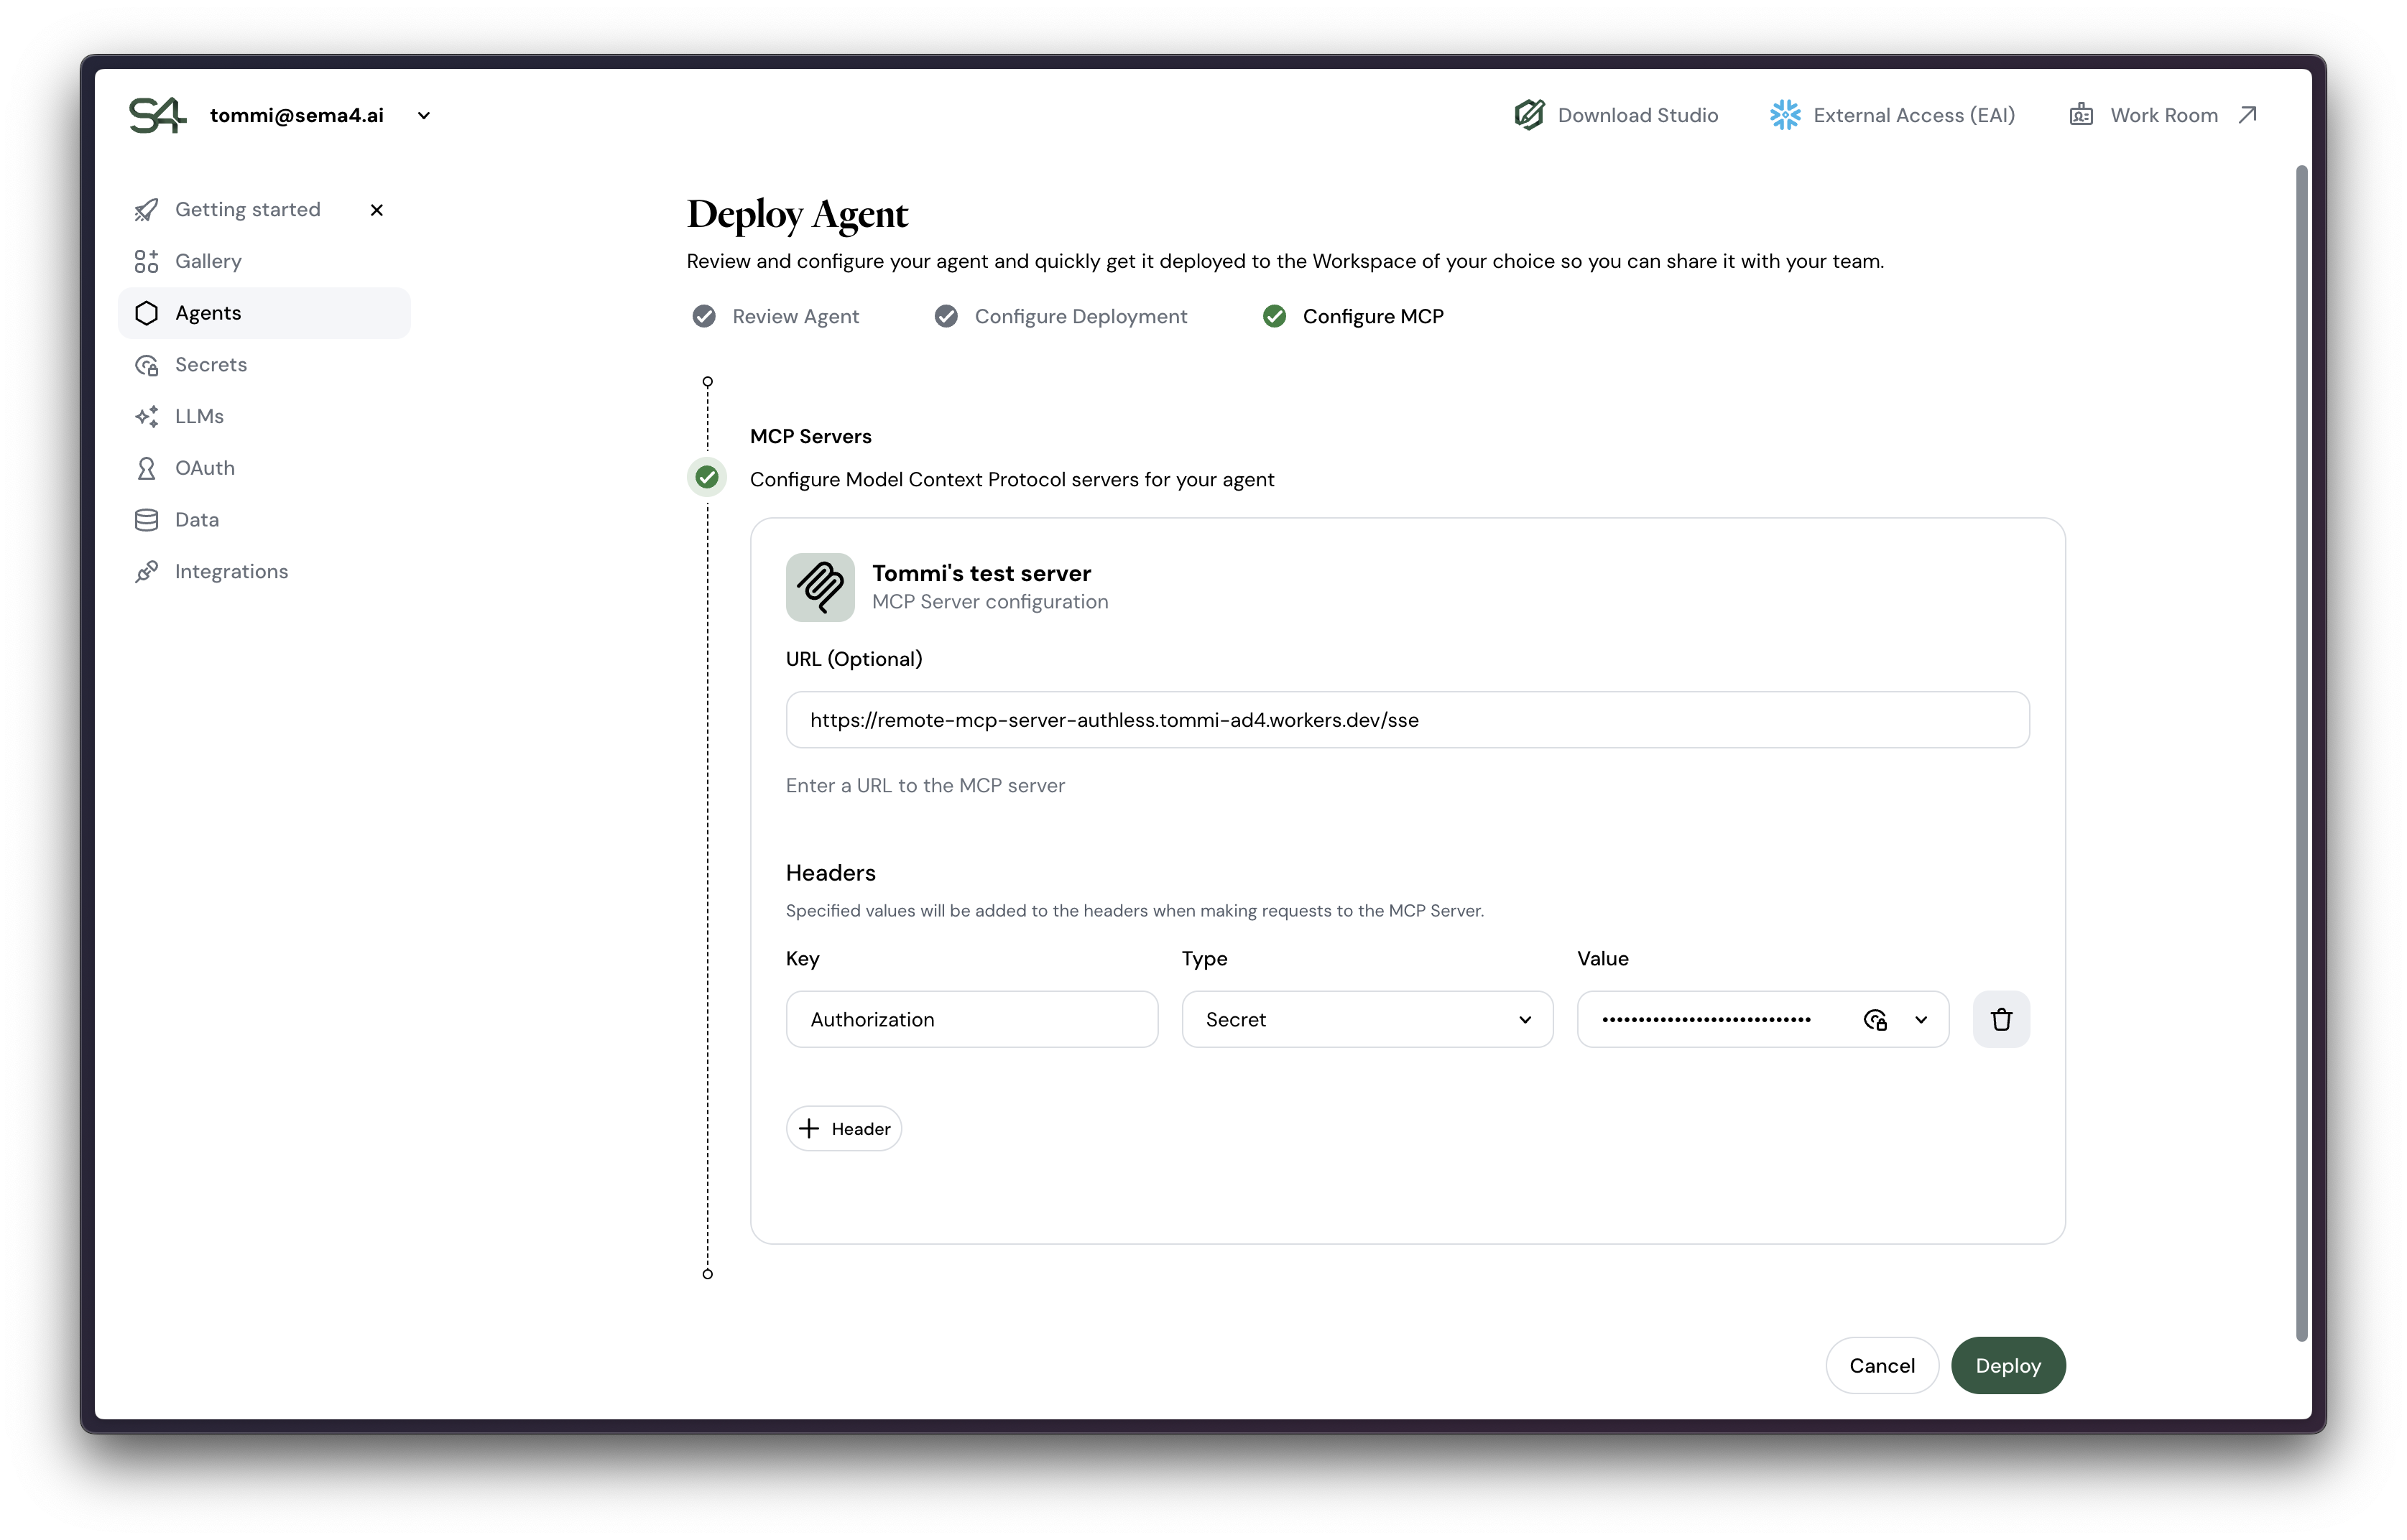
If your agent does not have data connections, you are ready to deploy. Click Deploy to proceed. In case you have data connections, click Continue to proceed.
Data sources
Configure connectin details for any data sources that your agent requires access to. Click Deploy to get going!
Agent deployment will take a few minutes to complete. You will see a progress indicator as the agent is deployed but you can leave the page and find your agent in the Agents tab later.
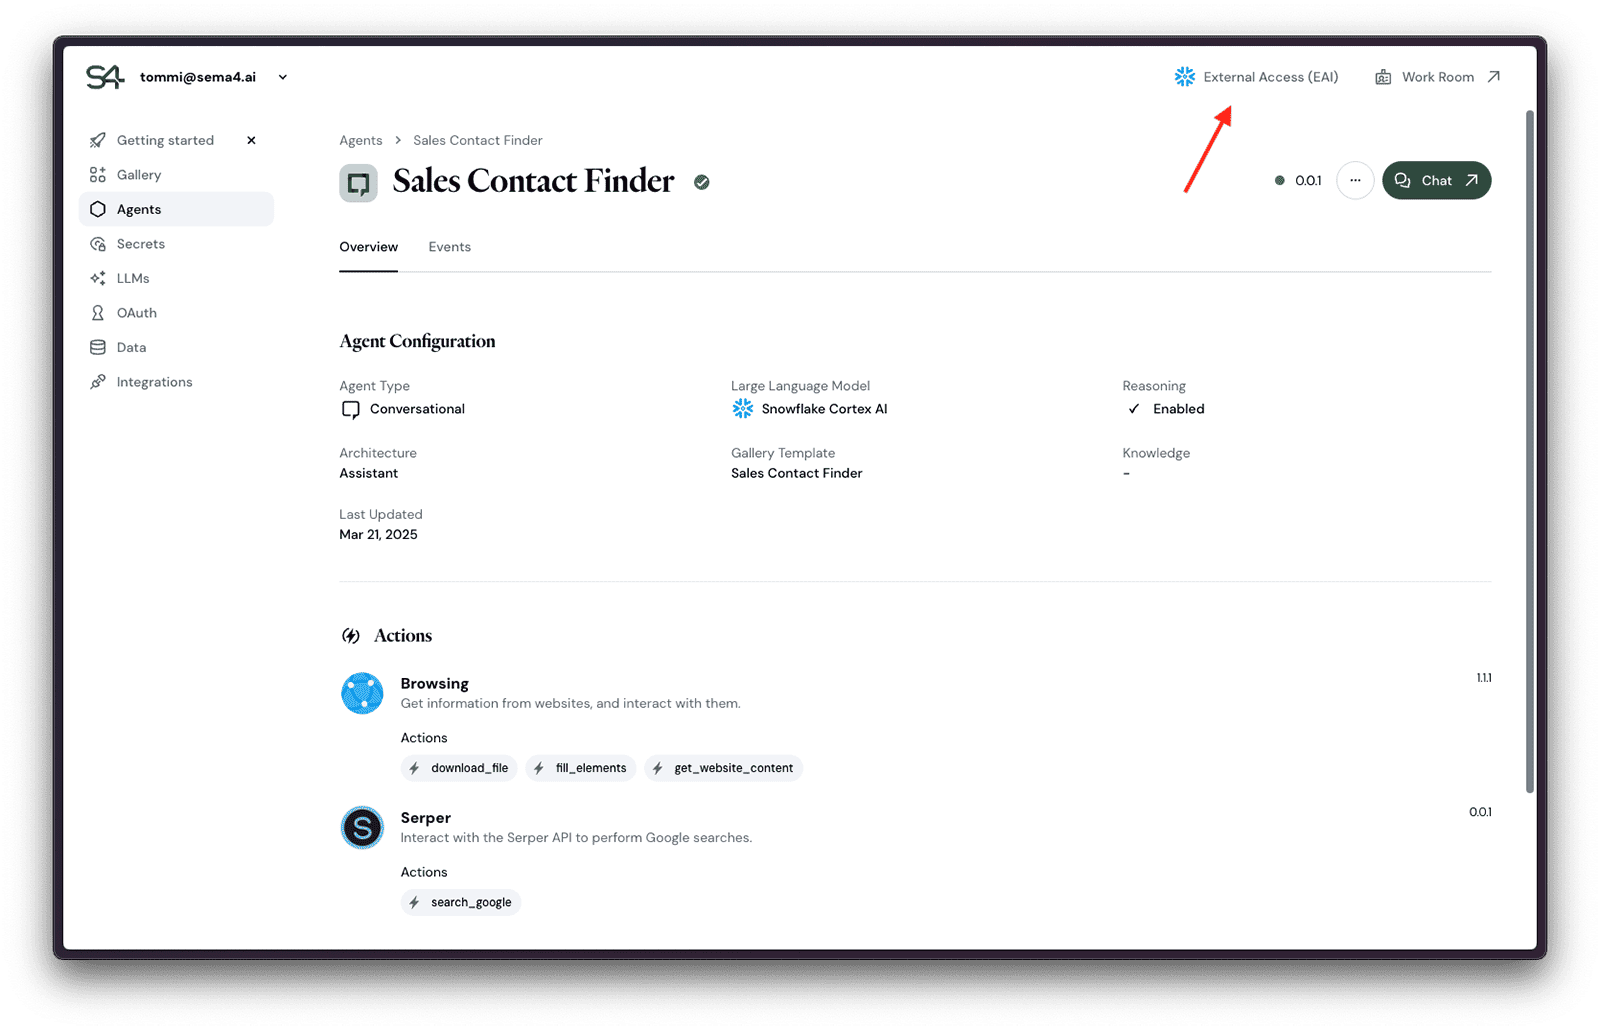
Update network rules
If your agent is requiring access to any external services, you need to update the network rules for the agent. You may need an administrator to help you with this. Follow the instructions in the Admin Guide.
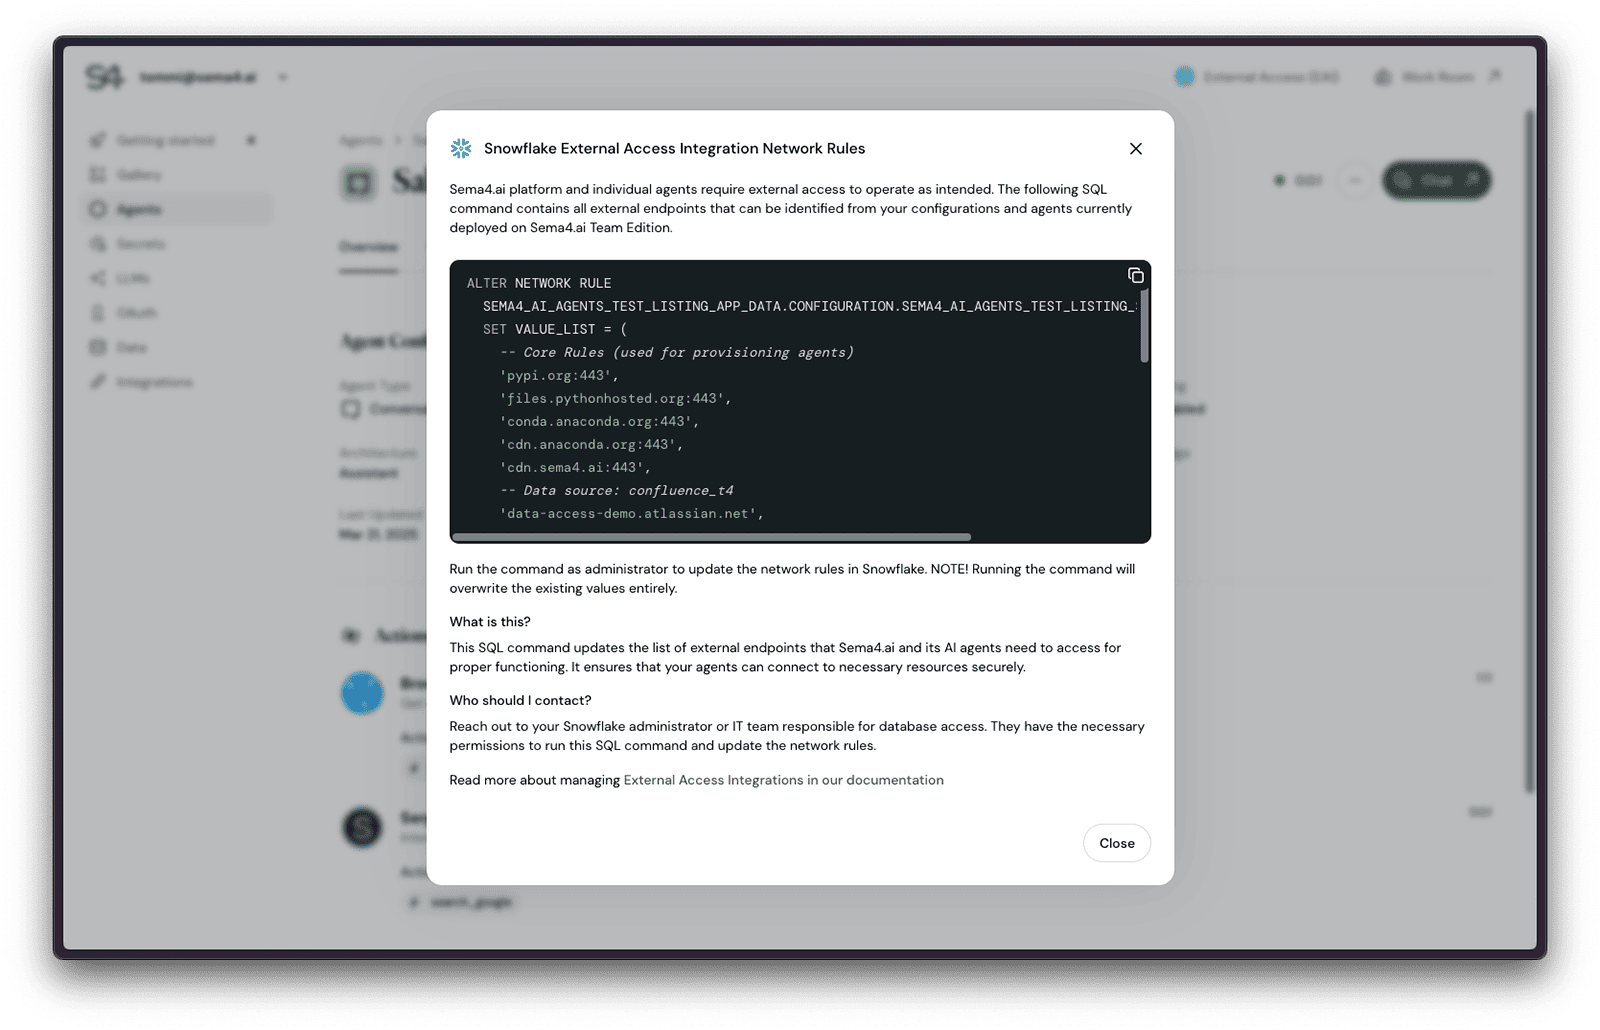
Easiest way to do this is to click the External Access (EAI) button at the top of the screen.
You'll be presented with the list of all current network rules needed by the platform. Run SQL to update the network rules.
Verify that agent is running
Once the agent is deployed, you can verify that it is running by clicking the Chat button in the top right corner of the agent details page.
Congratulations, agent deployment is complete!
Next steps
Here are some valuable resources to learn more about managing agents on Sema4.ai Team Edition.