Share agents with your team
Having built your agent in Studio, the next step is to publish it to Control Room. Publishing an agent makes it available as a shared resource that your team can collaborate on, reuse, and deploy to your business users in Work Room.
There are two ways to publish an agent to Control Room:
- Publish from Studio: Publish the agent directly from Studio to Control Room using the built in functionality
- Import a ZIP package: Export the agent from Studio as a ZIP archive and import it to Control Room
Publish from Studio
First, make sure you have your Studio linked to Control Room.
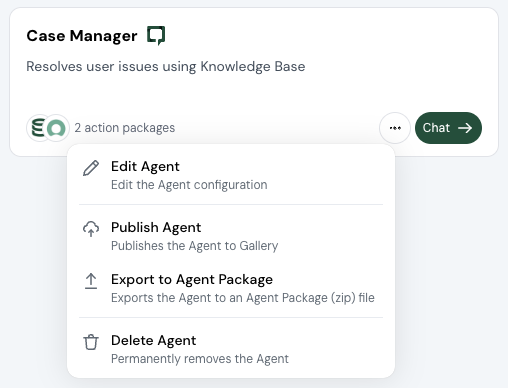
- In Studio, go to Agents using the left-side navigation.
- Under My agents, locate the card of an agent you want to publish.
- Click button on the card and select Publish.
After this step, you're prompted to assign a version number to the agent. Unless you need to assign it manually, you can leave the pre-filled value as it is.
The agent version you publish to Control Room always needs to be higher than the last one already in Control Room. You can specify it manually or let Studio auto-increment it for you.
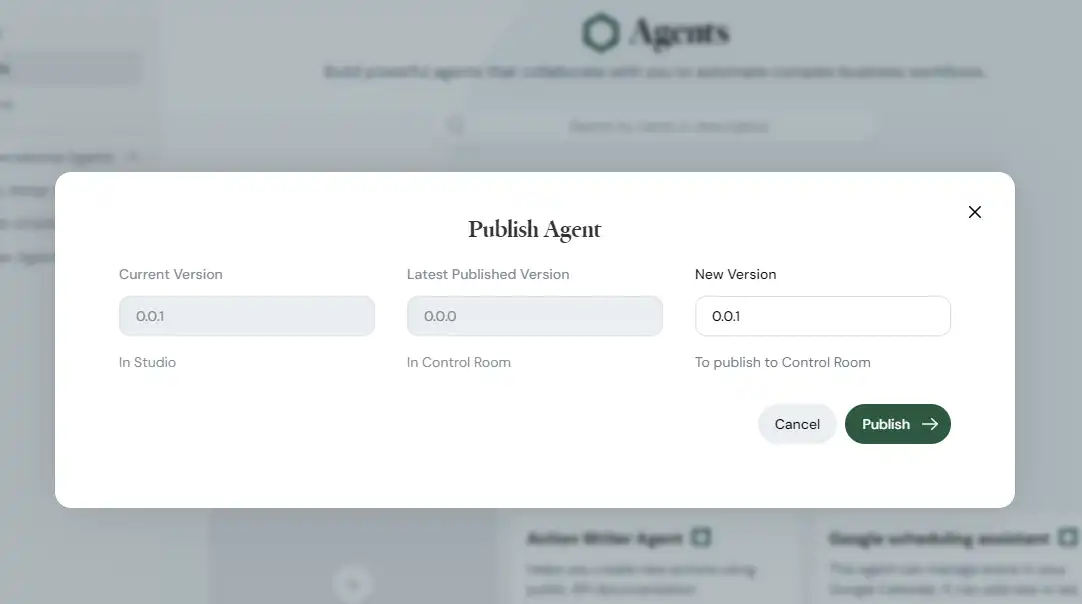
To finish the publishing process, click Publish . Studio verifies the agent structure at this point and once done, you get a confirmation that the agent is published.
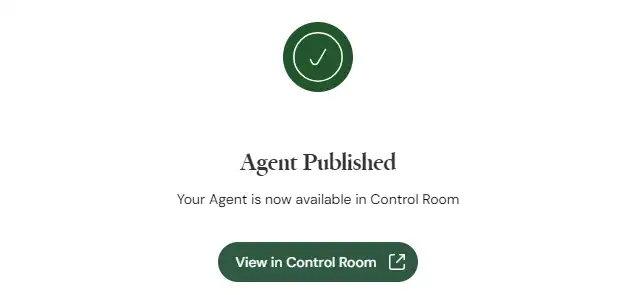
Congratulations, you now have your agent in the Gallery! 🙌
Export agent package to ZIP archive
If you need to back up an agent to your computer, you can export it from Studio as a ZIP archive. This is useful when migrating to a new computer or transferring the agent between Studio installations.
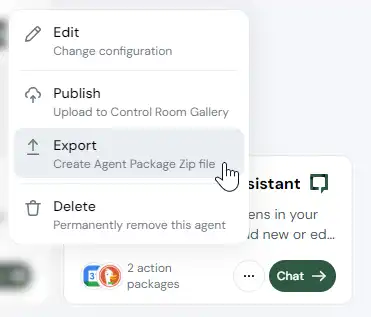
- In Studio, go to Agents.
- Locate the agent you want to export.
- Click button on the agent card and select Export.
- Select a directory on your computer where to save the package.
You can later import the agent to Studio using the button in the Agents section you use to create new agents. Alternatively, you can import the agent directly to Control Room.