Build agents with Data Access
Building Agents with Data Access is a breeze with Sema4.ai Studio. Data Access leverages the same Actions framework as for accessing any enterprise application. This section walks you through the specifics of deploying powerful agents with access to data!
After completing this tutorial, you will be able to:
- Install Data Server and manage its state in Studio
- Use Saved Connection Secrets for configuring data sources
- Build an agent that access enterprise data
- Publish the agent to Sema4.ai Control Room
Overview
The following diagram shows how agents with Sema4.ai Data Access work.
To add data access to your agent, you need to add actions with data queries, which in turn use data sources. Once you provide the data sources the necessary connection details (such as host, port, username, password etc), your agent is ready to use the data.
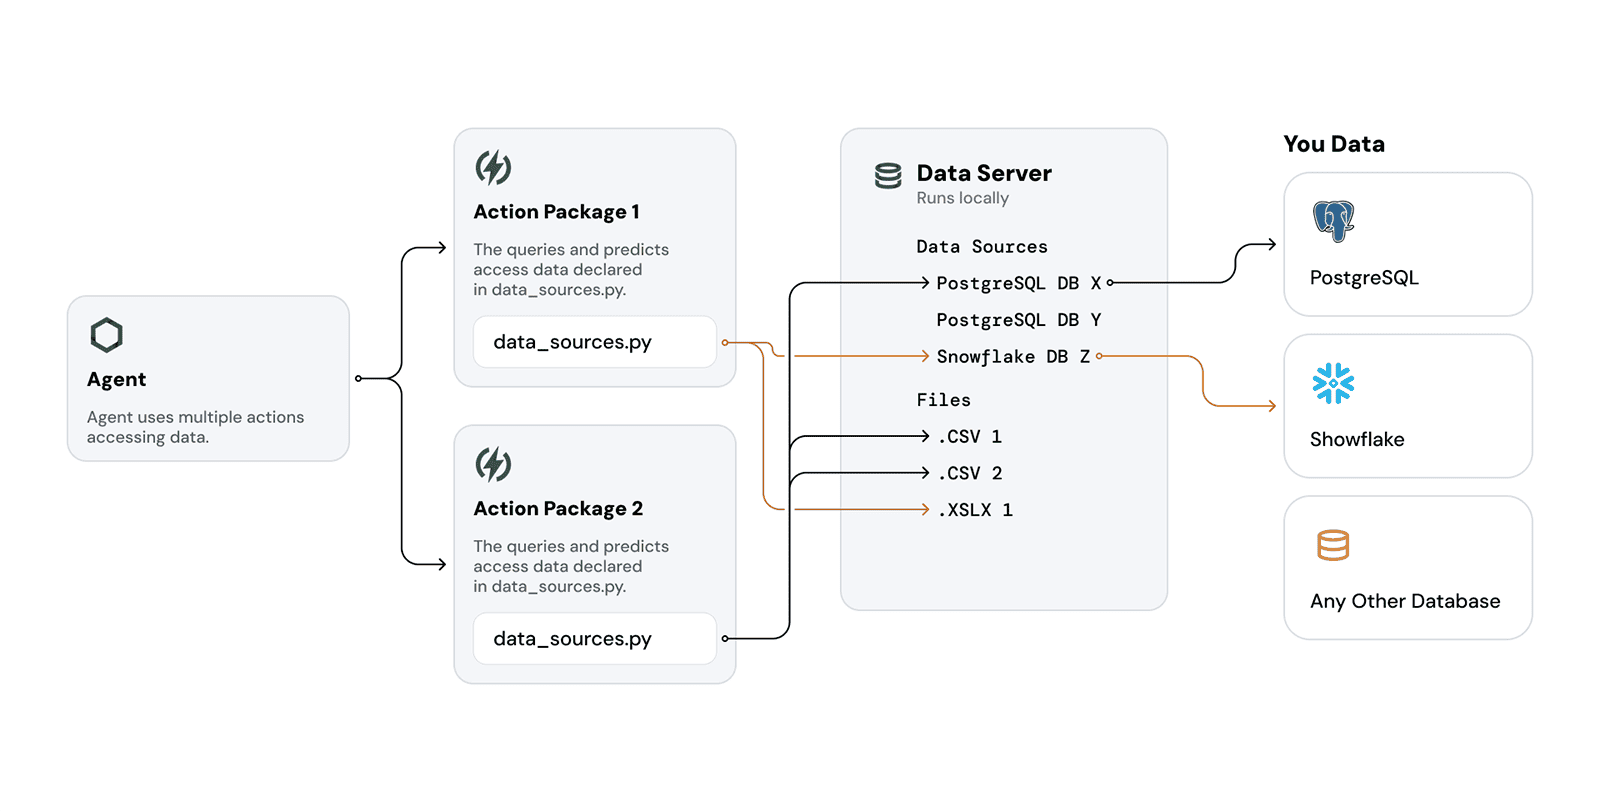
- You may add more than one action package with data access to your agent. You'll be prompted to provide the connection details to all of the required data sources at once.
- The action packages can use the same data sources, or different data sources.
- Action packages can also contain files, which are automatically loaded to the Data Server as tables.
- Data Server does not copy the data to the Data Server, it only provides zero-copy access to the data sources.
Step-by-step guide
Follow the steps below to build an agent that can access enterprise data. This tutorial will guide you through the process of creating an agent, managing data sources, and publishing the agent to Sema4.ai Control Room. Make sure you have already built and published at least one action package with data access, for example following the instructions in Build an Action Package.
Download and Install Studio to run Data Server
If you have not used Sema4.ai Studio before, you will need to download and install it before starting to work with Data Access. Follow the instructions in Install Studio to install Studio.
Make sure to wait until the Data Server is downloaded and running before you start building your agent. You can check the state of the Data Server in the Data Sources view in Studio.
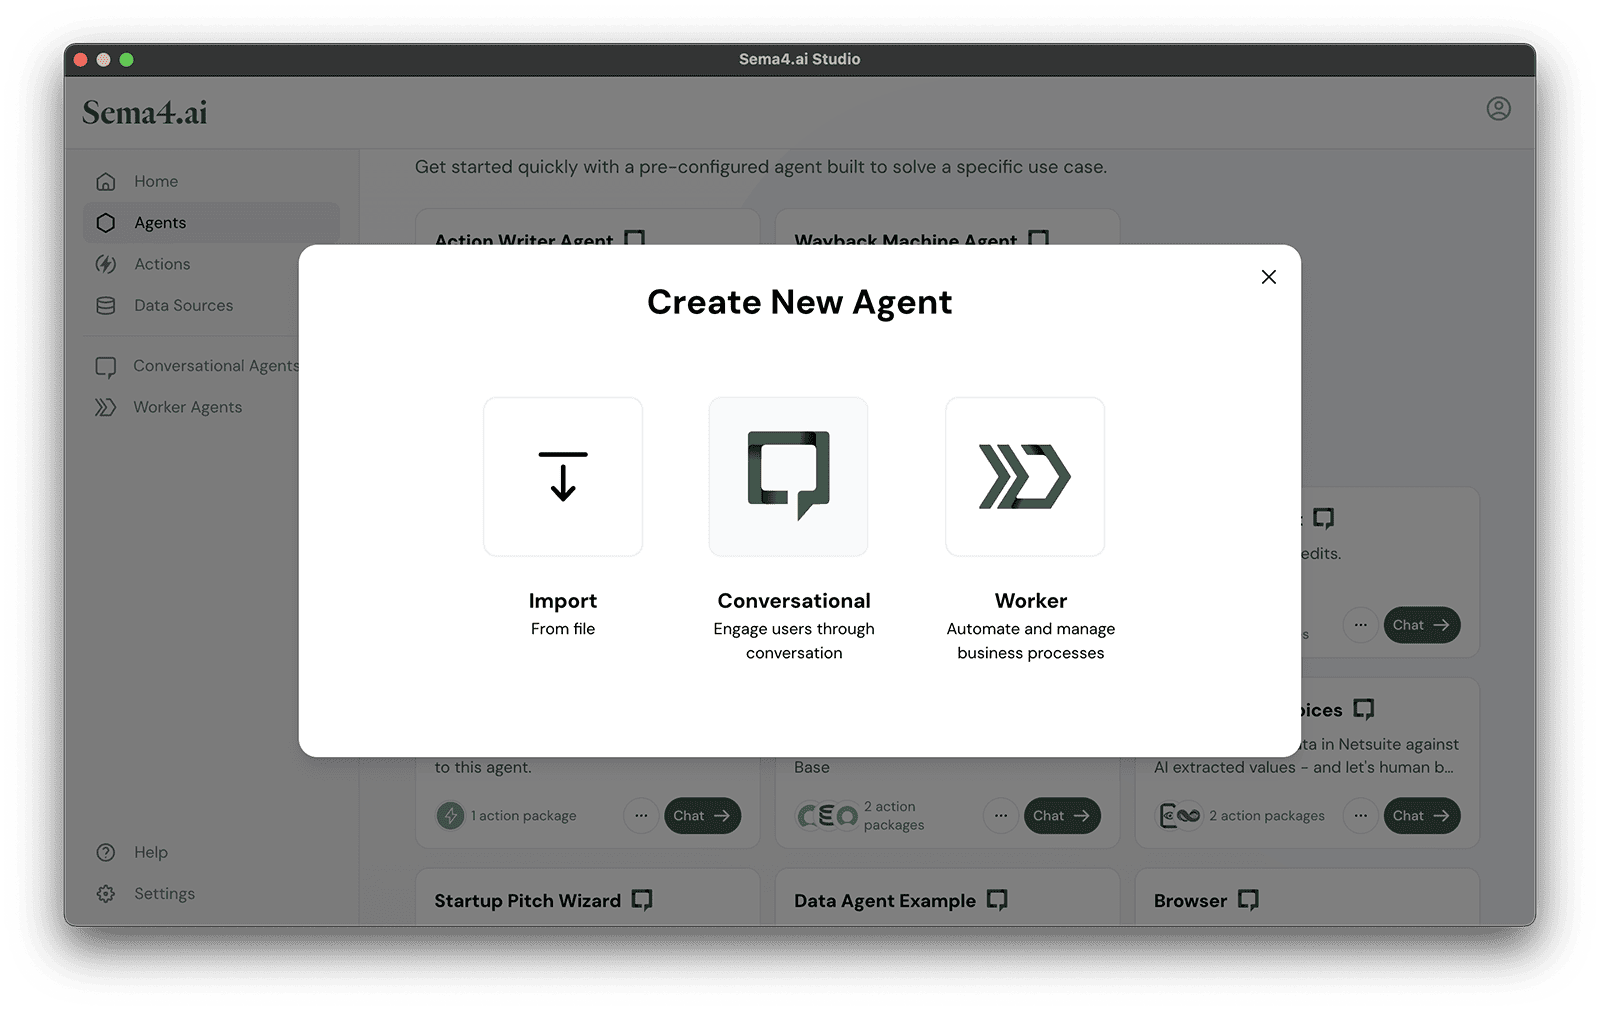
Create New Agent
Start building your agent by creating a new agent in Studio. For this tutorial, choose "Conversational Agent" for the type.
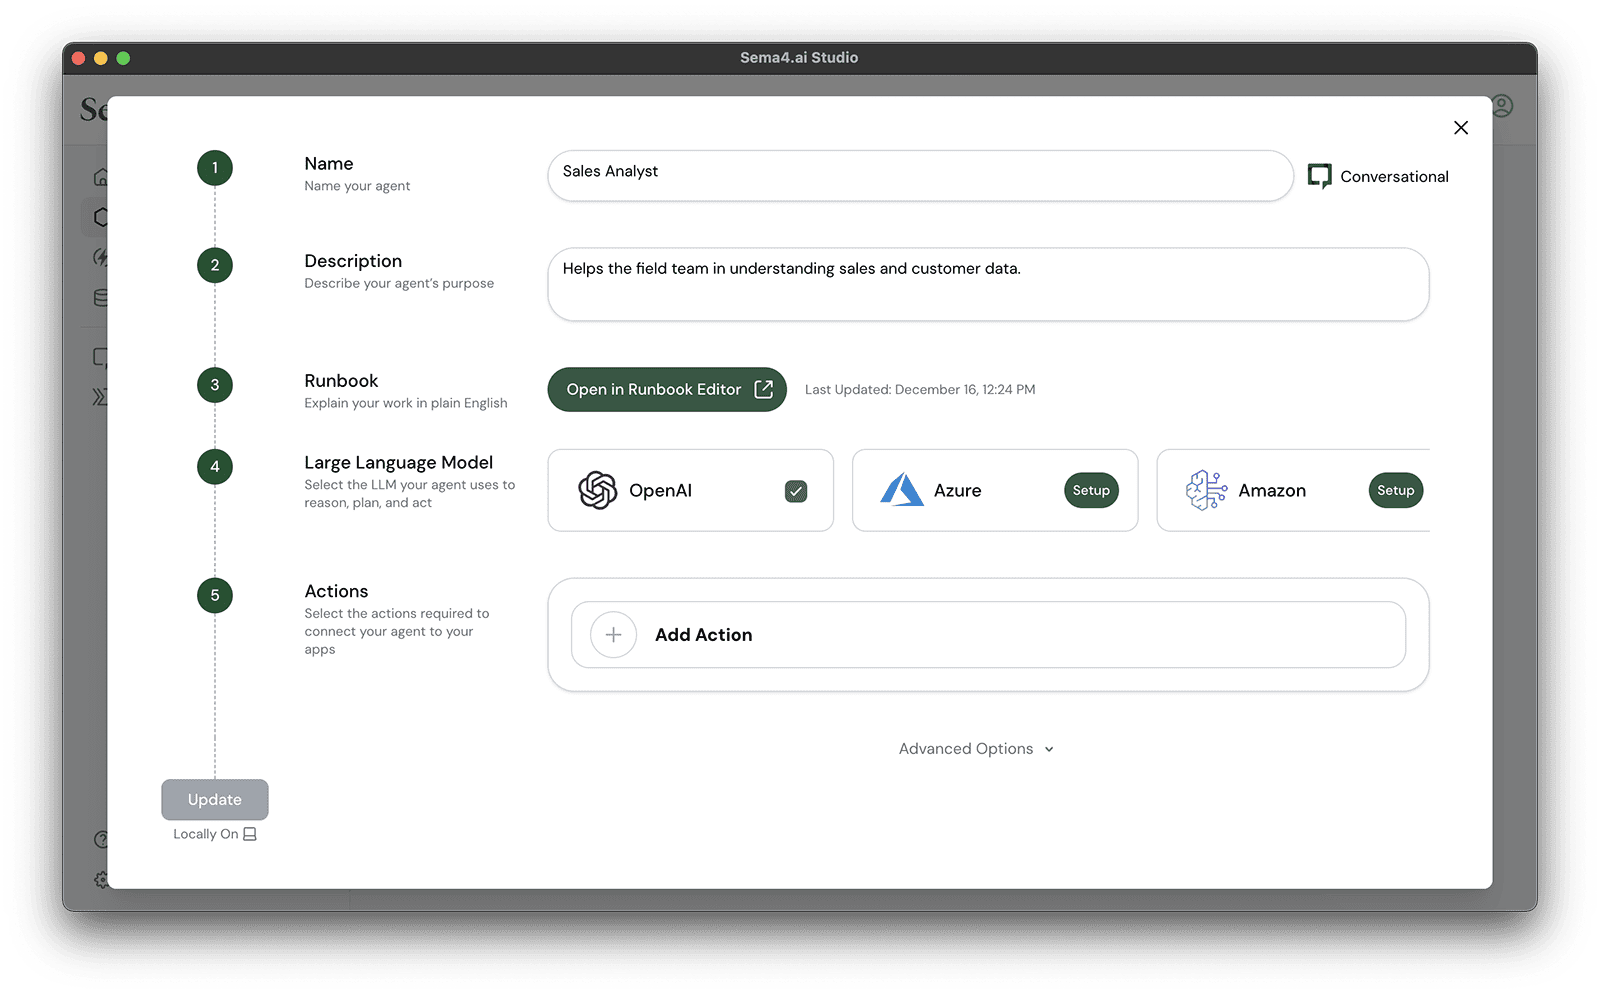
Name, Description, Runbook and LLM
Create the basic details of your agent by giving it a name, description, Runbook and LLM. For example following the example below:
Name: Sales Analyst
Description: Helps the field team in understanding sales and customer data.
Runbook:
Objective
You are an agent that helps sales execs deal with the context of their customers and their sales.
Context
Your data context is as follows:
- Customers: these are companies that can be in various countries
- Each customer has an assigned account manager
- Sales data shows dollar volume of customer's orders per month
Steps
- Respond to users questions always based on data.
- Start by retrieving the list of countries and customers
- Ask which country or customer the user is interested, to trigger the conversation
LLM: In this example we are using OpenAI GPT-4o model. But you can use which ever you have at hand.
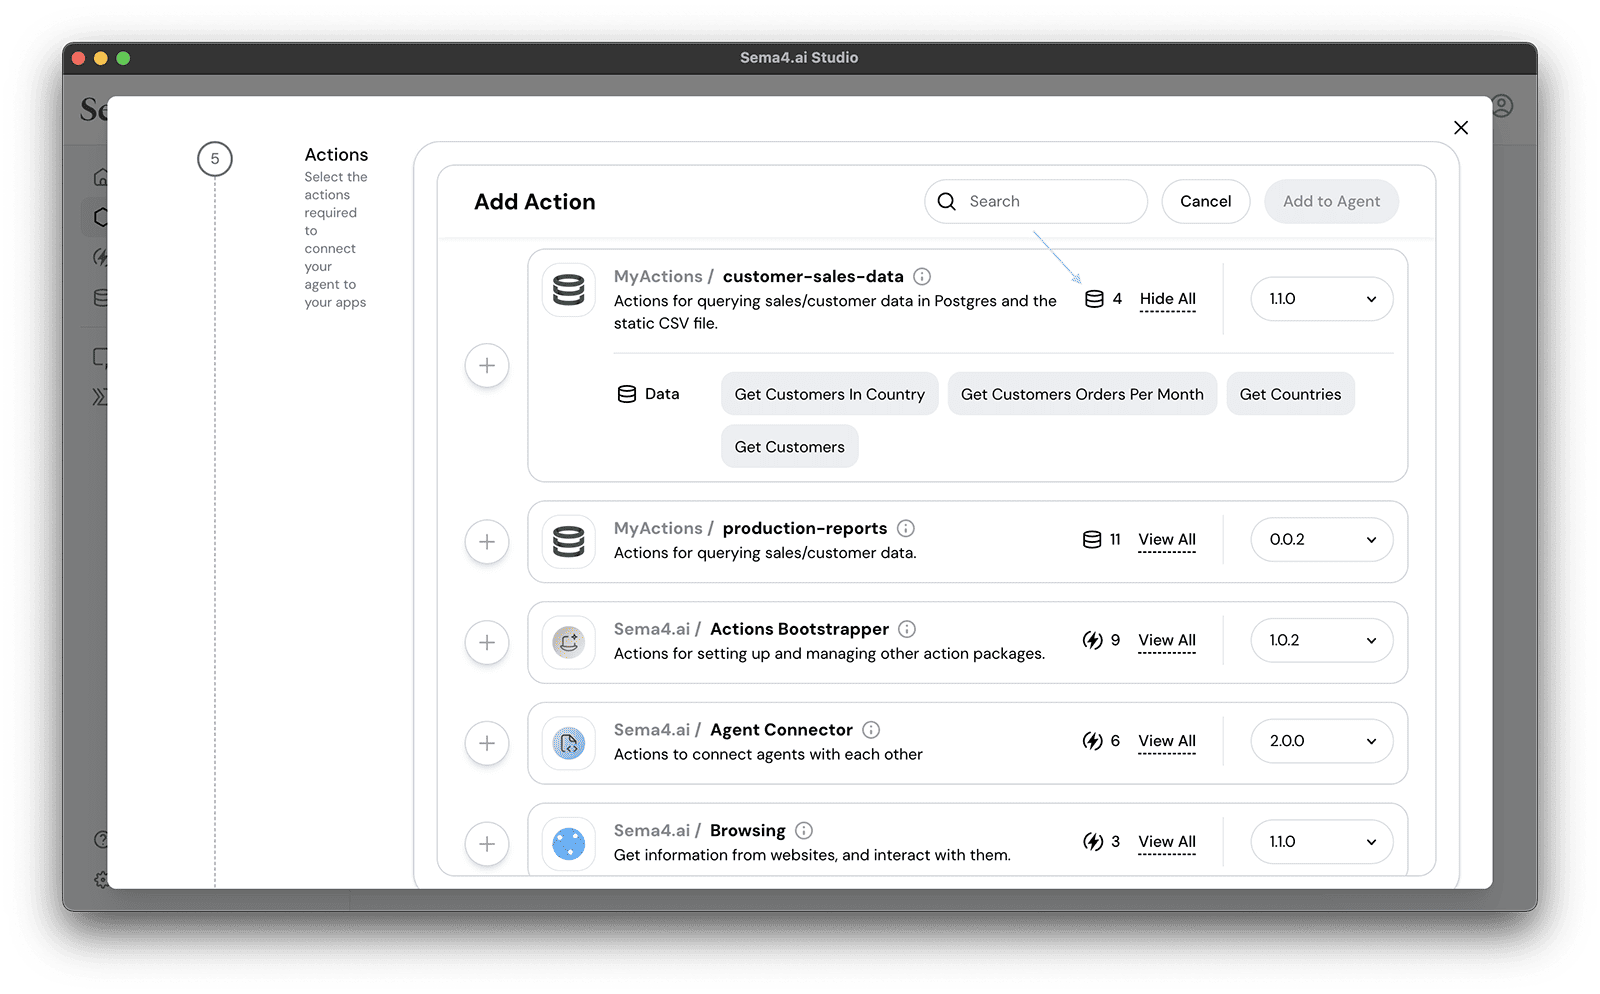
Add Actions with Data Queries
Now browse the list of actions available, and locate the actions that you have created with data access. You will see a small database icon that indicates how many query or predict actions each of the packages have. You can of course add multiple action packages, and each package can contain a combination of queries and "regular" actions.
Configure Data Sources
As a last step, you'll be asked to configure the data sources that you want to use in your agent.
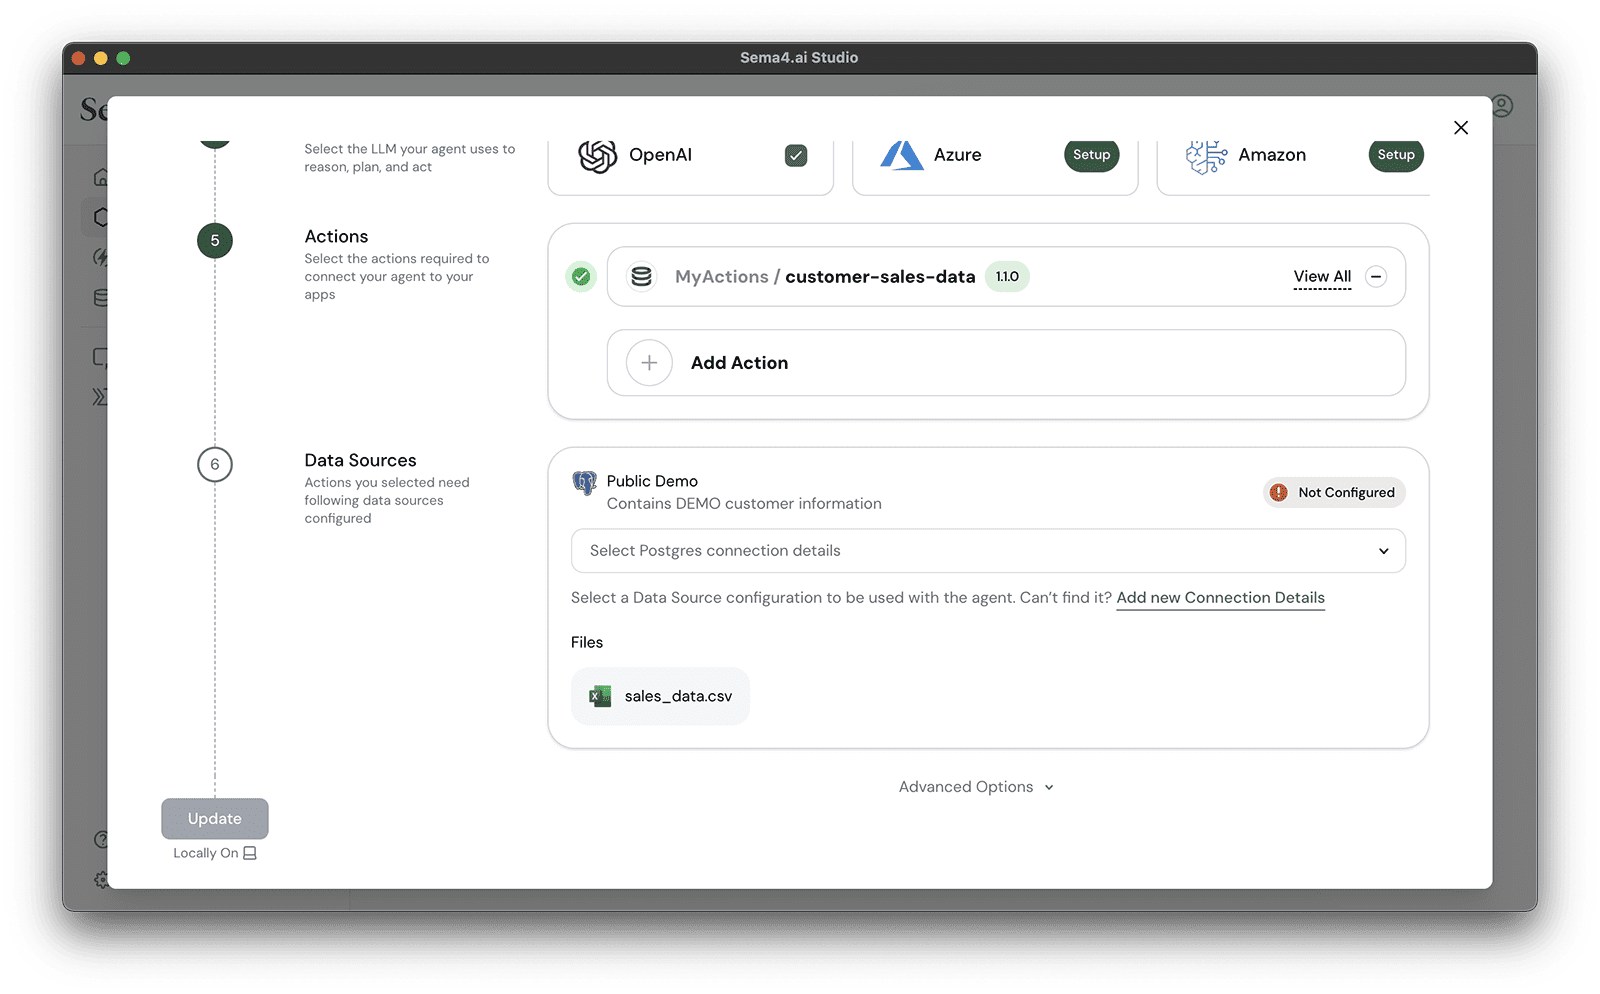
This view will show you all of the data sources required by the actions you have added - containing all database connections, models and files. You will see an indication if a data source is already configured in your Data Server, or if you need to configure it.
For each of the data sources you need to configure, you will be asked to create a new connection detail. The saved connection details contain the vital information like host, port, username and password needed to connect to the data source. Note, that you are now configuring the connection on your local machine - later in Control Room the configuration might be different for production environments.
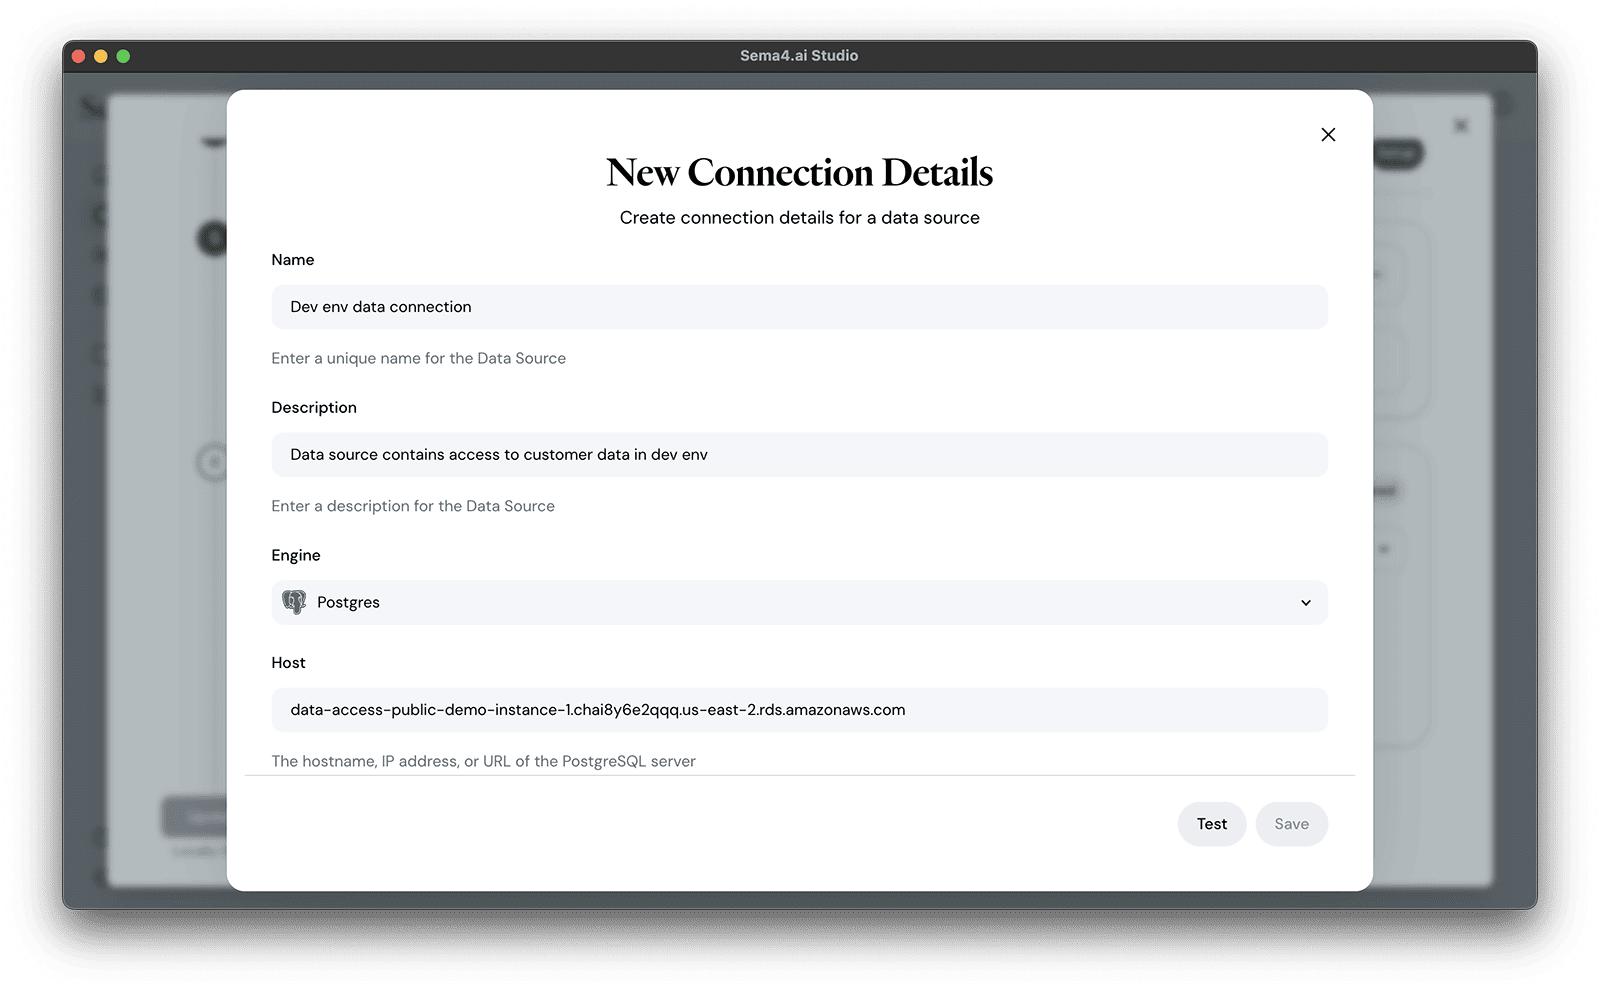
If you are using the public demo Postgres database that we provided in the actions with data access tutorial, you can use the following connection details:
HOST: data-access-public-demo-instance-1.chai8y6e2qqq.us-east-2.rds.amazonaws.com
PORT: 5432
DATABASE: postgres
USER: demo_user
PASSWORD: xyzxyzxyz
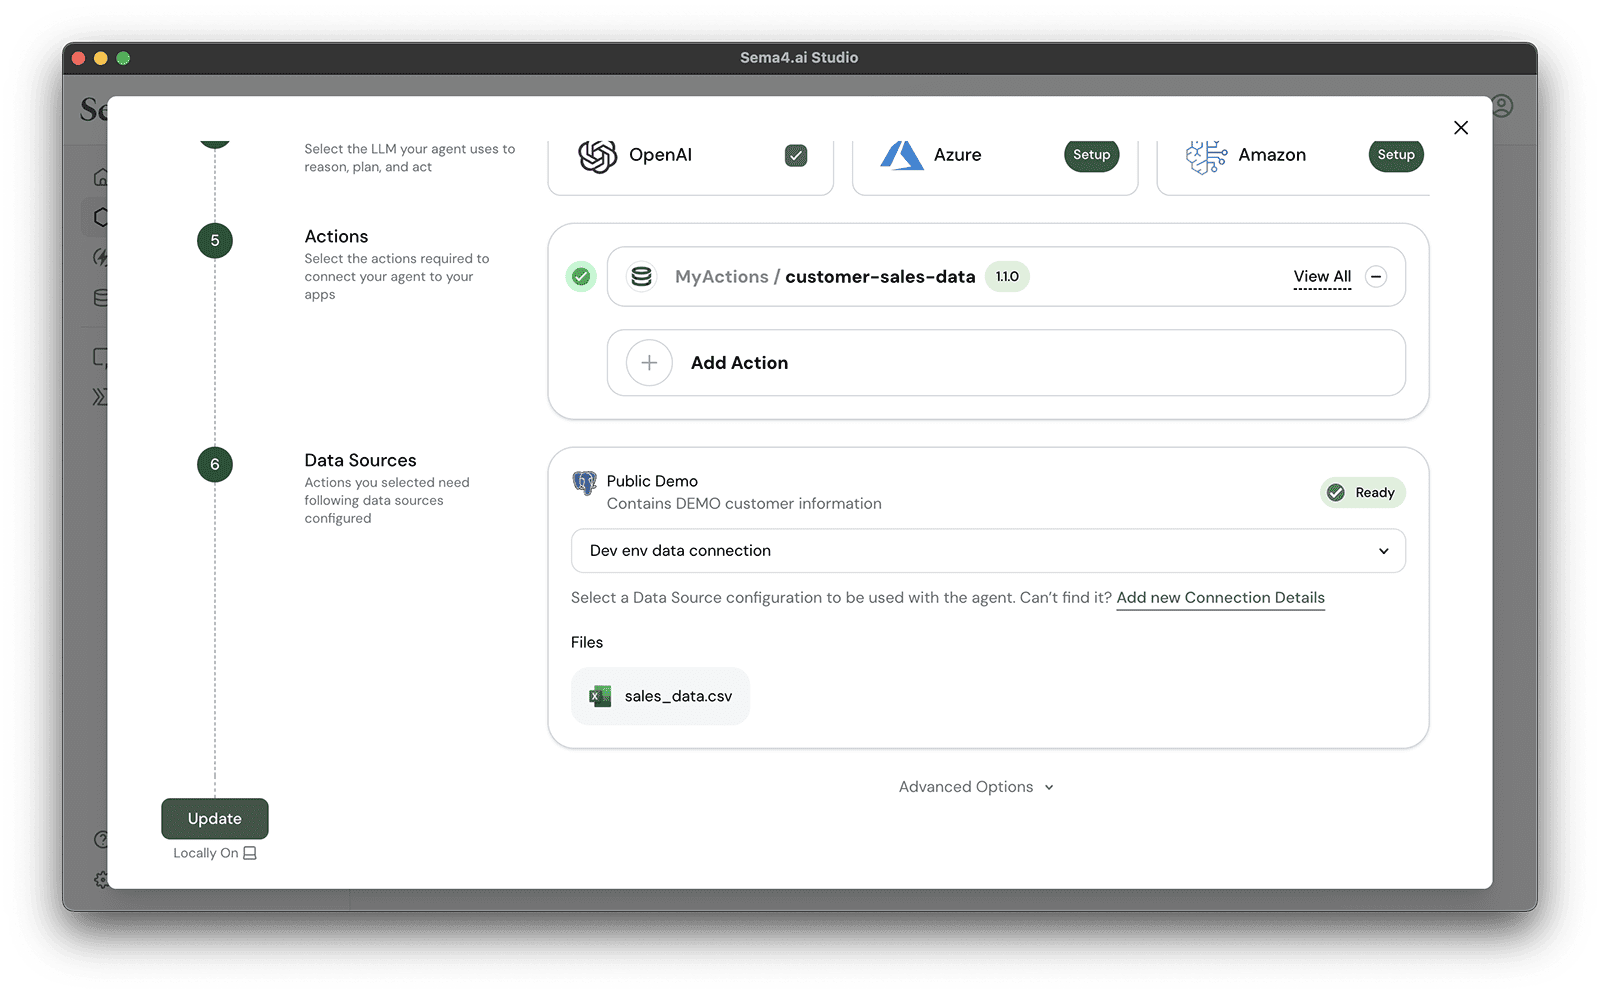
Once the connection details are created, you will be able to use them in your agent.
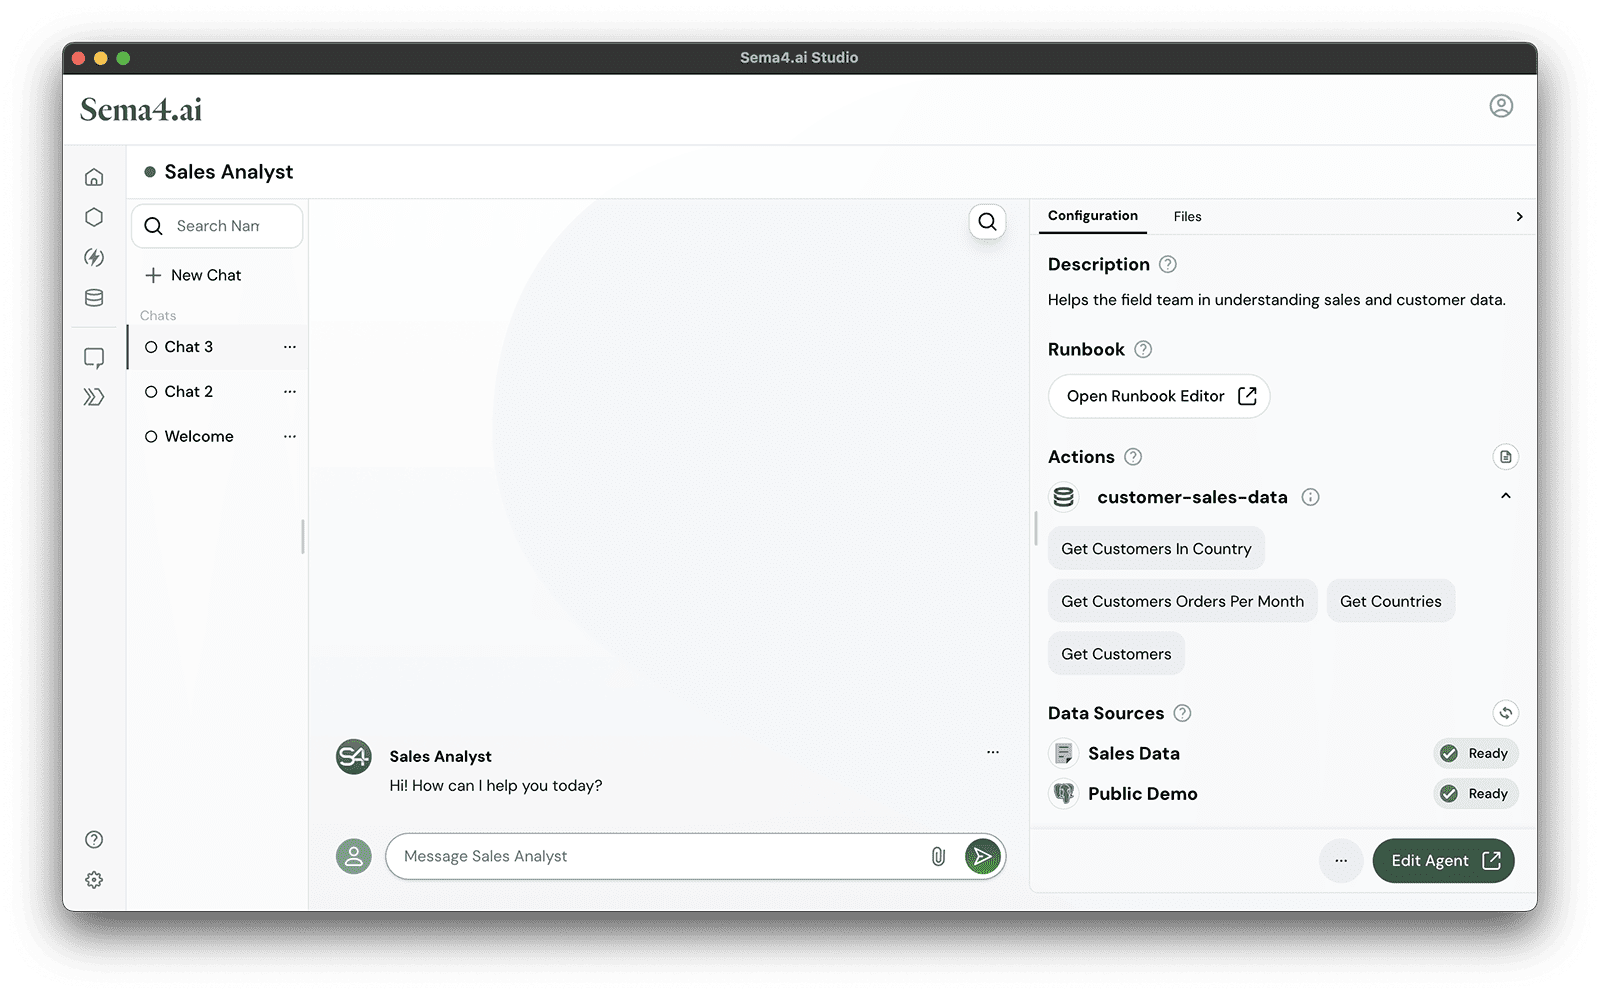
Deploy and test
All set! Now you can deploy yor agent and test it out in the agent chat view. In the side panel you can see the status of the data sources to make sure they are connected.
Data Source view
The Data Source view accessible one the left panel of Studio, and it shows the state of the Server and all of the data sources configured in it.
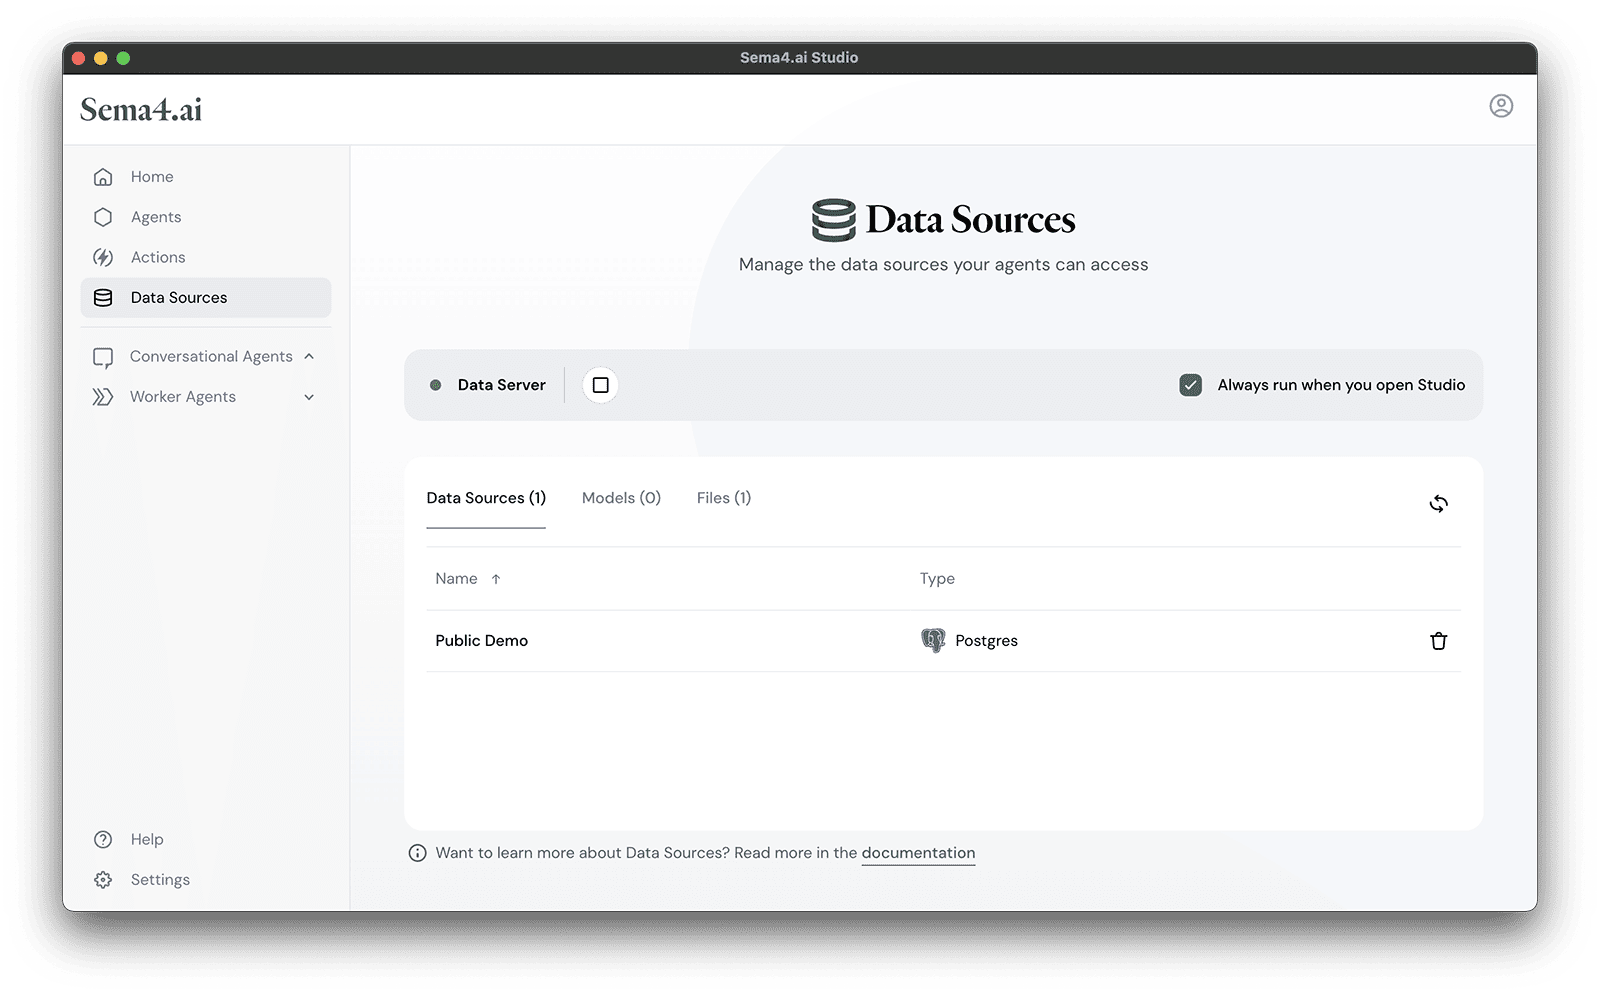
In this view you can:
- See the state of the Data Server (Running, Stopped, Error)
- Start and stop the Data Server
- Choose if the Data Server should start automatically when Studio is opened
- Connected data sources:
- Databases: You'll see the list of databases connected to the Data Server with their type and name. You can remove the connection by clicking the trash icon.
- Files: You'll see the list of files uploaded to the Data Server with their type and name. You can remove the connection by clicking the trash icon.
Data Connections view
Stored connection details are available through Settings view Data Connections tab.
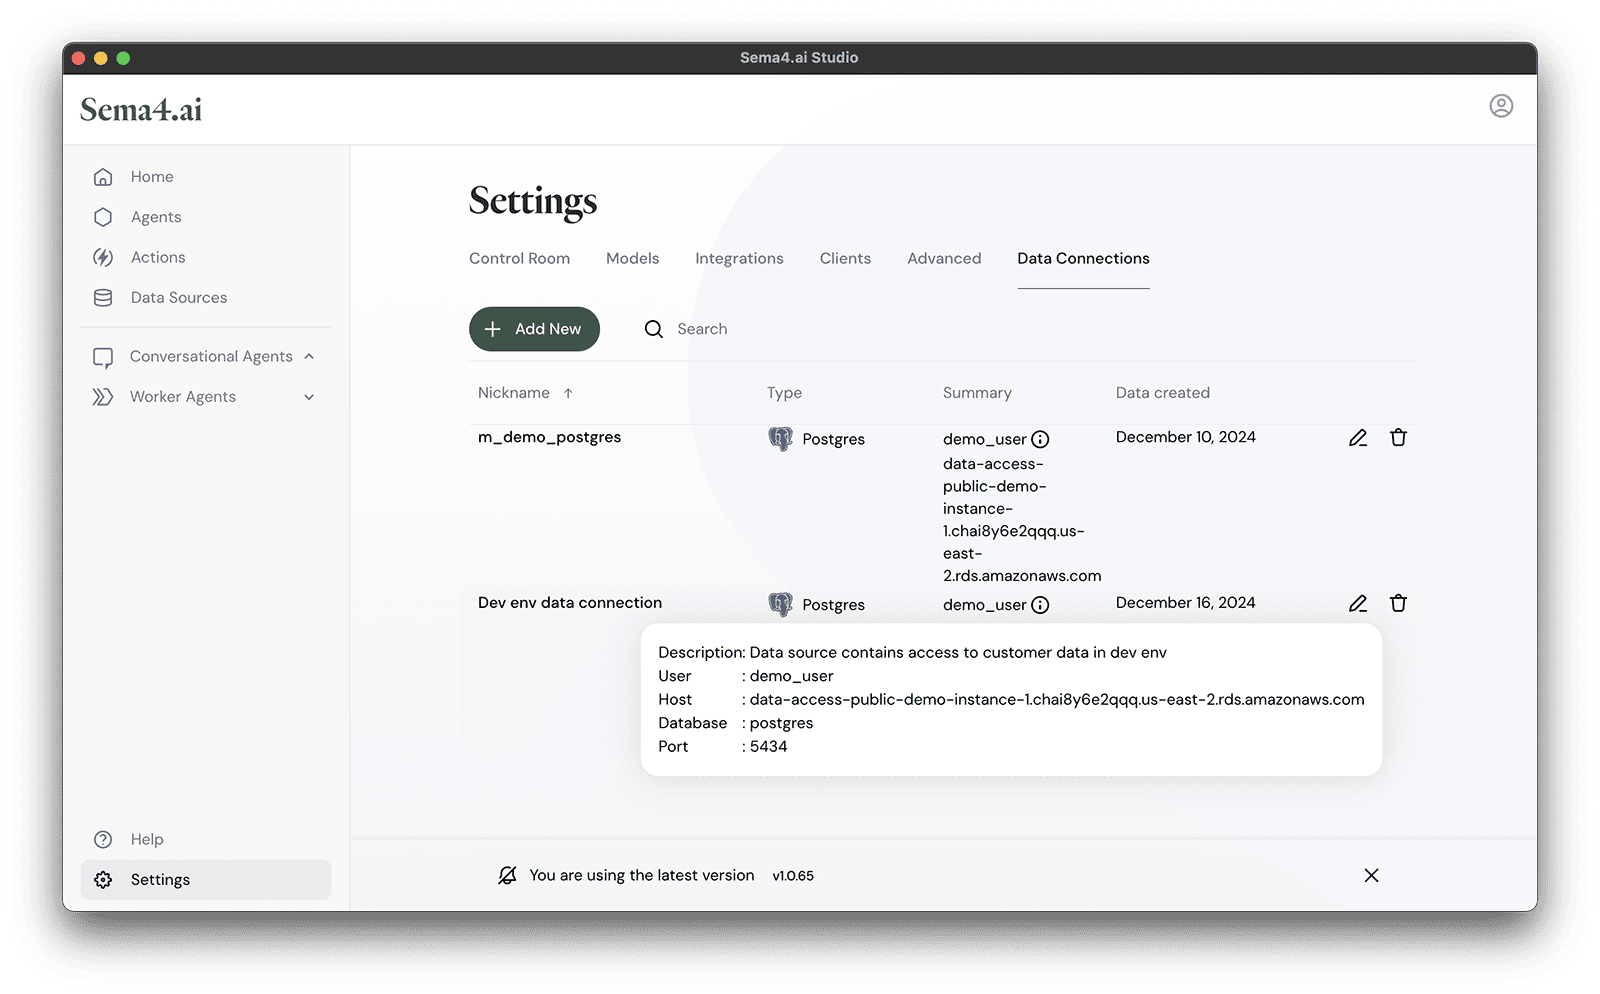
In this view you can:
- See the list of all stored connection details, and by clicking the i icon you can see the details of the connection.
- Create new connection details by clicking the + Add new button.
- Delete connection details by clicking the trash icon.
Publishing agents with data access
You may publish the agents with data access to Sema4.ai Control Room just the same way as you would do with any other agent. When your Studio is connected to the Control Room, you can just one-click publish the agent.
When publishing the agent, it's important to note that your connection details are not published with the agent. The connection details are only used to connect to the data sources on your local machine. When the agent is published, it will use the connection details configured separately in the Control Room.