Ready to power your AI agents with enterprise data? Named Queries enable your agents to access, query, and analyze data from your organization's databases with optimized performance and enhanced security. With Sema4.ai's Data Server, you can create efficient data retrieval patterns that ensure agents get exactly what they need.
Prerequisites
Before building named queries, you should have:
Installed Sema4.ai Studio — Your local development environment for building agents
Created a basic AI agent — Understanding the fundamentals will help you integrate data capabilities
SQL knowledge — Basic familiarity with SQL syntax for database queries
Access to a database — Connection details for the data sources you'll be working with
Get up to speed with Build your first AI Agent tutorial which provides step-by-step guidance on installing Studio and creating your first agent, giving you the foundation you'll need before adding data capabilities.
While not mandatory, understanding Custom Actions will help you comprehend action packages and the publishing process, as Named Queries follow a similar development and deployment workflow.
Understanding Named Queries
Named Queries are predefined, optimized SQL queries that allow your AI agents to retrieve specific data from your enterprise databases. Unlike ad-hoc queries, Named Queries:
Provide consistent, predictable data access patterns
Optimize performance with precompiled execution plans
Apply security rules consistently across different agents
Allow parameter-based filtering for flexible data retrieval
Translate technical database schemas into business-friendly terminology
Sema4.ai Data Server manages these queries and provides a secure interface between your AI agents and your organization's data sources.
Getting Started with Sema4.ai Data Access SDK
The Data Access SDK leverages the Actions framework to provide a way to query enterprise data sources. There are three types of data-related actions:
@action - For interacting with enterprise applications and systems
@query - For querying data from, or writing data to, data sources (Named Queries)
@predict - For using pre-trained models to make predictions
Install VS Code Extension
Open VS Code or Cursor
Navigate to the Extensions marketplace
Search for Sema4.ai Data Access
Click Install
The extension provides specialized tools for developing named queries, including SQL validation, connection management, and testing capabilities.
Create a New Data Action Project
Create a new folder for your data action project
Open the folder in VS Code or Cursor
Open the Command Palette (Ctrl+Shift+P or Cmd+Shift+P)
Type "Create Action Package" and select Sema4.ai: Create Action PackageUse Sema4.ai SDK to create an action package
Choose your project location (current folder)
Name your project (e.g., "my-data-actions")
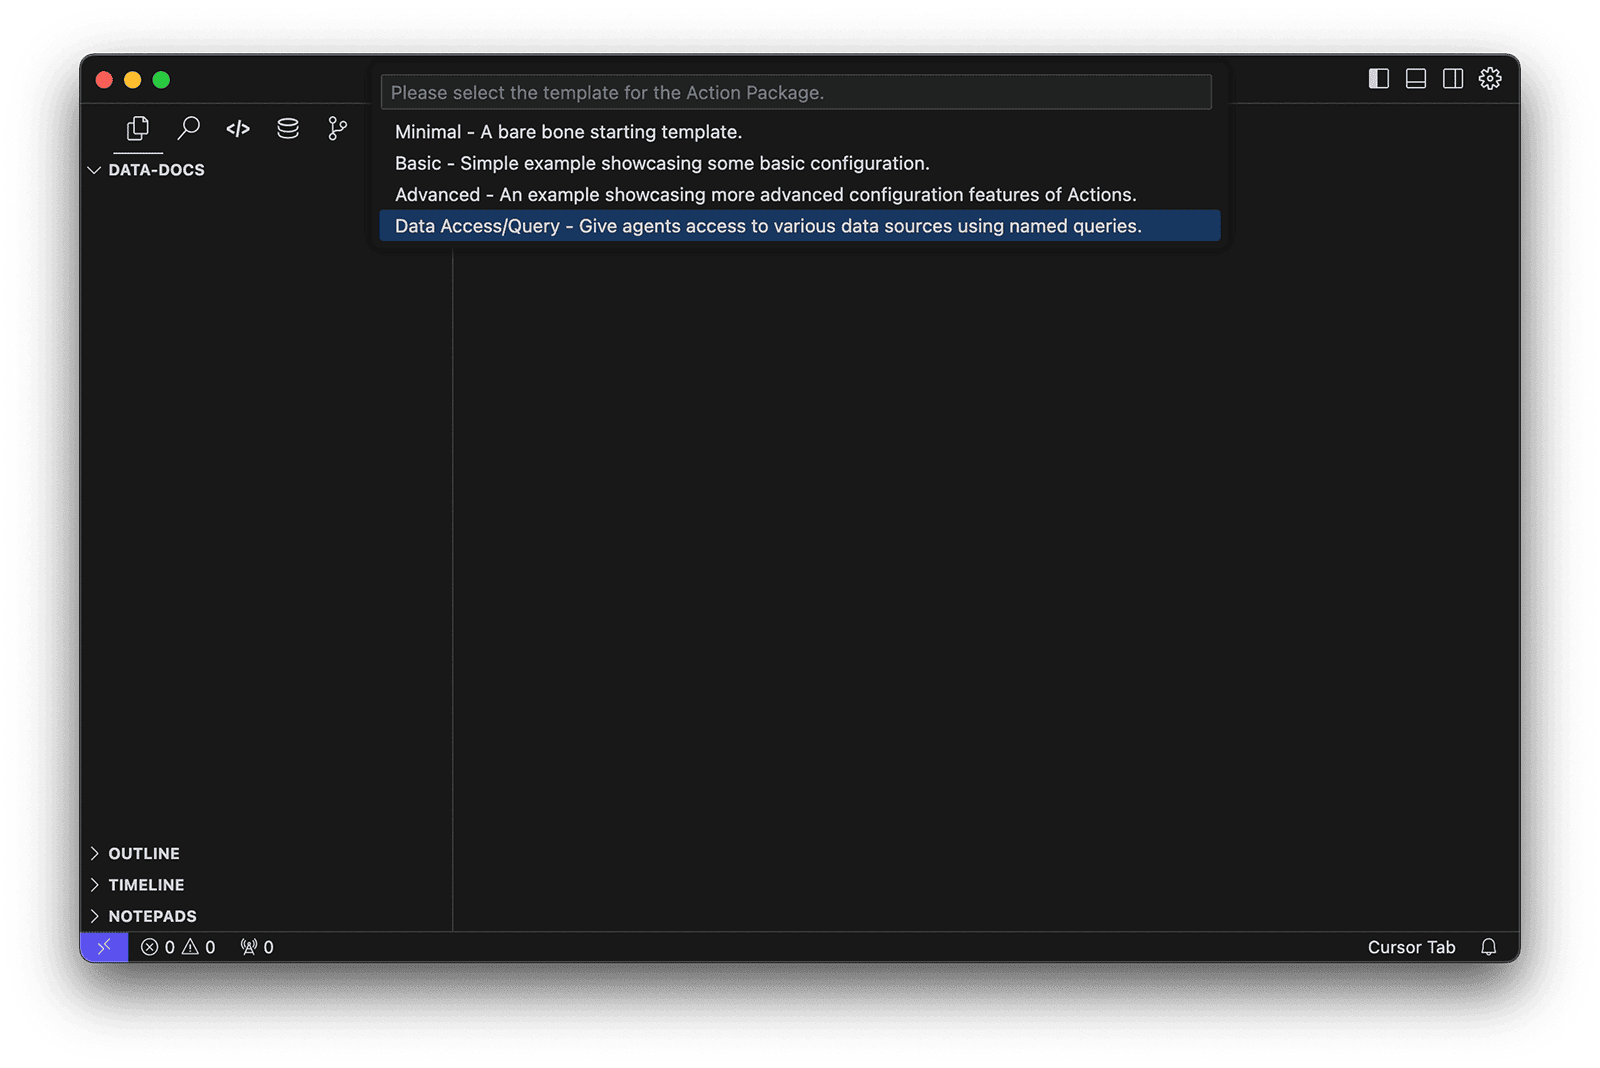
Select the Data Access/Query templateChoose the Data Access template
This creates a template project with everything needed for data actions development, including:
data_actions.py - Contains your named queries with @query decorators
data_sources.py - Defines data sources for your action package
SQL script files for development and testing
Connect Data Sources
Before creating queries, you'll need to connect to your data sources:
In the Data Access extension, locate the Data Server section
Click the "+" button next to the Data Server name
Alternatively, open the Command Palette (Cmd+Shift+P or Ctrl+Shift+P) and type Sema4.ai: Add New Data Source
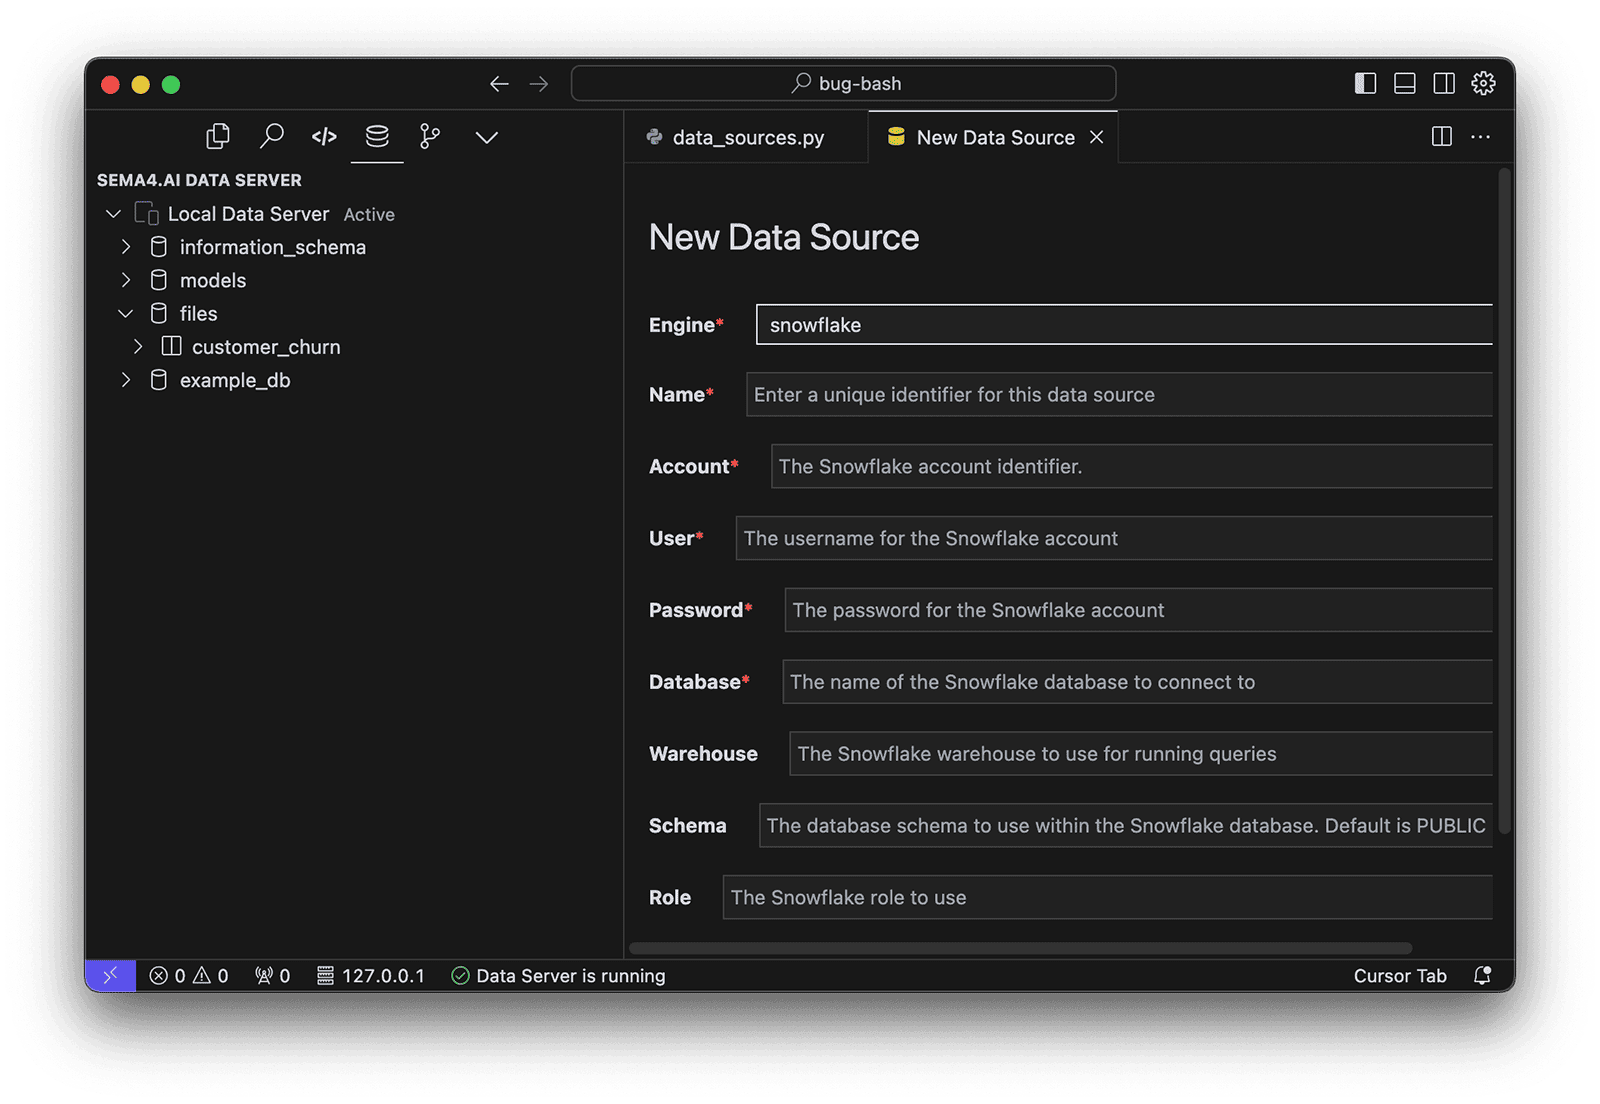
Add new data source
Select your data source type:
For databases: Choose PostgreSQL, Snowflake, MySQL, etc.
For files: Choose File Upload
For applications: Choose Salesforce, Slack, etc.
Enter the required connection details:
For databases: Server, database name, username, password, etc.
For files: Browse to select your CSV, JSON, or Excel file
For applications: API credentials and authentication details
Test the connection to ensure it works properly
Give your data source a descriptive name and save it
Once connected, the data source will appear in the Data Explorer. You can browse its schema, tables, and columns to better understand the available data.
Data source explorer
Data Explorer shows you all the data sources, files and models configured on your local Data Server. This is NOT the same as what your agents will have access to. The action package defines the data sources that will be available to your agents in it's data_sources.py file.
Write and Test SQL Queries
Before creating named queries, you can develop and test SQL in the provided .sql files:
Open the scratchpad.sql file in your project
Write your SQL query against your connected data sources
Run the query using one of these methods:
Click "Run SQL on Data Server" above your query
Use Ctrl+Enter shortcut
Use the Command Palette and type "Run Selected SQL"
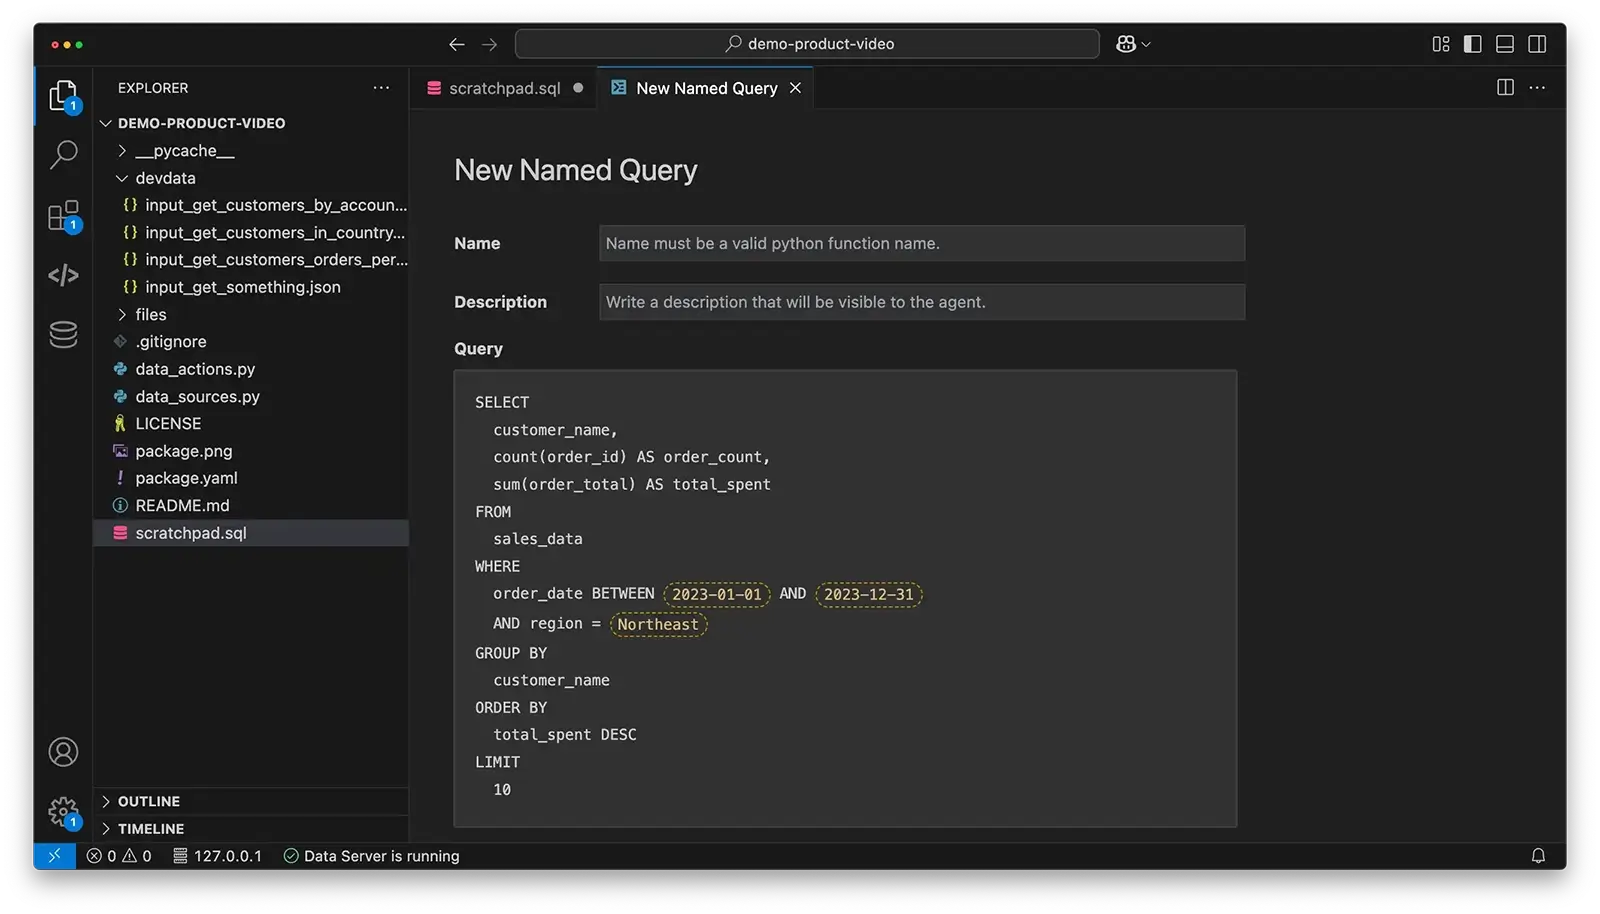
For example, you might write:
SELECT customer_name, COUNT(order_id) as order_count,SUM(order_total) as total_spentFROM sales_dataWHERE order_date BETWEEN'2023-01-01'AND'2023-12-31'AND region ='Northeast'GROUP BY customer_nameORDER BY total_spent DESCLIMIT10;
Create a Named Query
Once your SQL is working, convert it to a named query:
In your SQL file, position your cursor within the query
Click Create Named Query from the context menu (or use Command Palette)
Named Query
Name your query (e.g., get_top_customers)
Identify parameters in your query (highlighted in yellow)
Name and describe each parameter
Save the query
This automatically:
Creates a new @query function in data_actions.py
Adds any new data sources to data_sources.py
Creates a test JSON file in the devdata folder
Your named query will look something like this:
@querydefget_top_customers(start_date:str,end_date:str,region:str,datasource: Annotated[DataSource, FileSalesDataSource]) -> Response[Table]:"""Get top customers by total spending for a specific region and time period. Args: start_date (str): Start date in YYYY-MM-DD format end_date (str): End date in YYYY-MM-DD format region (str): Sales region to filter by Returns: Table: Top customers with order count and total spent """ ...
Test Your Named Query
To test your named query:
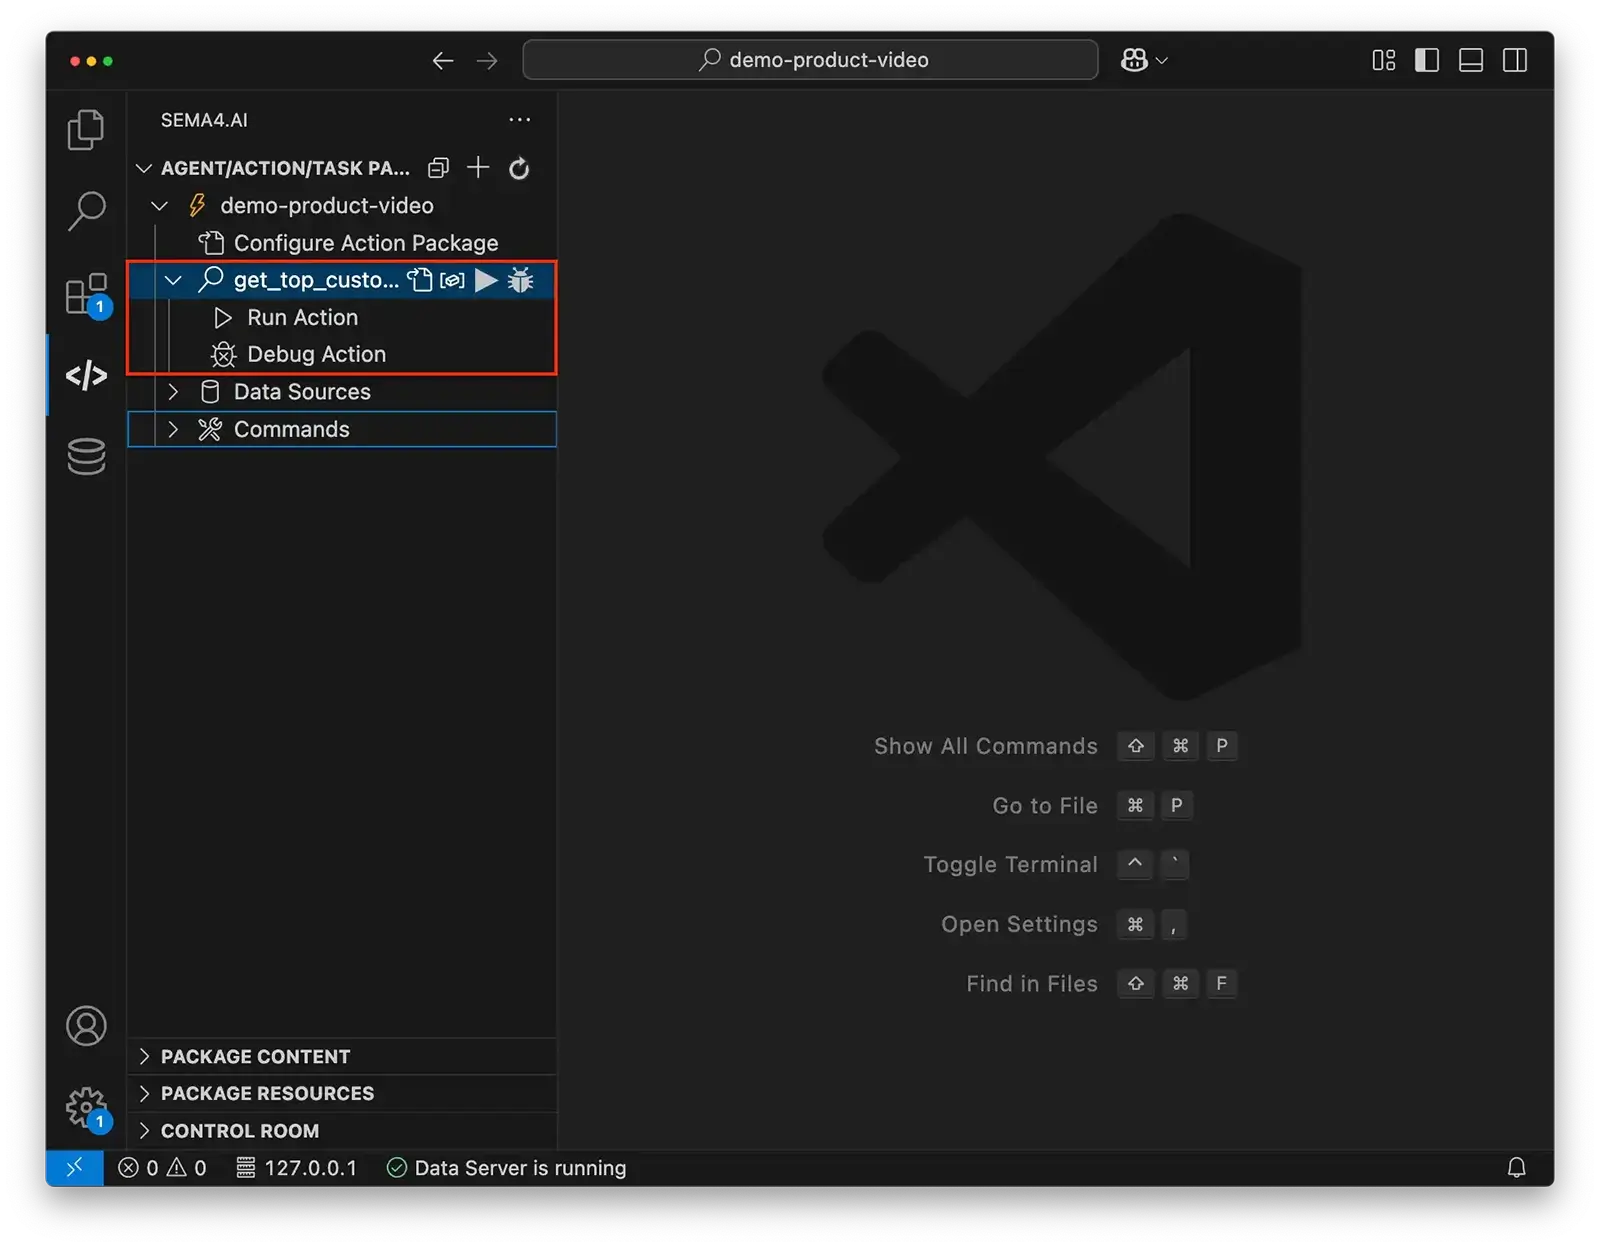
In VS Code, find your query in the Sema4.ai SDK extension's Activity panel
Activity Panel
Click the play button next to the query
If prompted, select which test input to use
Review the results in the console
The test uses the input values defined in the JSON file in the devdata folder. You can modify these values to test different scenarios.
Publish to Studio
Once your named queries are ready:
Open the Command Palette
Type Publish Action Package and select Sema4.ai: Publish Action Package to Sema4.ai Studio
Follow the prompts to complete the publication
Alternatively, to share with others:
Use the Sema4.ai: Build Action Package (zip) command
Share the resulting ZIP file
Implement in Your Agent
To use your named queries in an agent:
Open Studio and navigate to your agent
Add the Data Access action package to your agent
Update your agent's runbook to utilize the named queries
Test your agent with various data-related questions
By creating named queries, you enable your AI agents to make data-driven decisions while maintaining security and performance, bringing the full power of your enterprise data to your conversational AI experiences.