Using remote MCP servers
MCP servers can provide agents with access to a wide range of tools and services, including enterprise applications, APIs, databases, and more. Software companies are increasingly providing remote MCP servers for their products, allowing agents to access their data and services just like their APIs. For example, Linear (opens in a new tab), Notion (opens in a new tab), Atlassian (opens in a new tab), all have recently added MCP servers to their products.
For most of our customers who have custom applications of their own, custom MCP servers can also be built to provide access to your own data and services. In these cases you'll retain the full control over the data and the logic, but you'll need to build and host the MCP server yourself.
Sema4.ai Studio supports remote MCP servers and supports both of these scenarios.
MCP features are available in Studio 1.3.6 and above.
Build your catalogue
Start by connecting to your MCP servers in Studio - this creates a catalogue of servers and tools you can use in your agents.
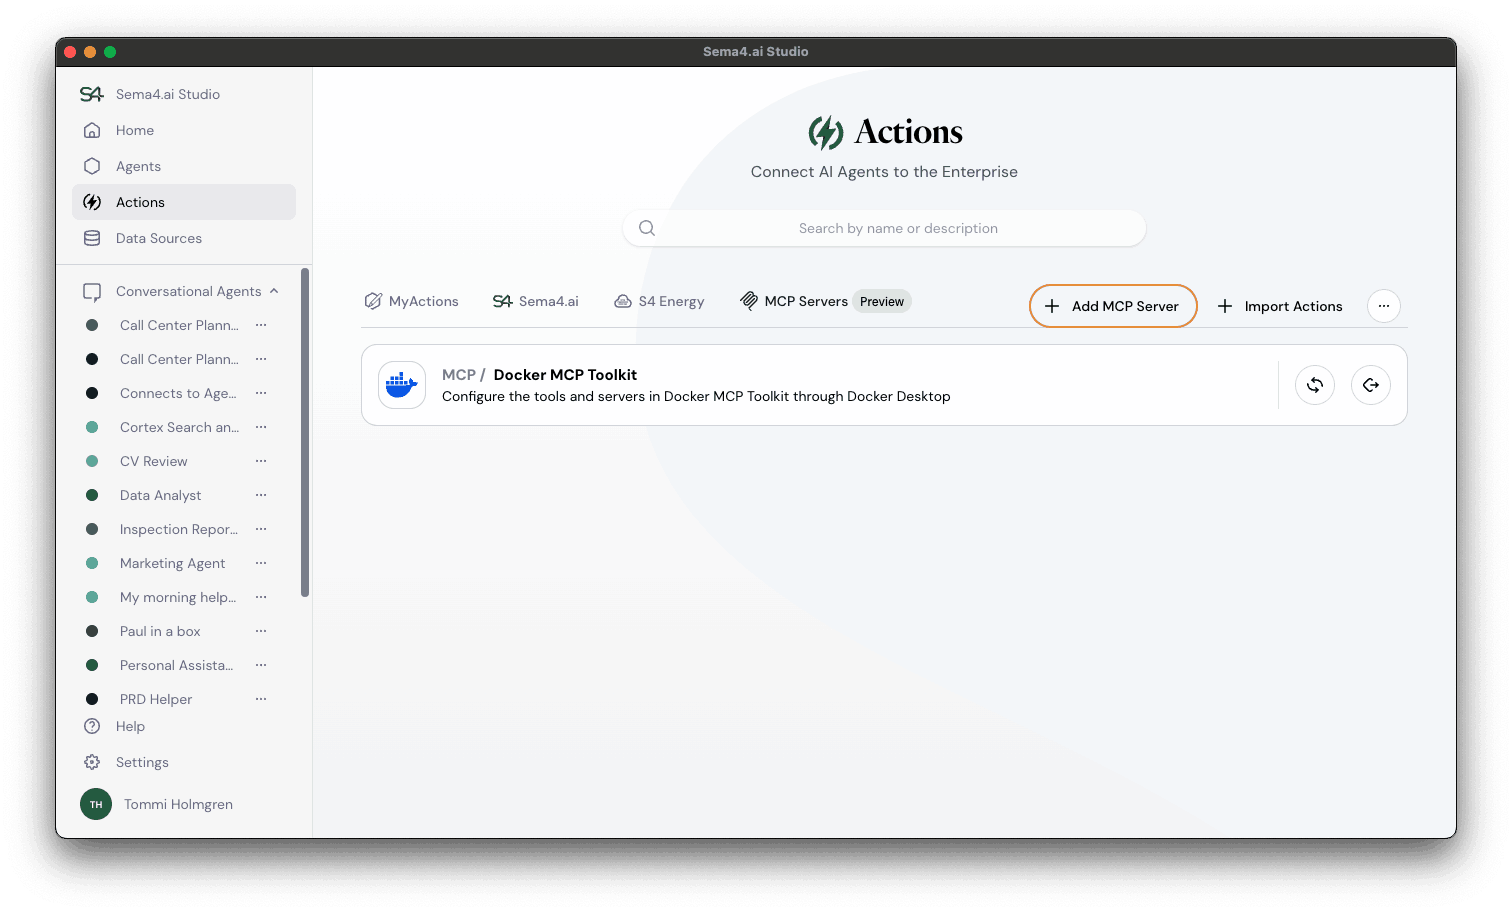
Add new MCP server
Choose Actions tab in the left sidebar, and then click Add MCP Server button for the top right menu.
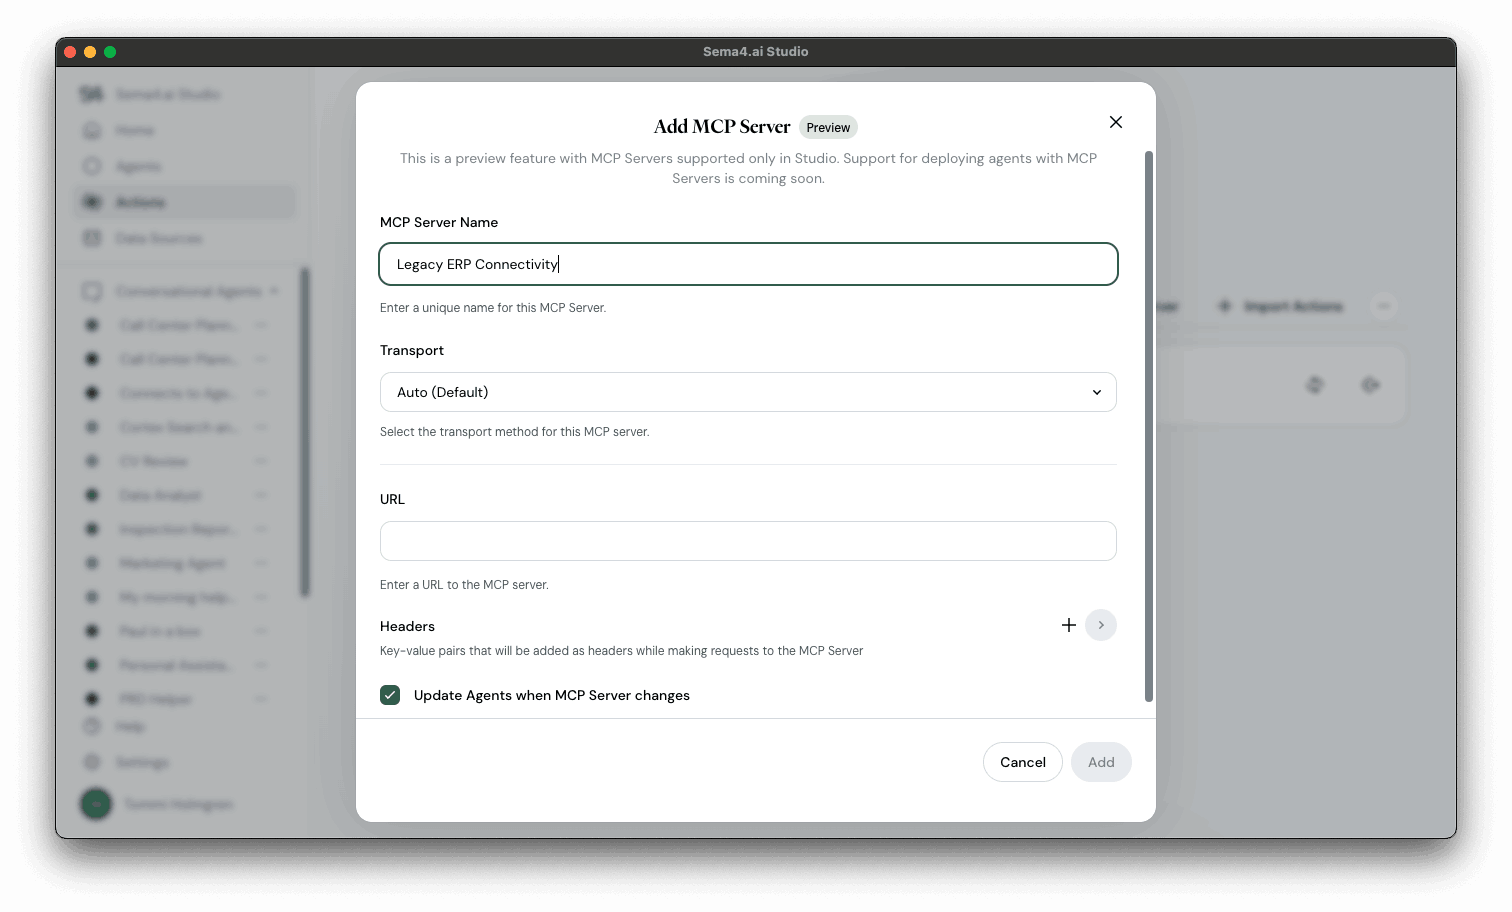
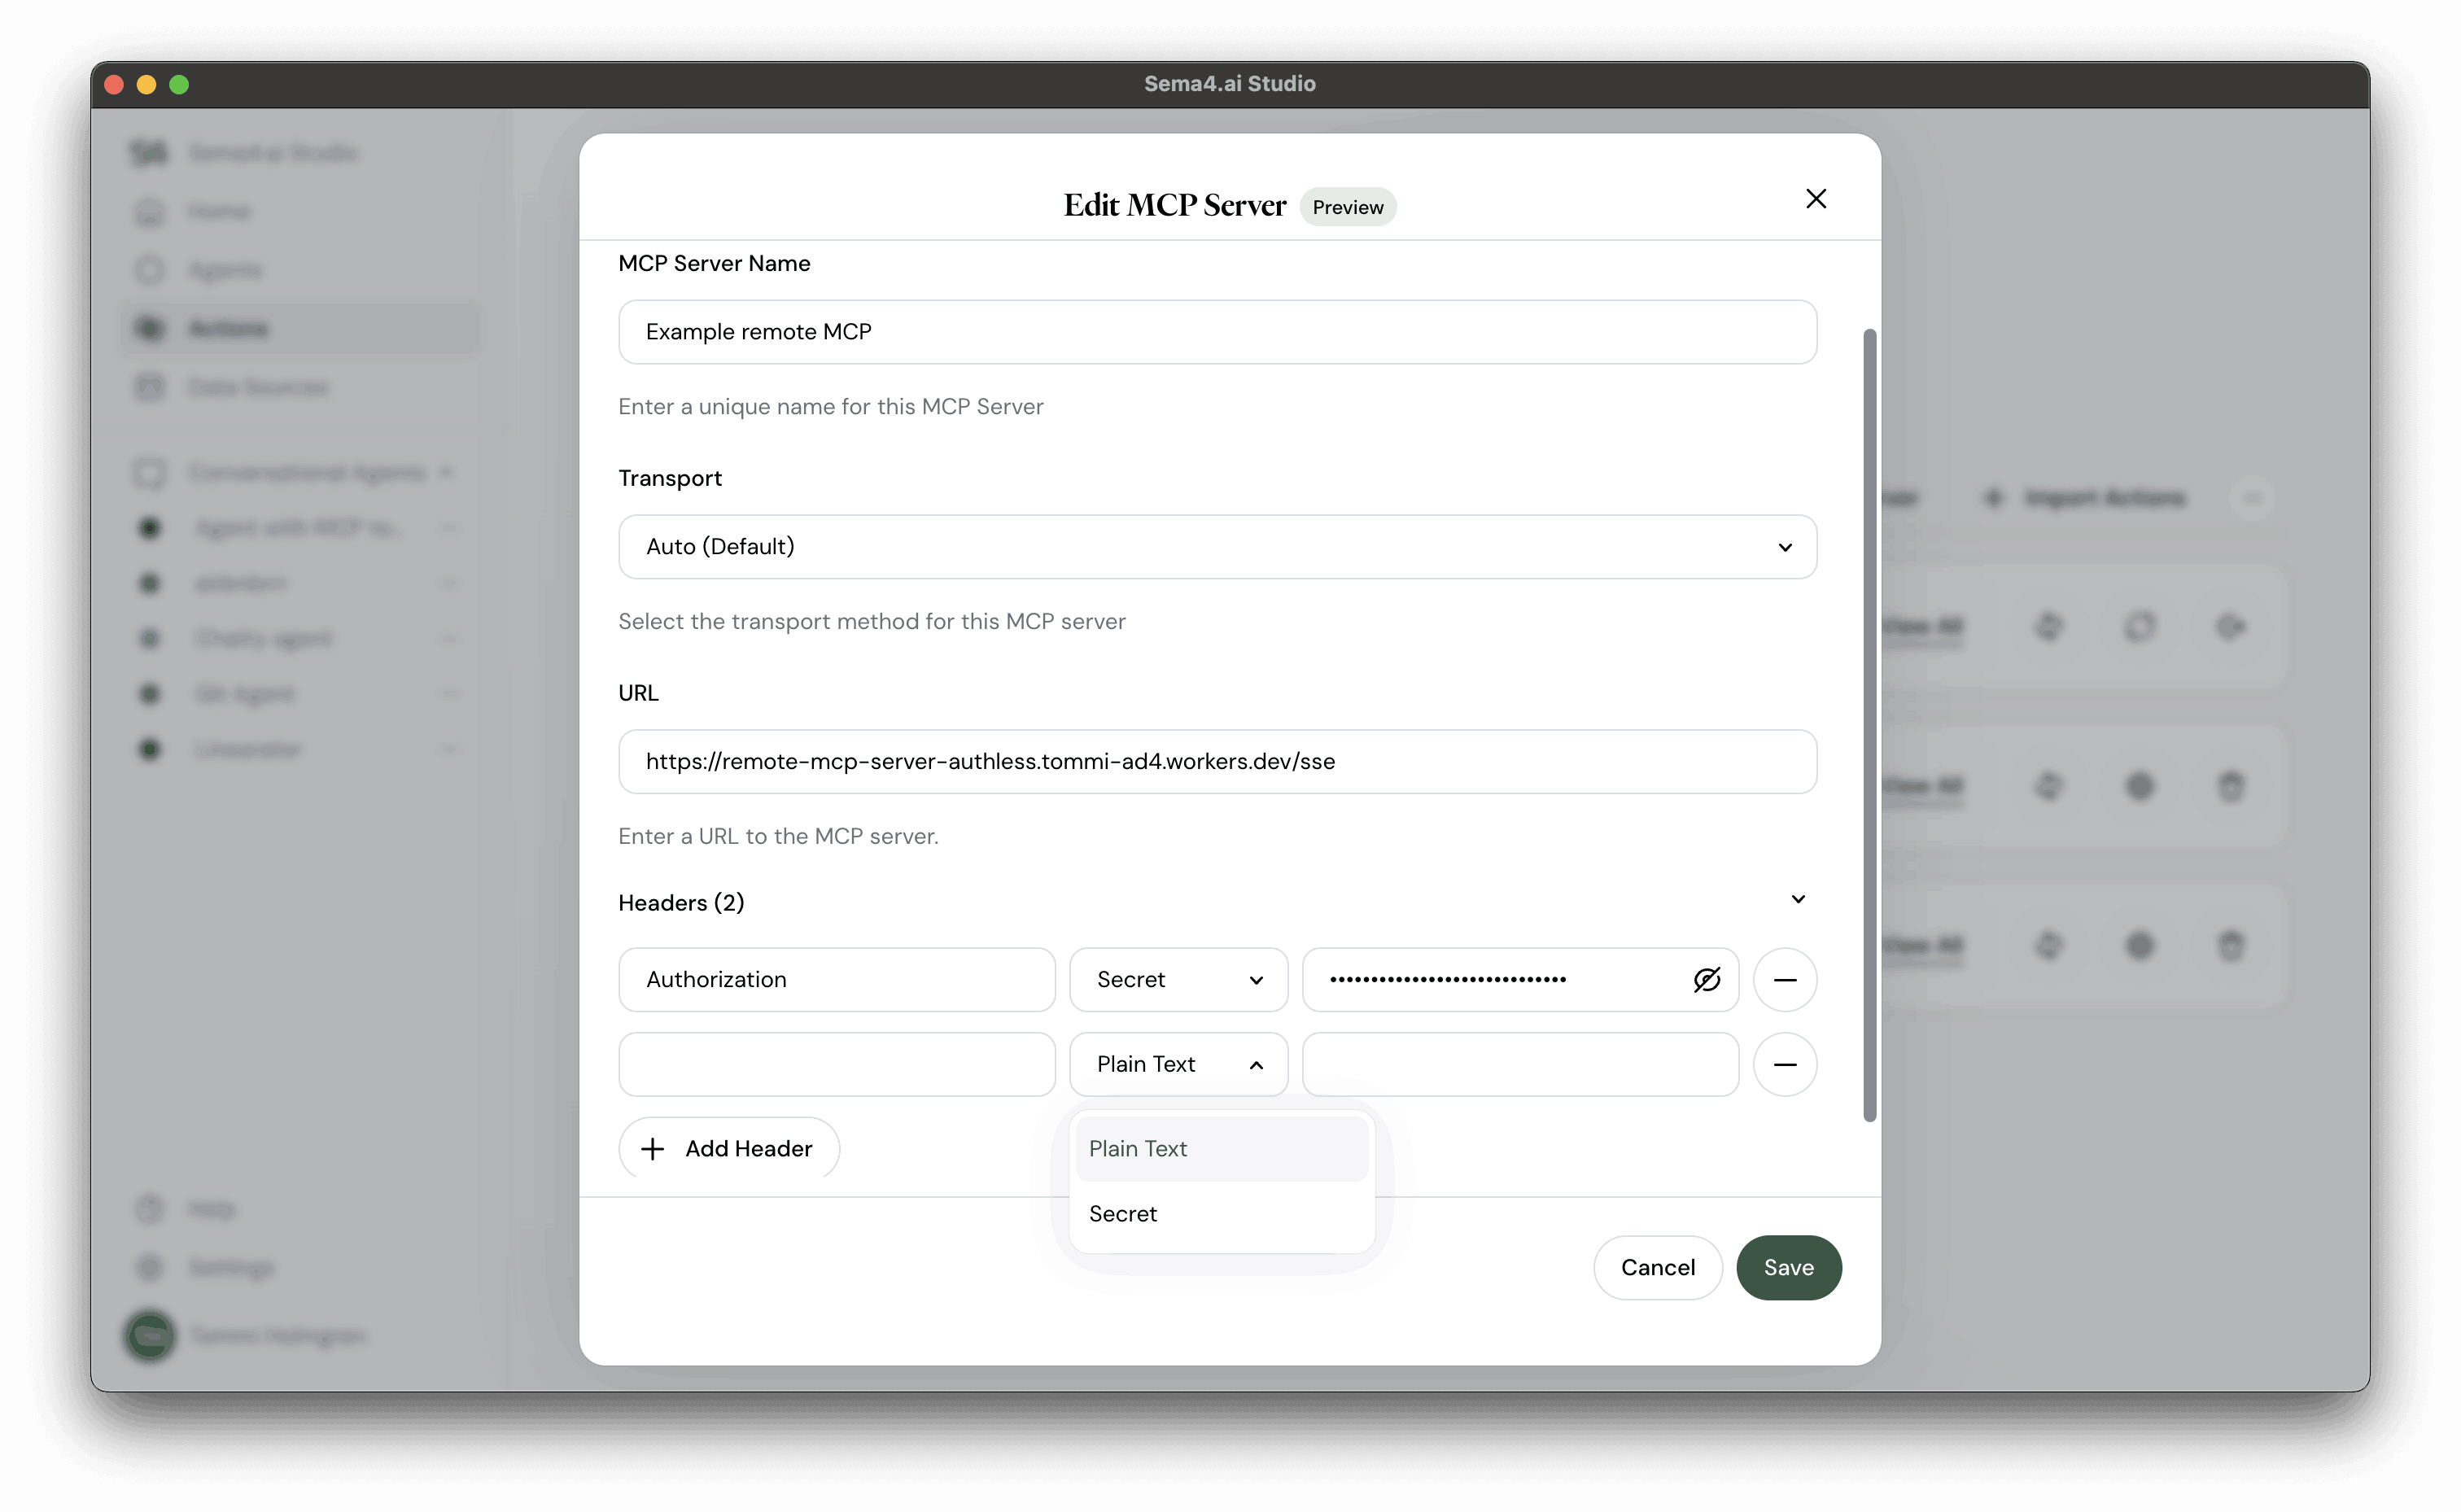
Name
Enter a name for your MCP server. This will be displayed later when building your agents. Also, the end users of your agents will see the name of the MCP server as you define it here in Work Room.
Choose transport method
Select the transport method for your MCP server. This is determined by the type of MCP server you are connecting to. Here's how to choose the right transport method:
- Auto: Selects automatically between Streamable HTTP and Server-Sent Events (SSE). Recommended for most cases.
- Streamable HTTP: Use this if you have an MCP server that is accessible via HTTP.
- Server-Sent Events (SSE): Use this if you have an MCP server that is accessible via SSE. Note that SSE is deprecated byt the MCP specification and will be removed in the future.
- Standard I/O (STDIO): Use this if you have an MCP server that is accessible via STDIO, typically running locally. This is used for example with Docker MCP Gateway.
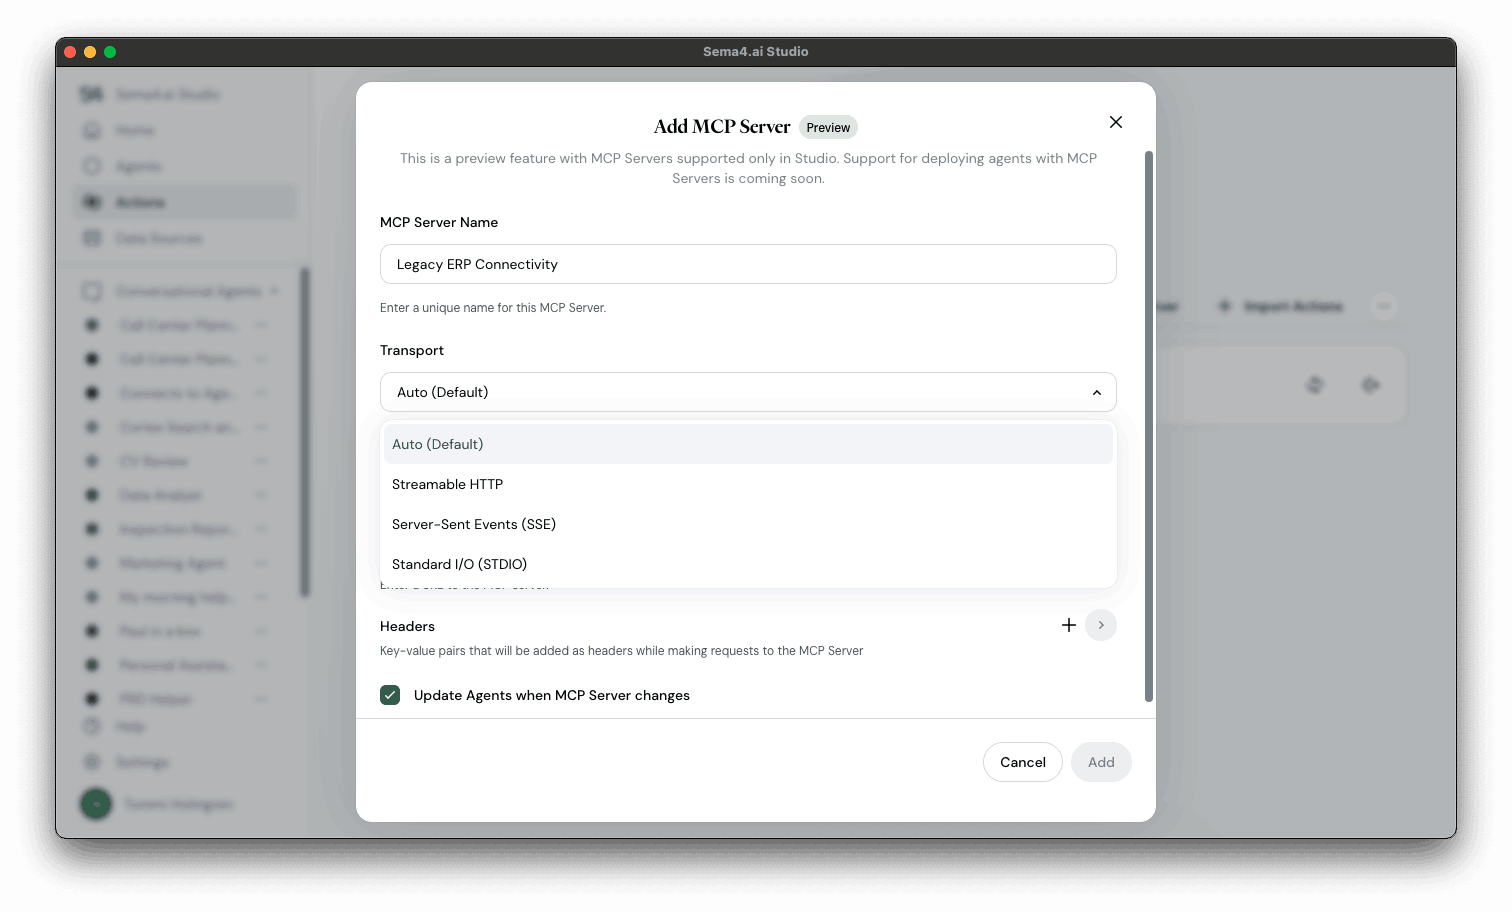
The rest of this tutorial assumes you're using a remote MCP server, and chose the Auto transport method.
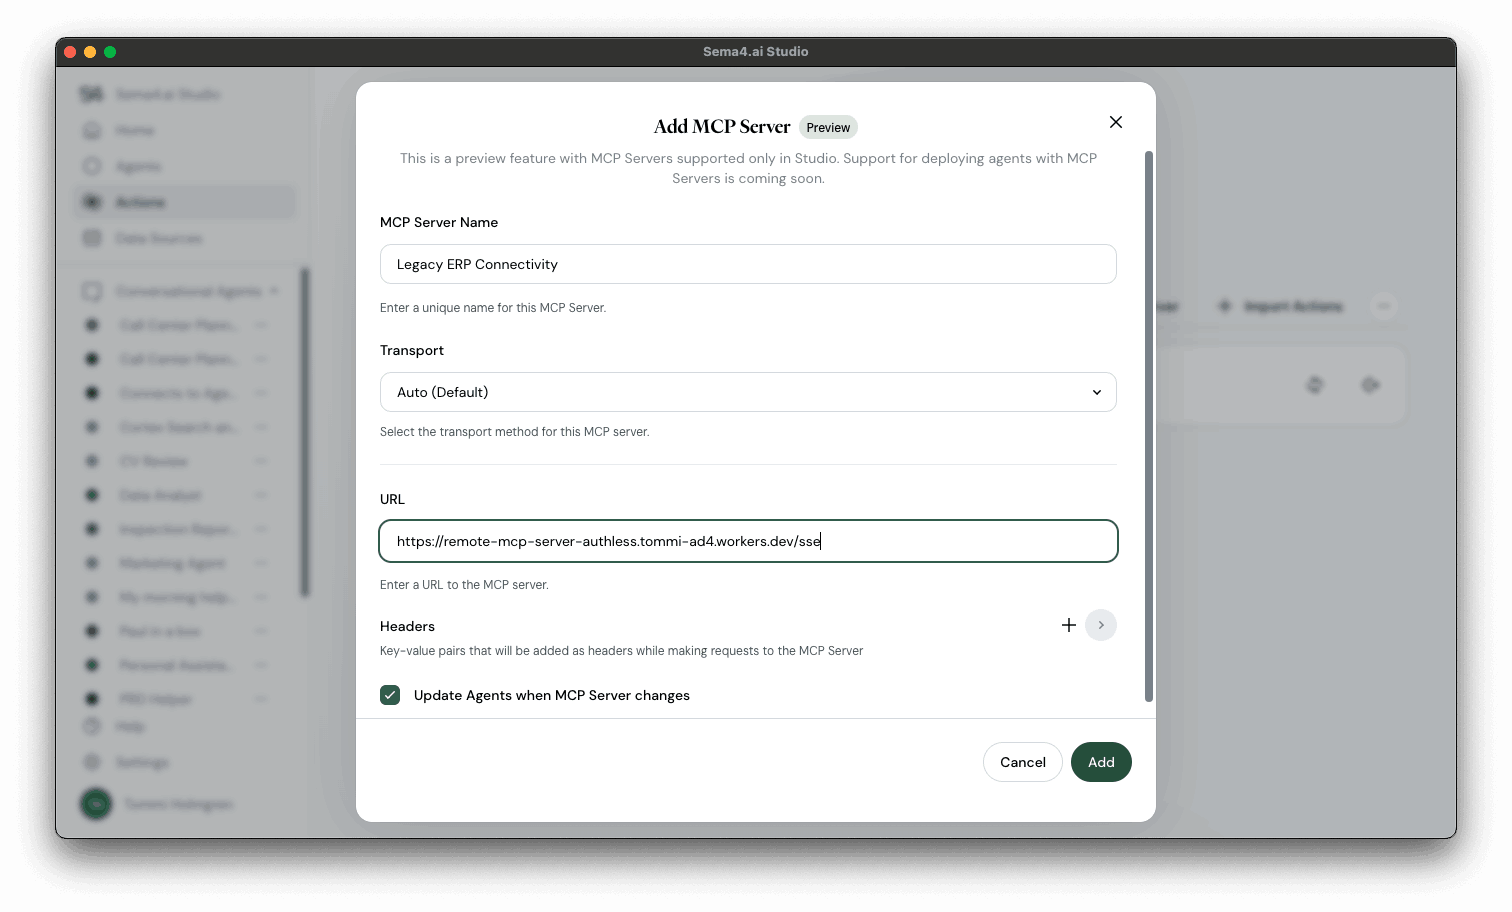
Enter the URL
Enter the URL of your MCP server. The URL should be complete and starting with http or https and typically ends with /mcp or /sse. If using localhost, you often need to add the port number, too.
Headers and authentication
This step is optional, but often needed to define the authentication method for your MCP server. If you're using a remote MCP server, you can usually find the authentication method in the documentation of the MCP server. In our example, we need to add a header for the Authorization, which contains the Bearer token.
You may add any number of headers.
For each header, you can choose the type of the header.
- Secret: The value of the header is a secret and will NOT be stored in the agent package when exported or published.
- Plain text: The value of the header is a plain text and will be stored in the agent package when exported or published.
User-based authentication using OAuth is coming soon.
Save your MCP server connection
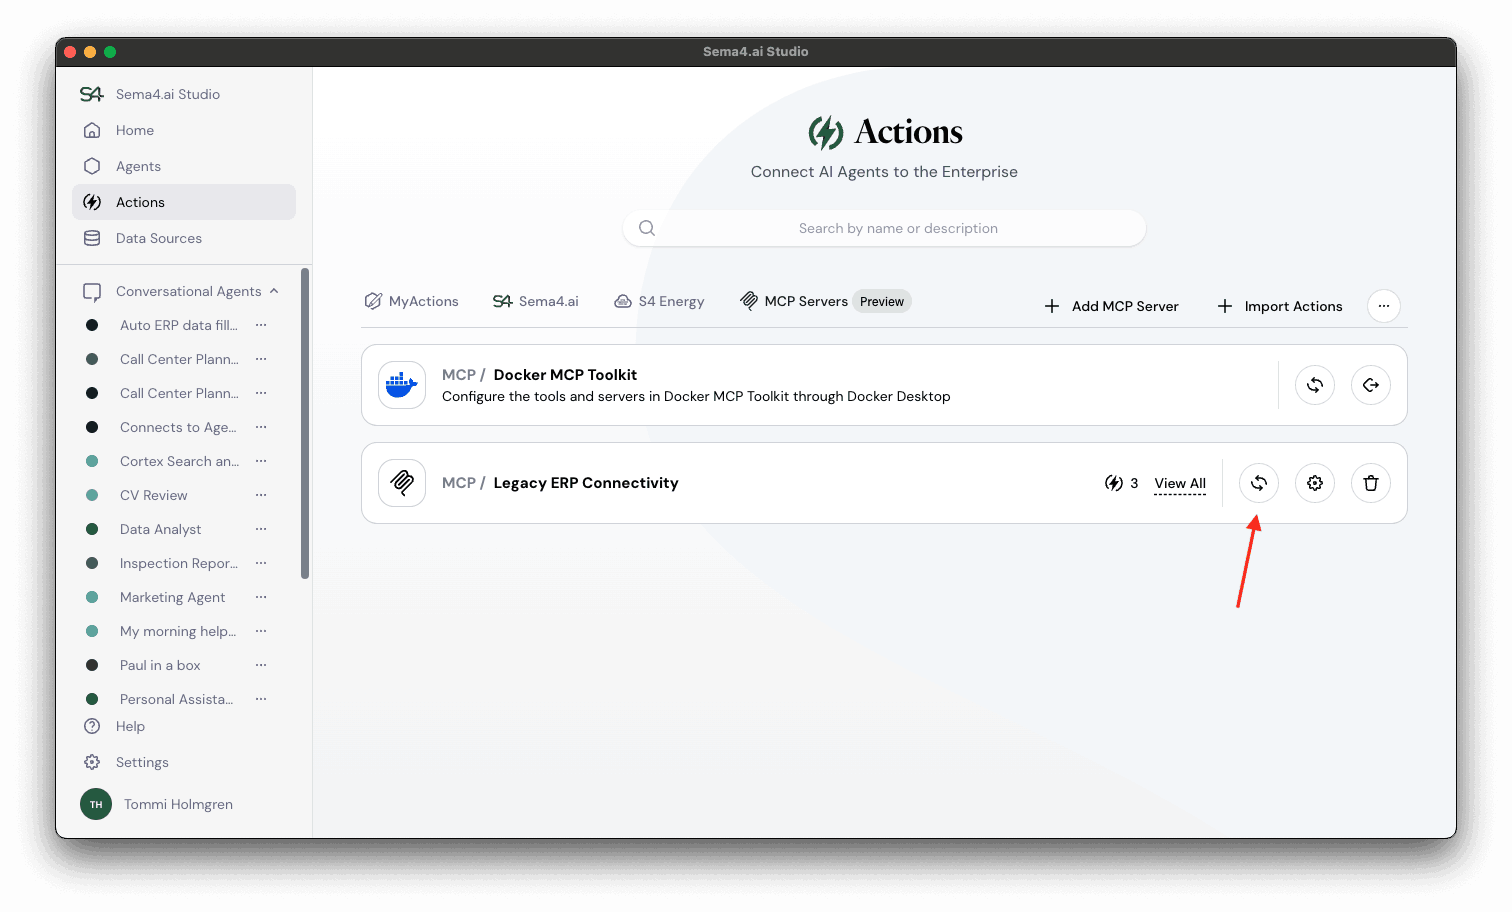
Click Add button to save your MCP server. Your MCP server is now available in the list of MCP servers under the MCP Servers tab.
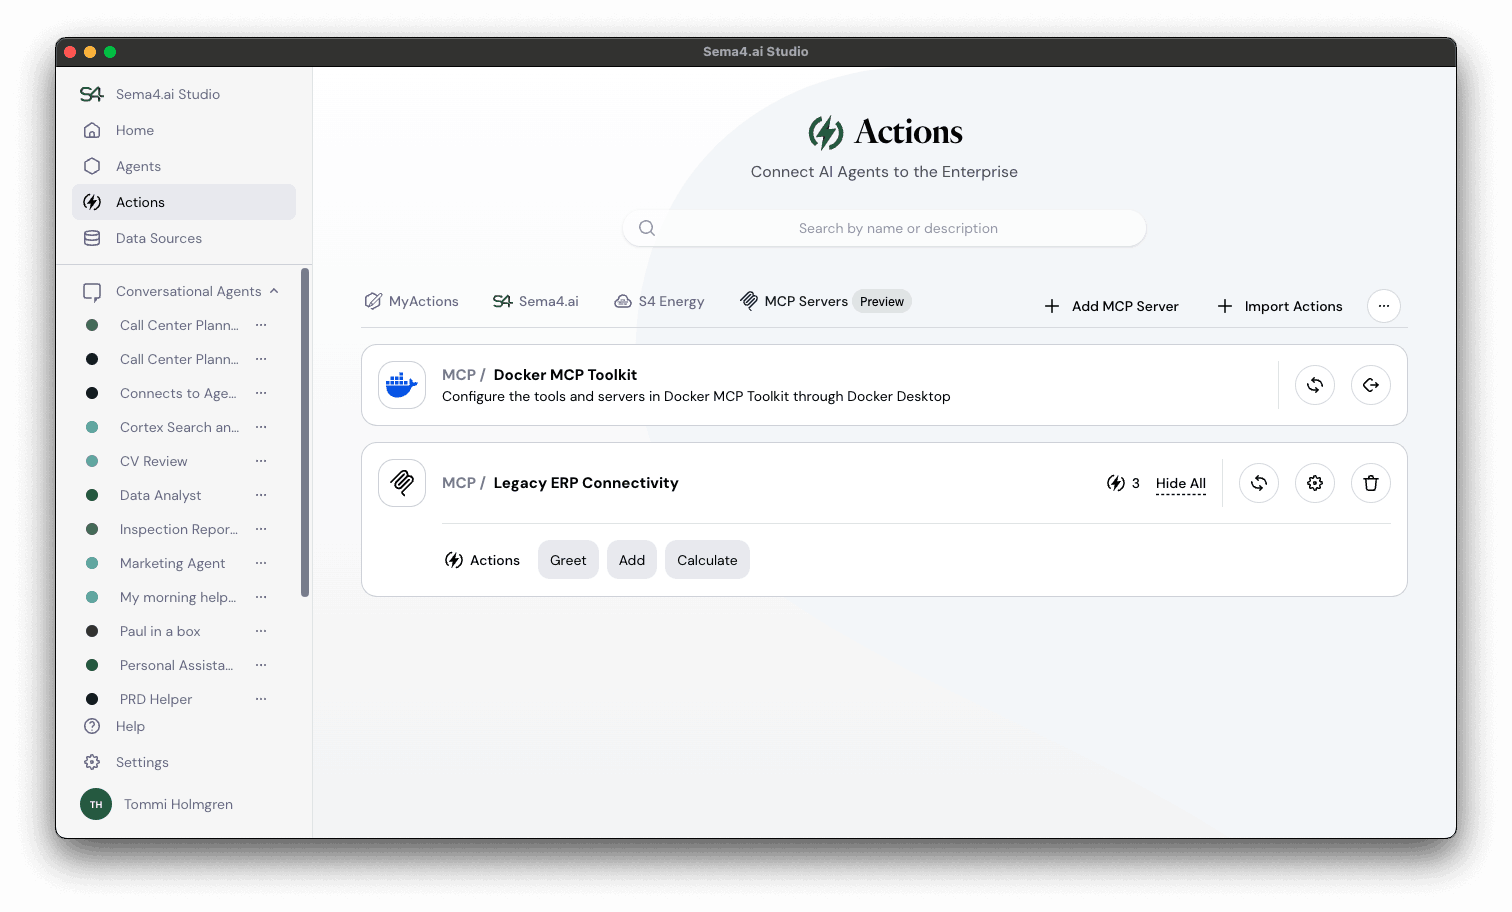
Use MCP Servers with your agents
When building an agent, you can now use the MCP servers you just added to your catalogue. Follow the detailed instructions in Build your first agent to learn the basics.
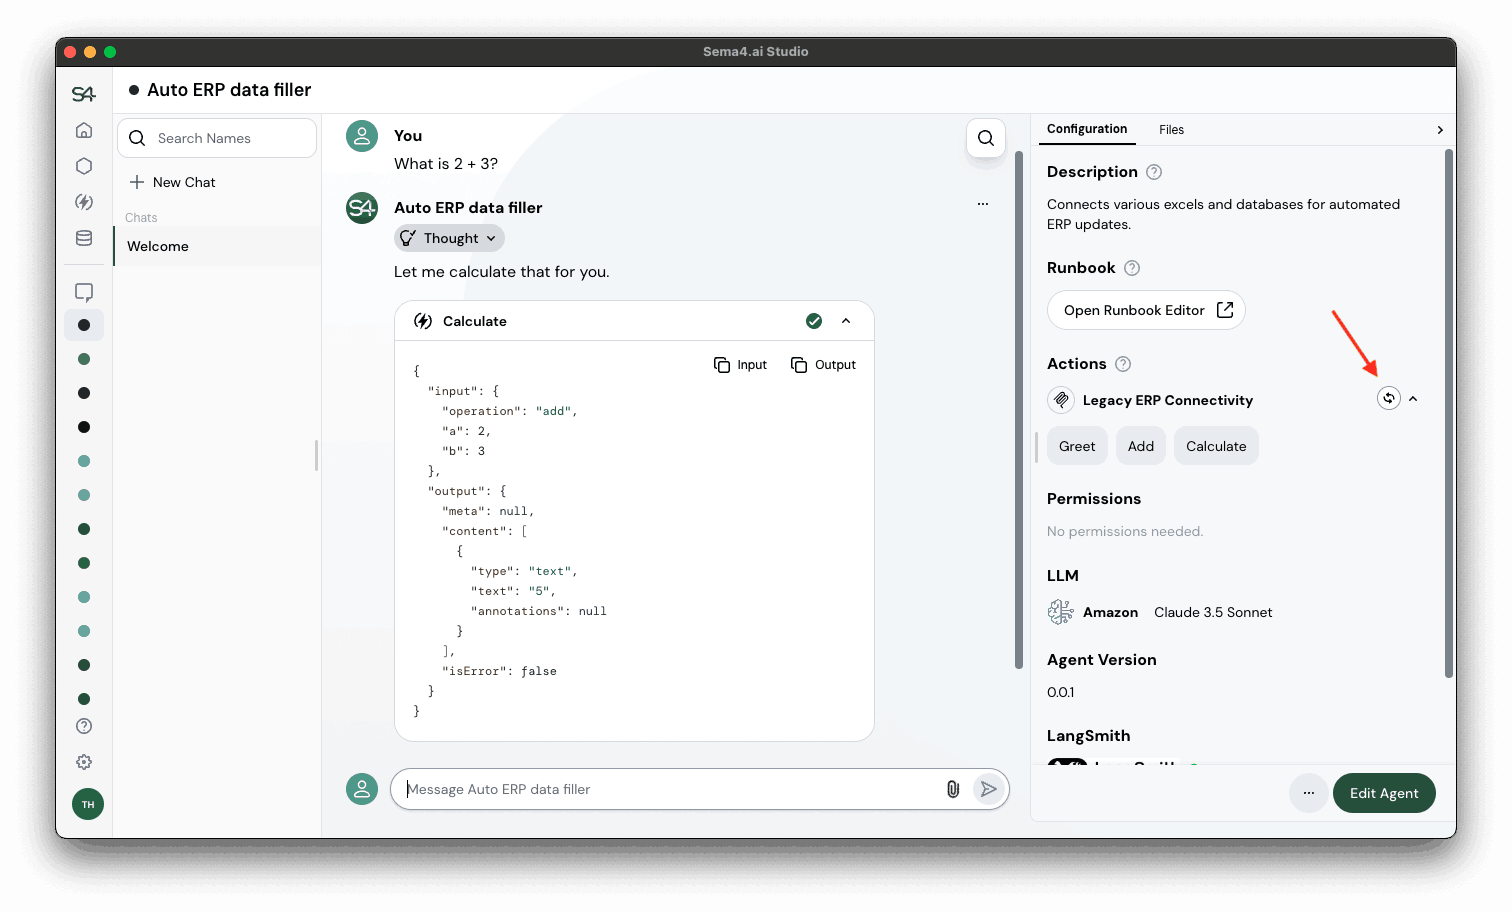
When adding actions to your agent, the configured MCP servers will be available in the list of actions. You'll see the name of the MCP server as you defined it in the catalogue, and the tools it will provide for the agent.
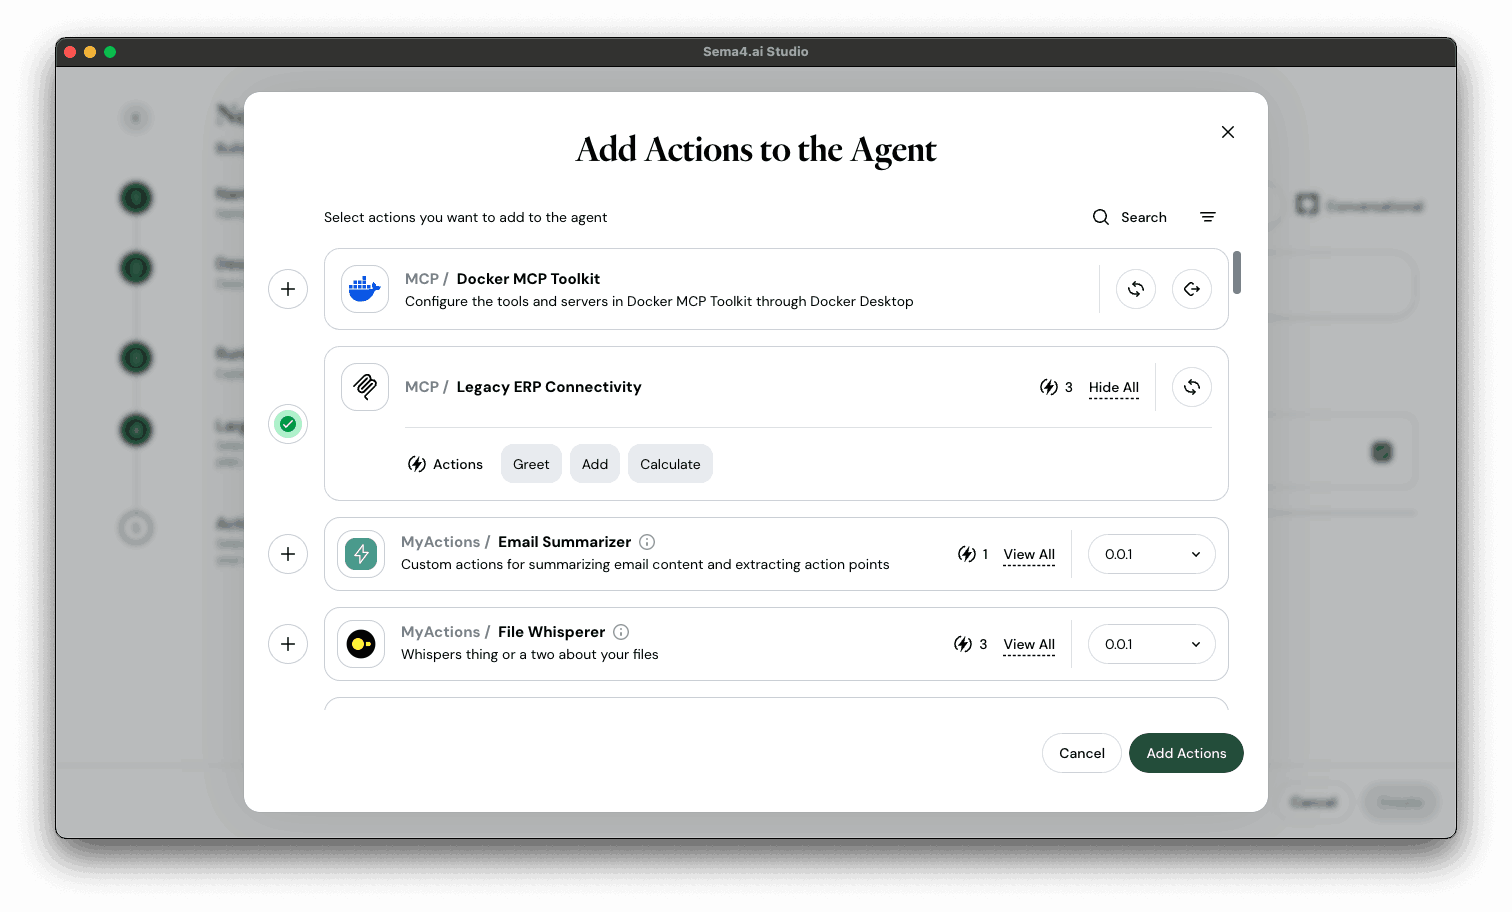
Currently, all tools will be added to the agent every time. In the future, we'll add a way to select individual tools to add to the agent.
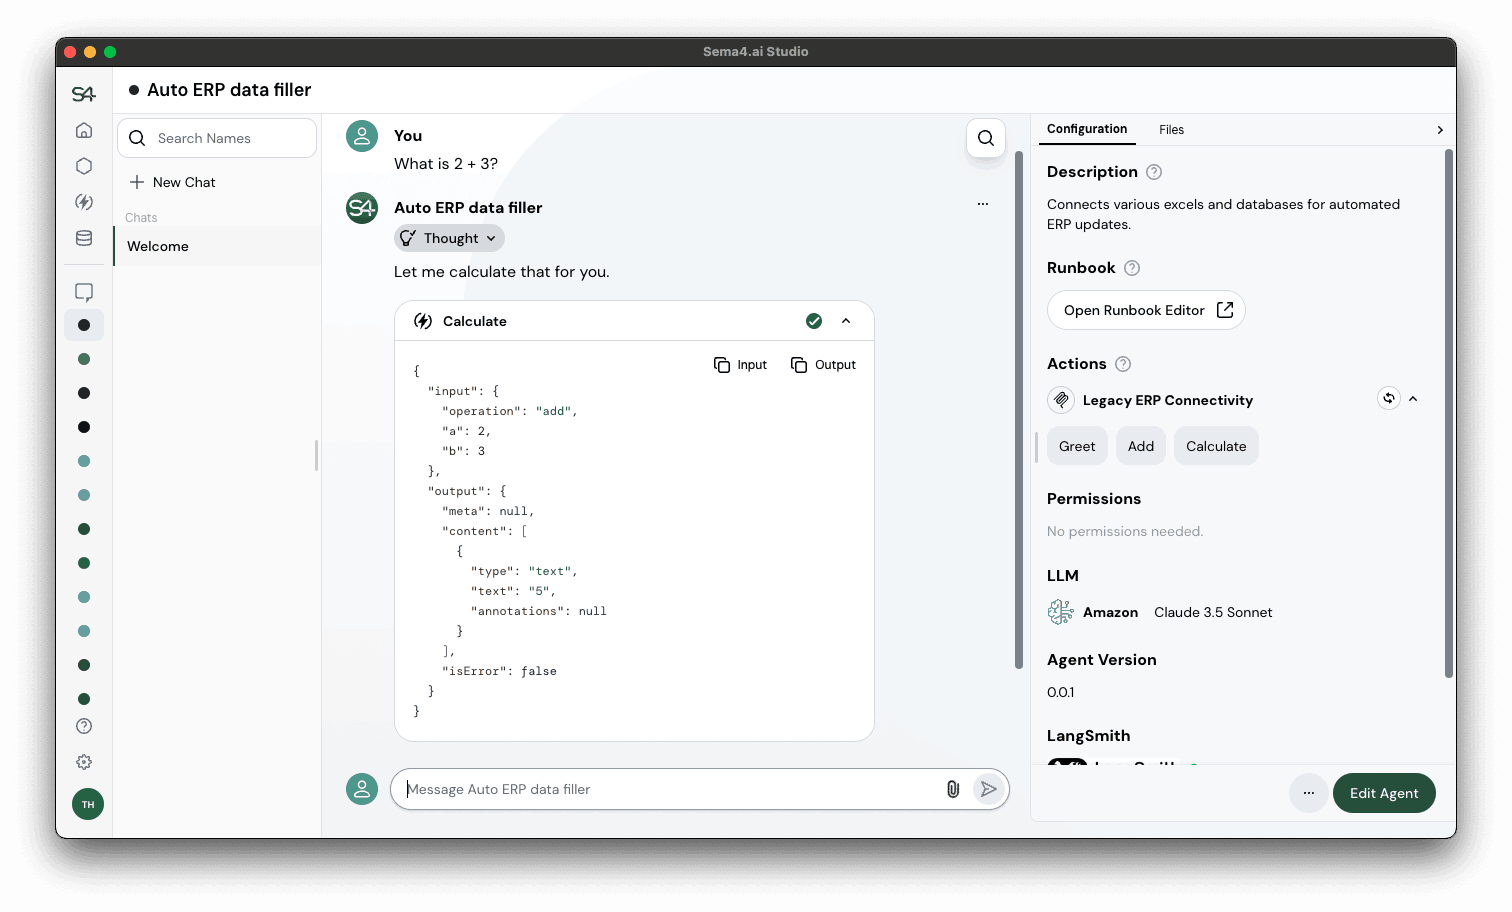
Once MCP server has been added to the agent, your agent instantly has access to the tools it provides and the tool calls will be shown in the chat view the same way as with Sema4.ai Actions.
Updates to MCP servers
There are three situations to consider when it comes to updates to MCP servers:
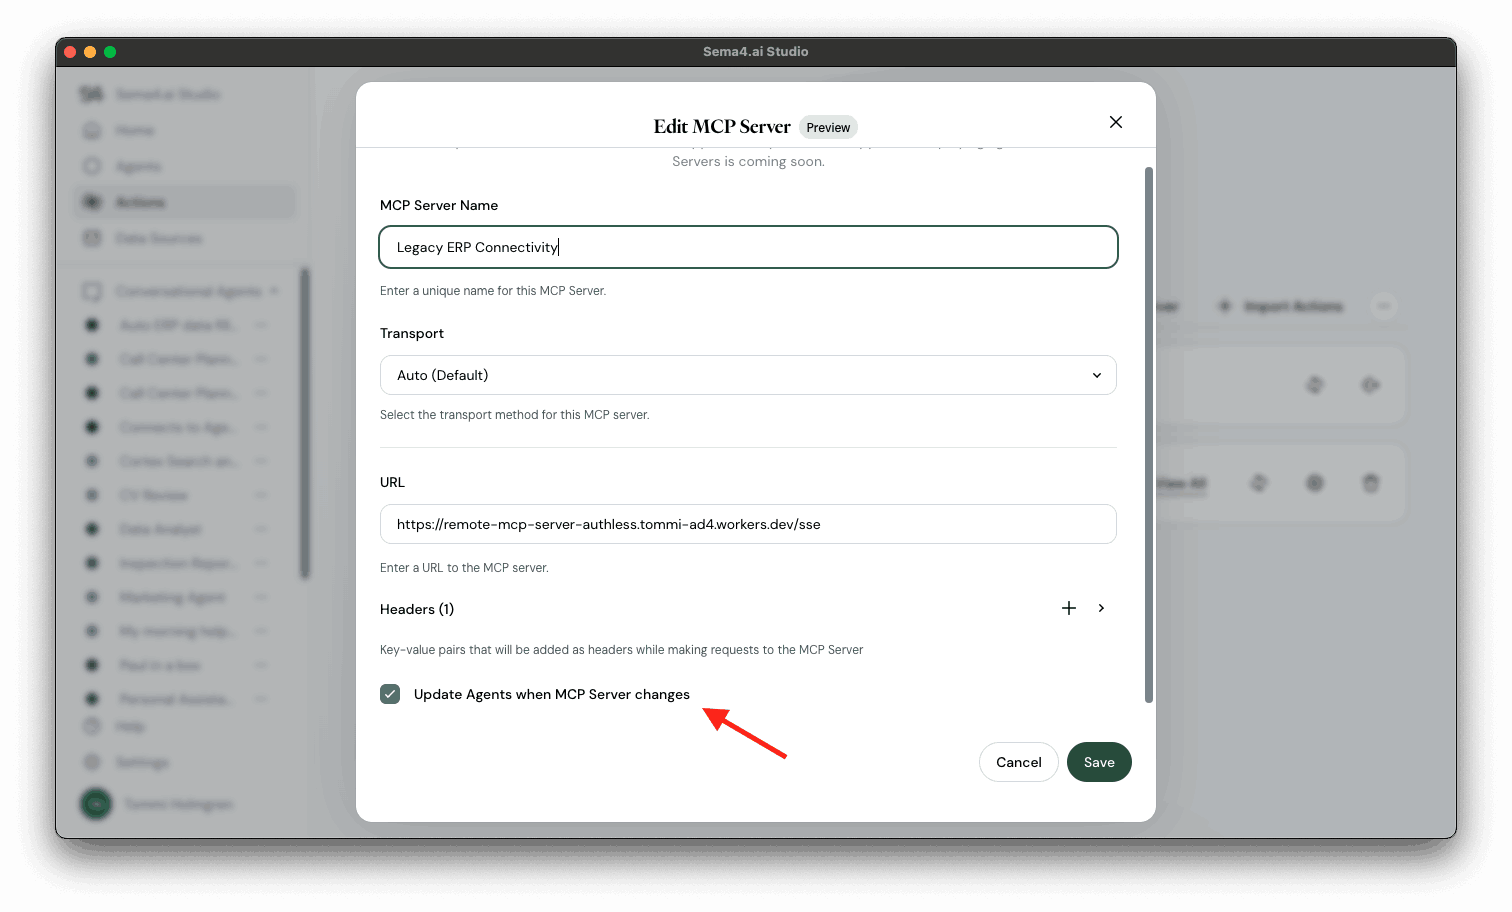
- When updating the details of your MCP server such as URL, headers, etc. - you can choose if the update should be applied to all agents that use this MCP server when saving the configuration change to your MCP server.
- When the implementation of the MCP server changes the tools provided by the server (but connection details are the same) - you can manually refresh the tools in the agent by clicking the Refresh button with icon.
- When deleting an MCP Server from the catalogue, agents using this MCP Server will continue to use the last known configuration. If you wish to remove the MCP Server from your agents completely, you will need to remove the MCP Server from each agent that uses it.