Create your own simple agent
In this section, you'll build a scheduling assistant to manage your Google Calendar—adding, editing, and removing events. You'll discover how to:
- Integrate a 3rd-party app with your agent.
- Select appropriate actions to enable the agent to efficiently help you.
- Create a runbook in natural language to guide your agent without having to write a single line of code.
While building the agent from scratch, you'll use some pre-built actions from the action gallery (opens in a new tab) to save time. No programming involved!
Plan for this module:
- Set up authentication to Google Calendar in Studio.
- Create and set up a brand new agent.
- Write a detailed runbook.
- Select the right actions.
- Deploy the agent on your computer.
- Enjoy the superpowers of your new assistant!
Set up Google Calendar authentication
First, you need to set up Google services OAuth client so that you can later give your agent access to Google Calendar events.
Follow our tutorial on setting up a Google OAuth2 client before you continue with building the agent.
Be sure to also set up the client in Studio and Work Room.
Create the scheduling assistant agent
The agent we're creating here consists of a name and description, a runbook, an LLM setup, and two actions. Let's set this all up now:
- In Studio, click Agents in the left sidebar.
- Under My Agents, click on the empty card to add a new agent.
- Select Conversational option in the Create New Agent popup that appears.
Now, you're in the 5-step setup screen. Fill in each section so that in the end, you get a result similar to the screen below:
Name
For example: Google scheduling assistant
Description
For example: This agent can manage events in your Google Calendar. It can add new or edit and remove existing ones.
Runbook
- Click Create New Runbook.
- In the editor popup that opens, write the runbook. You can copy and paste the runbook below.
## Objective:
Add, edit, and remove Google Calendar events.
## Instructions:
Use the Google Calendar action to manage events in the connected Calendar.
## Detailed steps to be done by agent:
When creating an event, ensure you know the date and time of the event that's to be added, edited, or removed. Create a short event description from what the user tells you about the event. If the user doesn't tell you in the first place, ask them if they wish to add a location to the event. If the user mentions other people in the instructions, ask whether they wish to add them to the event using their e-mail addresses. If the user answers yes, ask for the e-mail addresses.
When removing or editing an event, ensure you have all the information you need to identify the right event. If you identify an event that's part of a series, ask if the user wants to update or remove just one occurrence, all future occurrences, or the whole series.
Once you have all the information, create, edit, or remove the event in the connected Google Calendar.
Runbook formatting matters. Use headings to help the LLM understand your goal.
- Click Save .
- Close the editor using the button in the top-right corner.
Large language model
- Click Setup on the card of the LLM provider you want to use.
- Select a configured LLM.
- Click Confirm.
Actions
Now, equip your agent with the necessary tools. It needs an action to manage Google Calendar and, as per the runbook, another action to search the internet for event locations. Add these actions in this step:
- Click Add Action.
- Locate the Google Calendar action.
You may need to click View More to see all the available actions. - Click left of the action card to download the action to your Studio.
- Once finished, click to add the action to the agent.
- Repeat steps 2 and 4 but for the Free Web Search action instead.
- Click Add to Agent.
You're back at the 5-step setup screen, where you see the two actions added to the agent.
Deploy the agent
With all the steps finished, you're ready to deploy your agent!
Click Deploy.
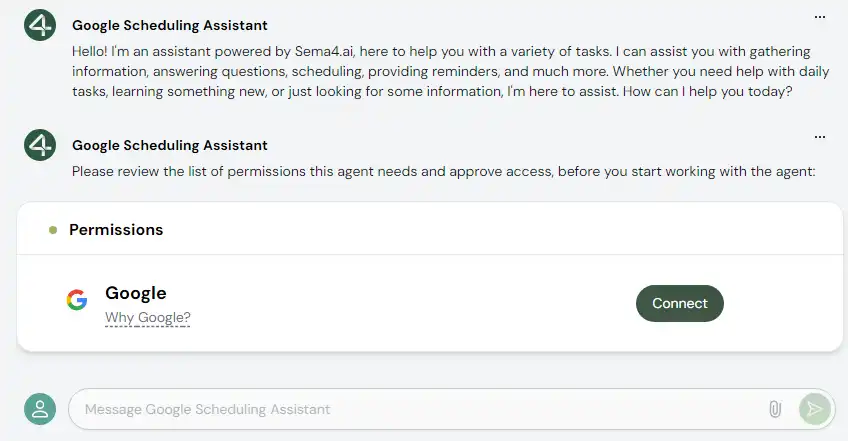
After this step, the Google scheduling assistant agent opens a new chat window. In the chat history, notice the permission card with the Connect button. Use it to authenticate and allow access to your Google Calendar.
- Click Connect.
- Log into the Google account you wish to use.
- Allow the required access permissions.
If you see "Configure client" instead of "Connect", it means you don't have the Google OAuth2 client set up. Refer to the section on setting up Google OAuth client for Google services.
Put the assistant to work
Now, open Google Calendar in your browser or app to view the agent's actions. Ensure you're logged into the same account you used to connect the action.
Now, give the agent a task, such as:
I have a gym workout on Tuesday with Petr. We're going to Fitstop at Waikiki.
The assistant will ask, per the runbook, if you want to add Petr as an attendee. After you respond, it will create the event for the upcoming Tuesday.
If you want to change the time, just tell the agent. It will handle the update for you:
Oh, forgot to say, we're going at 7 am for 40 minutes
And the event is updated. Check your calendar 😊
You can also issue prompts in other languages of your convenience. AIs are usually multilingual.
And that's it! Congratulations—your first AI agent is live in your Studio. With this done, experiment further. The possibilities are limitless.