Shared Configurations
New in version 1.3.0 and is available in the Enterprise Edition only.
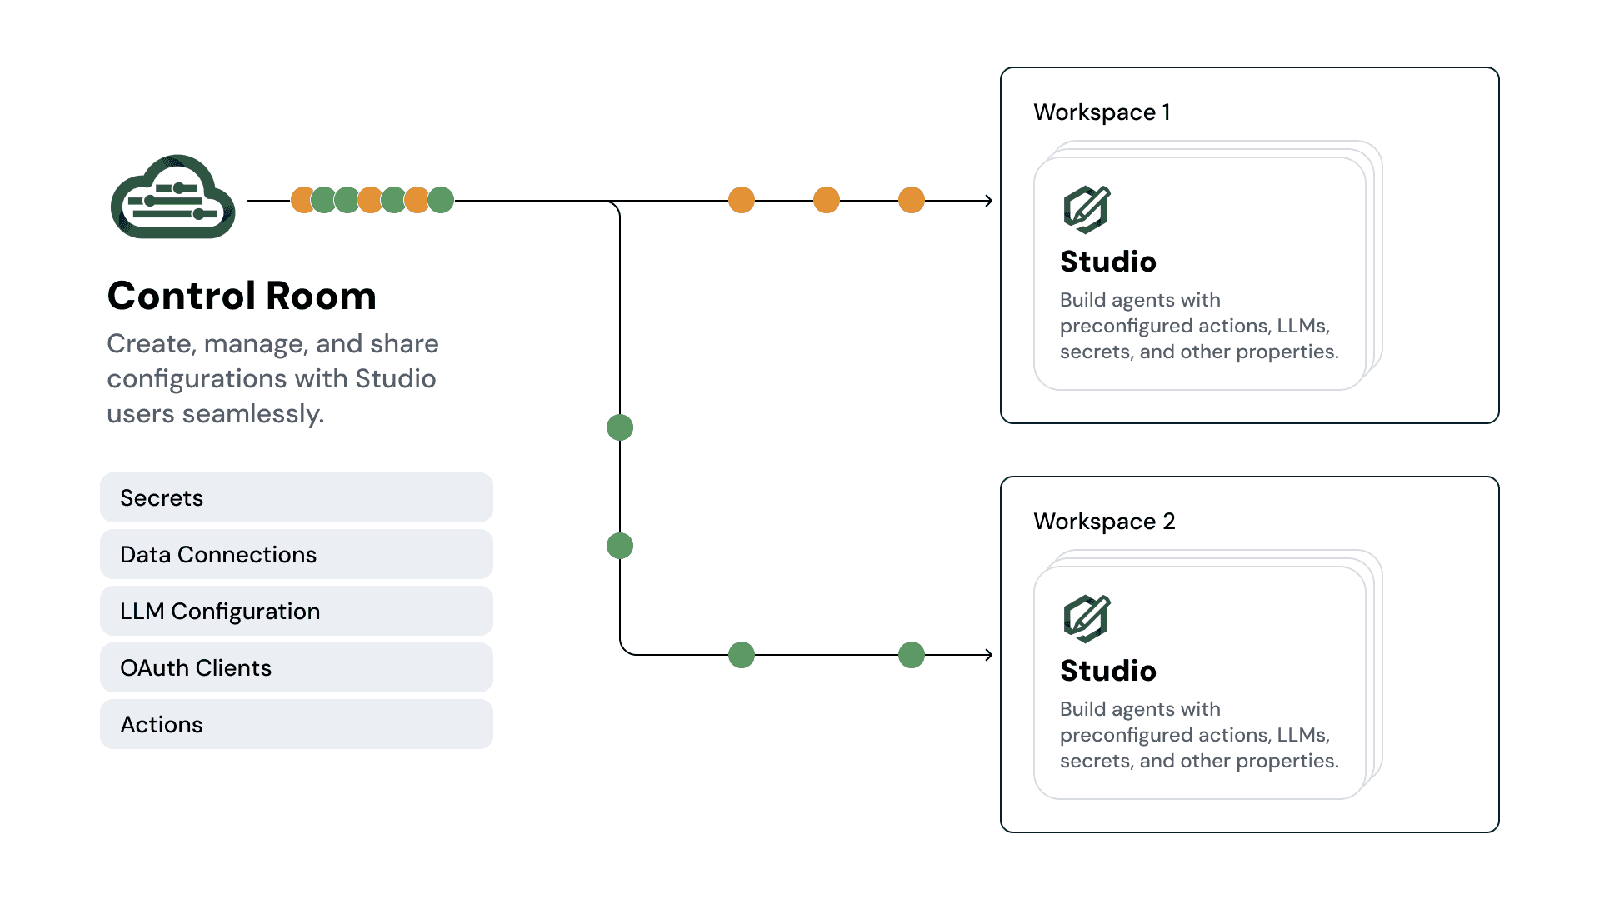
Sharing configurations from Control Room to Studio users significantly simplifies the setup process for the new Studio users, and makes coordination of the agent program easier and more secure.
You can share Secrets, Data connection details, LLM configurations, Oauth clients and Action packages from Control Room to Studio users based on the Workspace they are linked to.
Using shared configurations in Studio
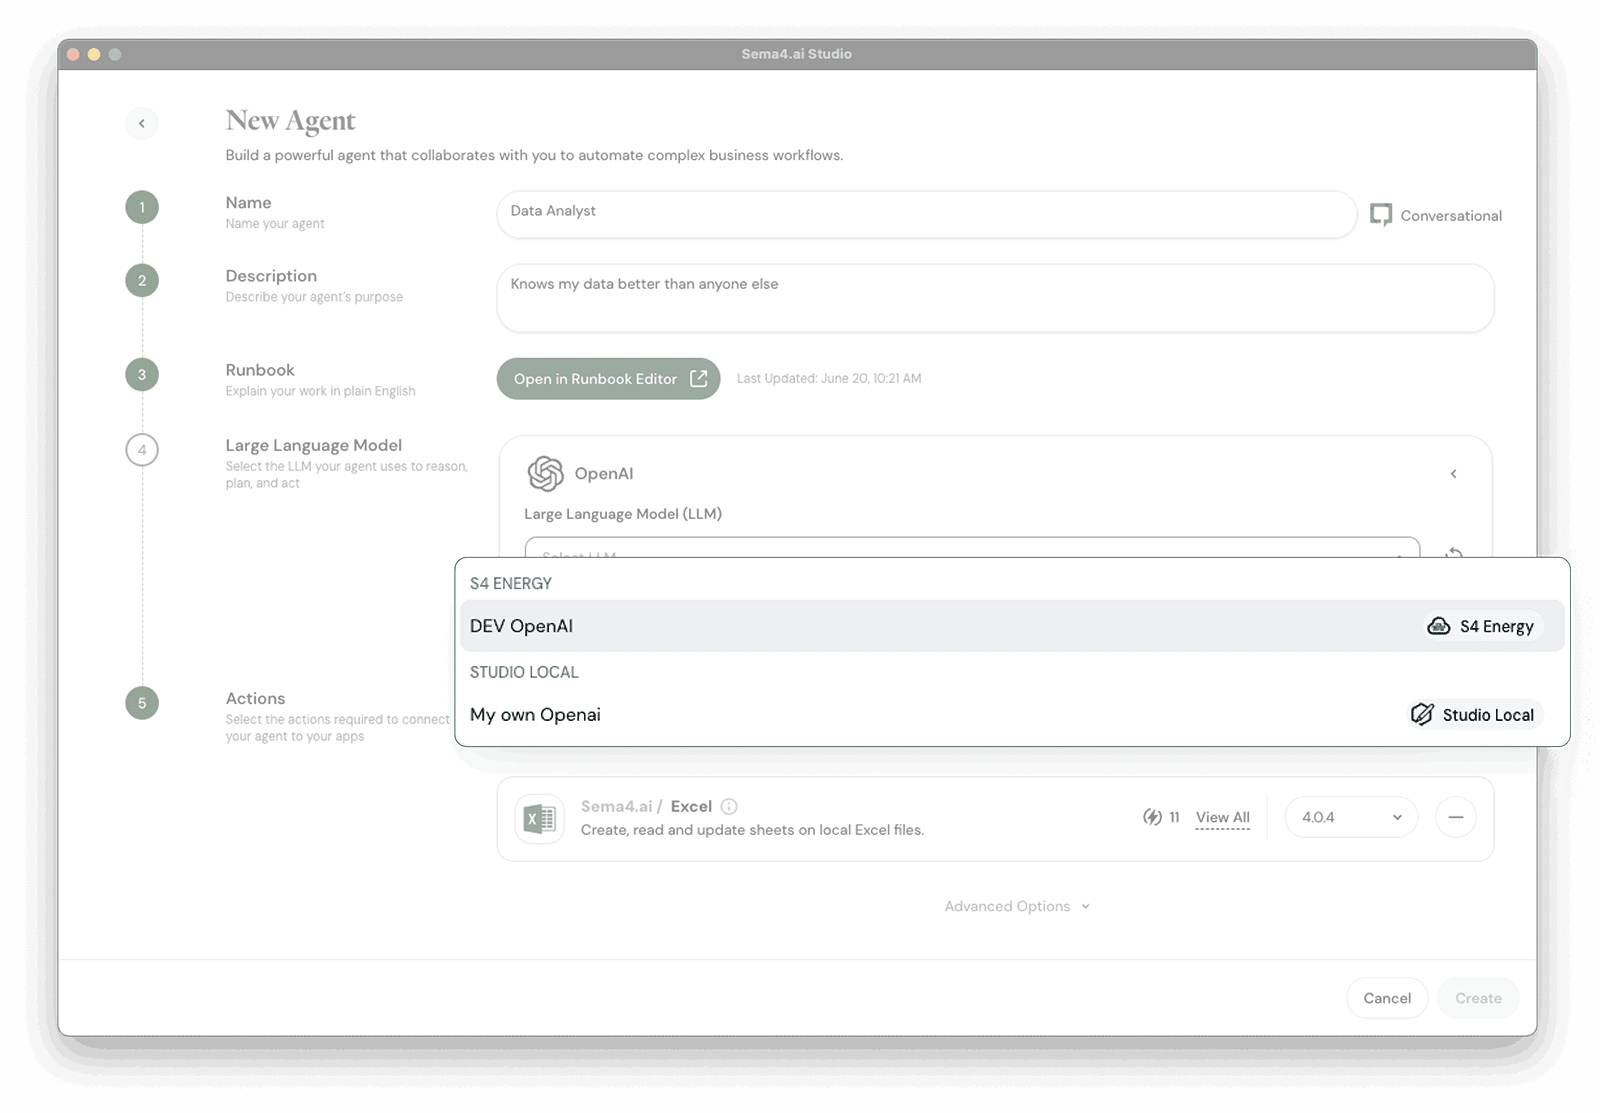
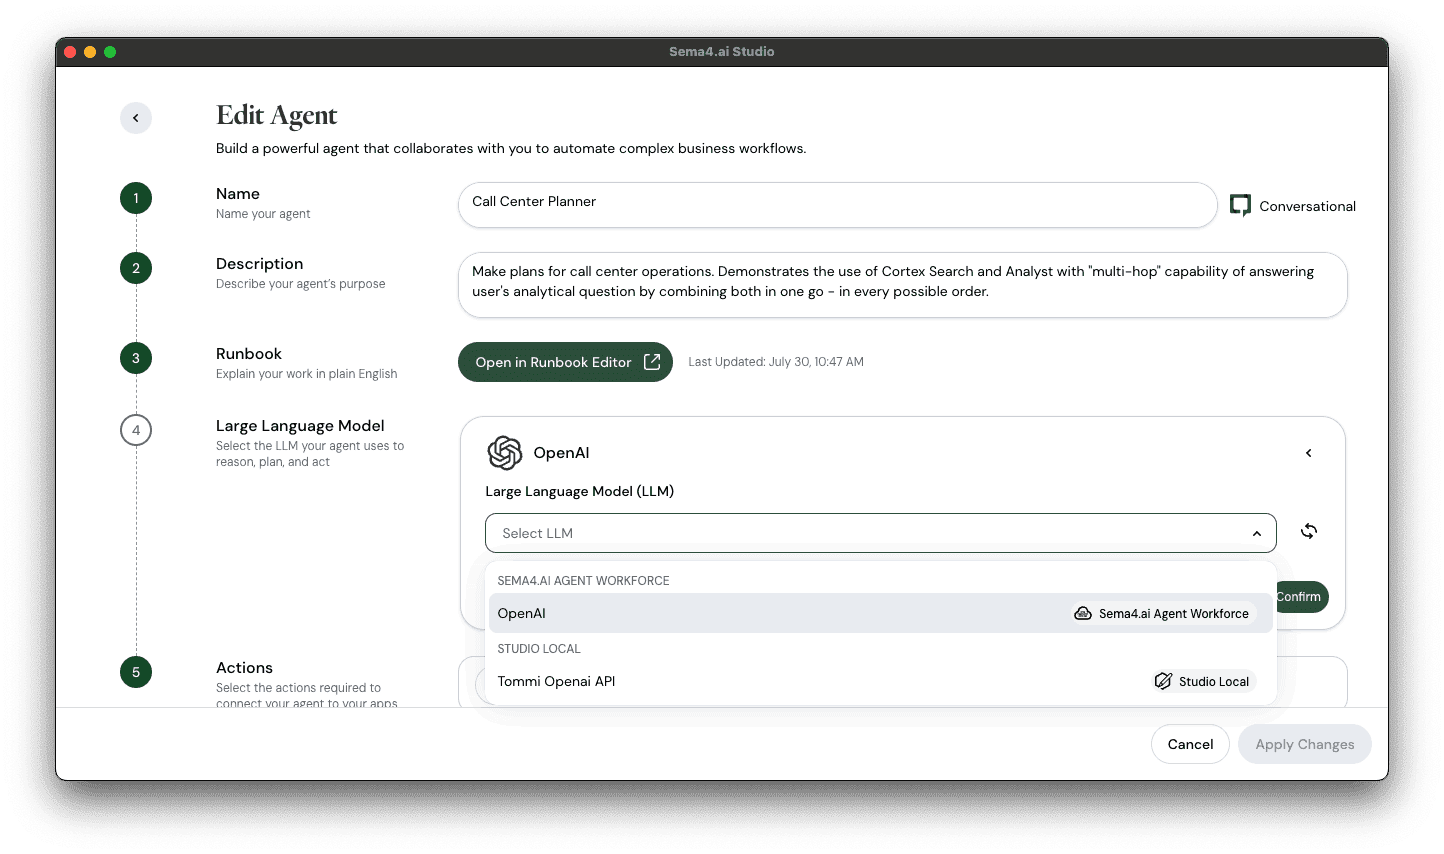
When Studio is linked to Enterprise Edition Control Room, the shared configurations become available to be used with Agents. For example in the screenshot below you'll see both the local configurations as well as the shared configurations available for when building an agent.
Please note that when sharing configurations are changed in Control Room or Studio is unlinked, the configurations might change or become unavailable locally. In general, once a shared configuration is used in an agent, it continues to work with the original value even if the sharing ends or the configuration is changed.
Setting up sharing in Control Room
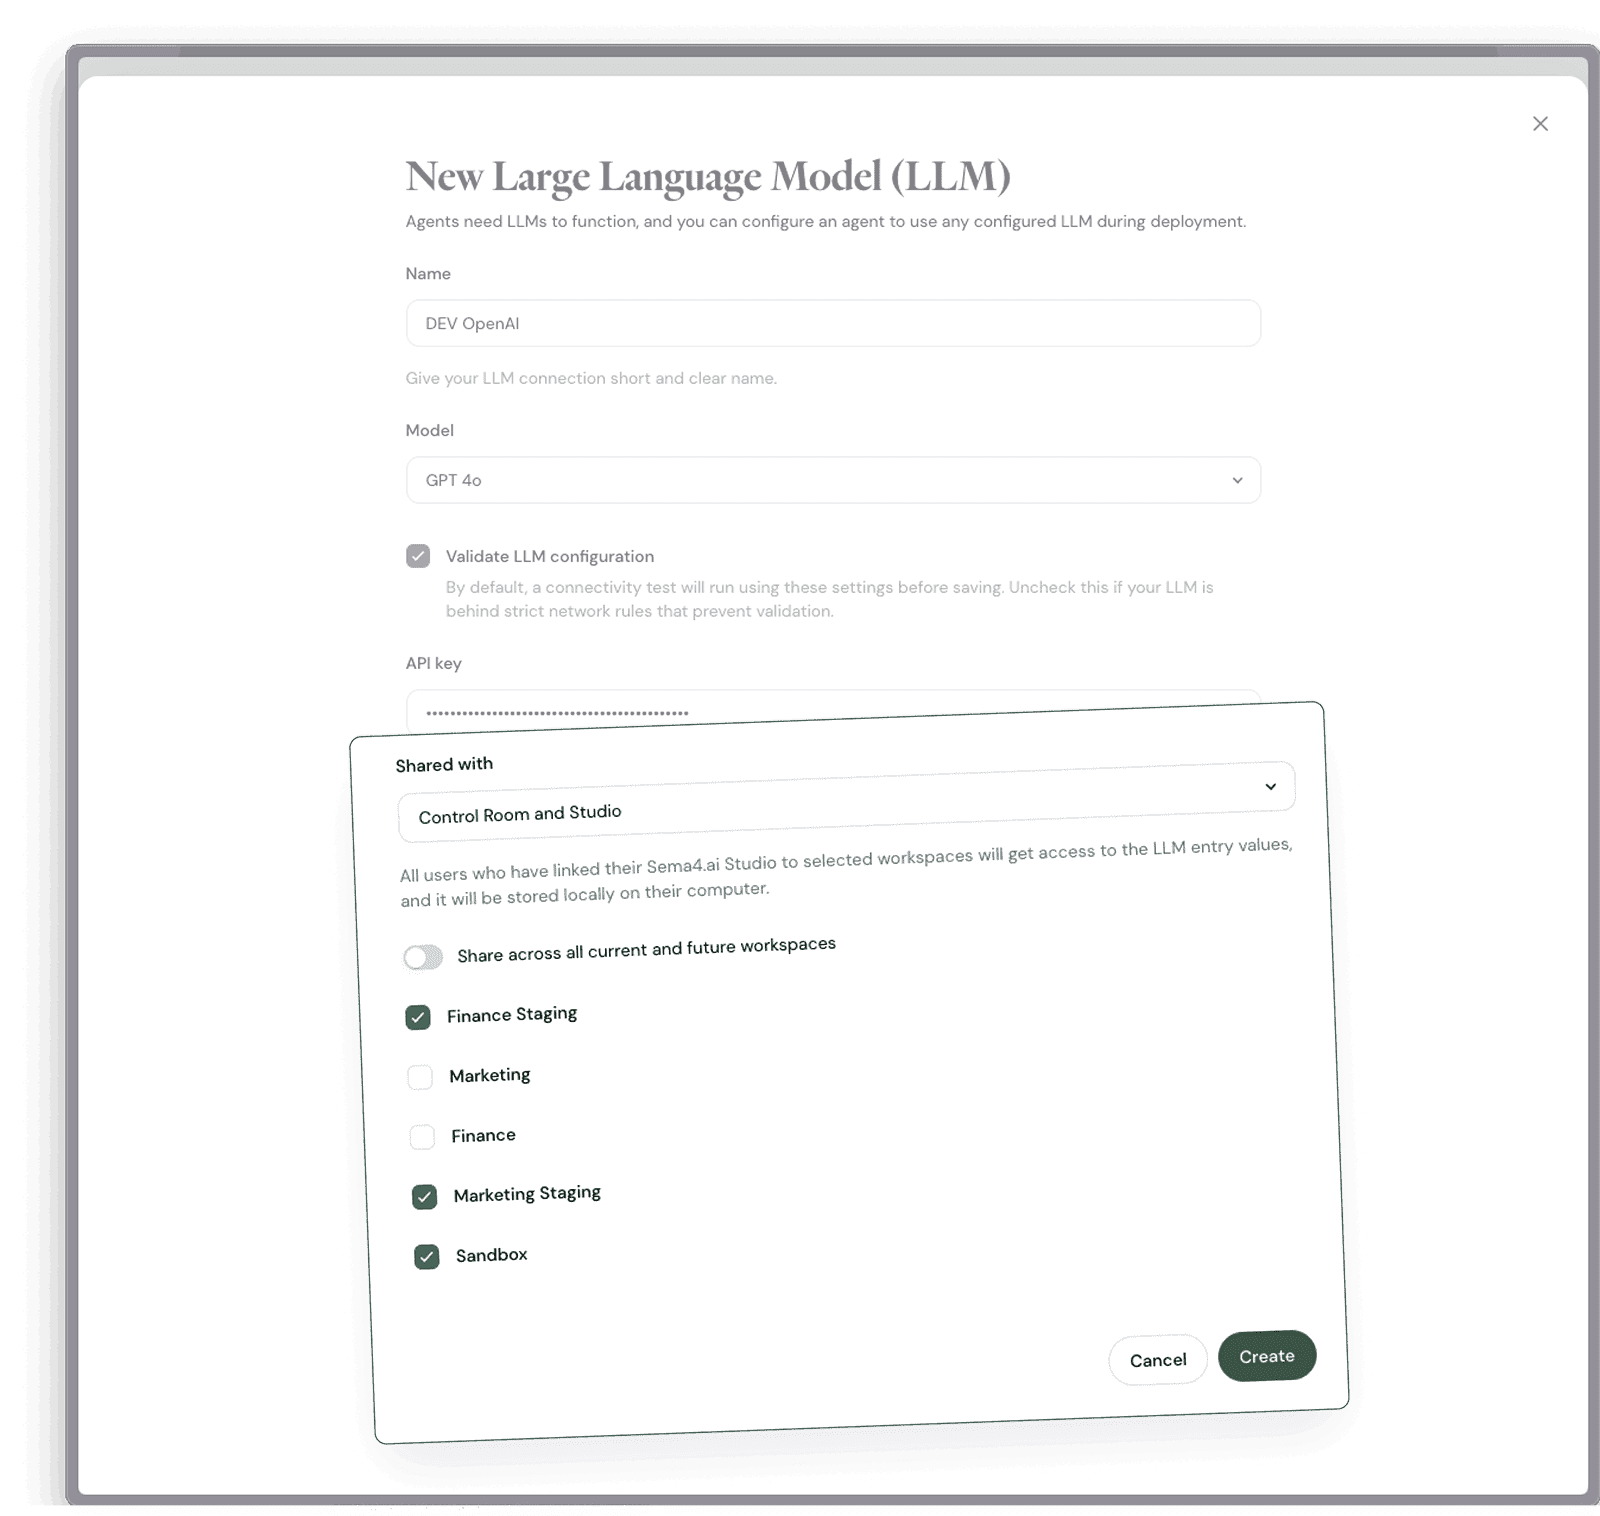
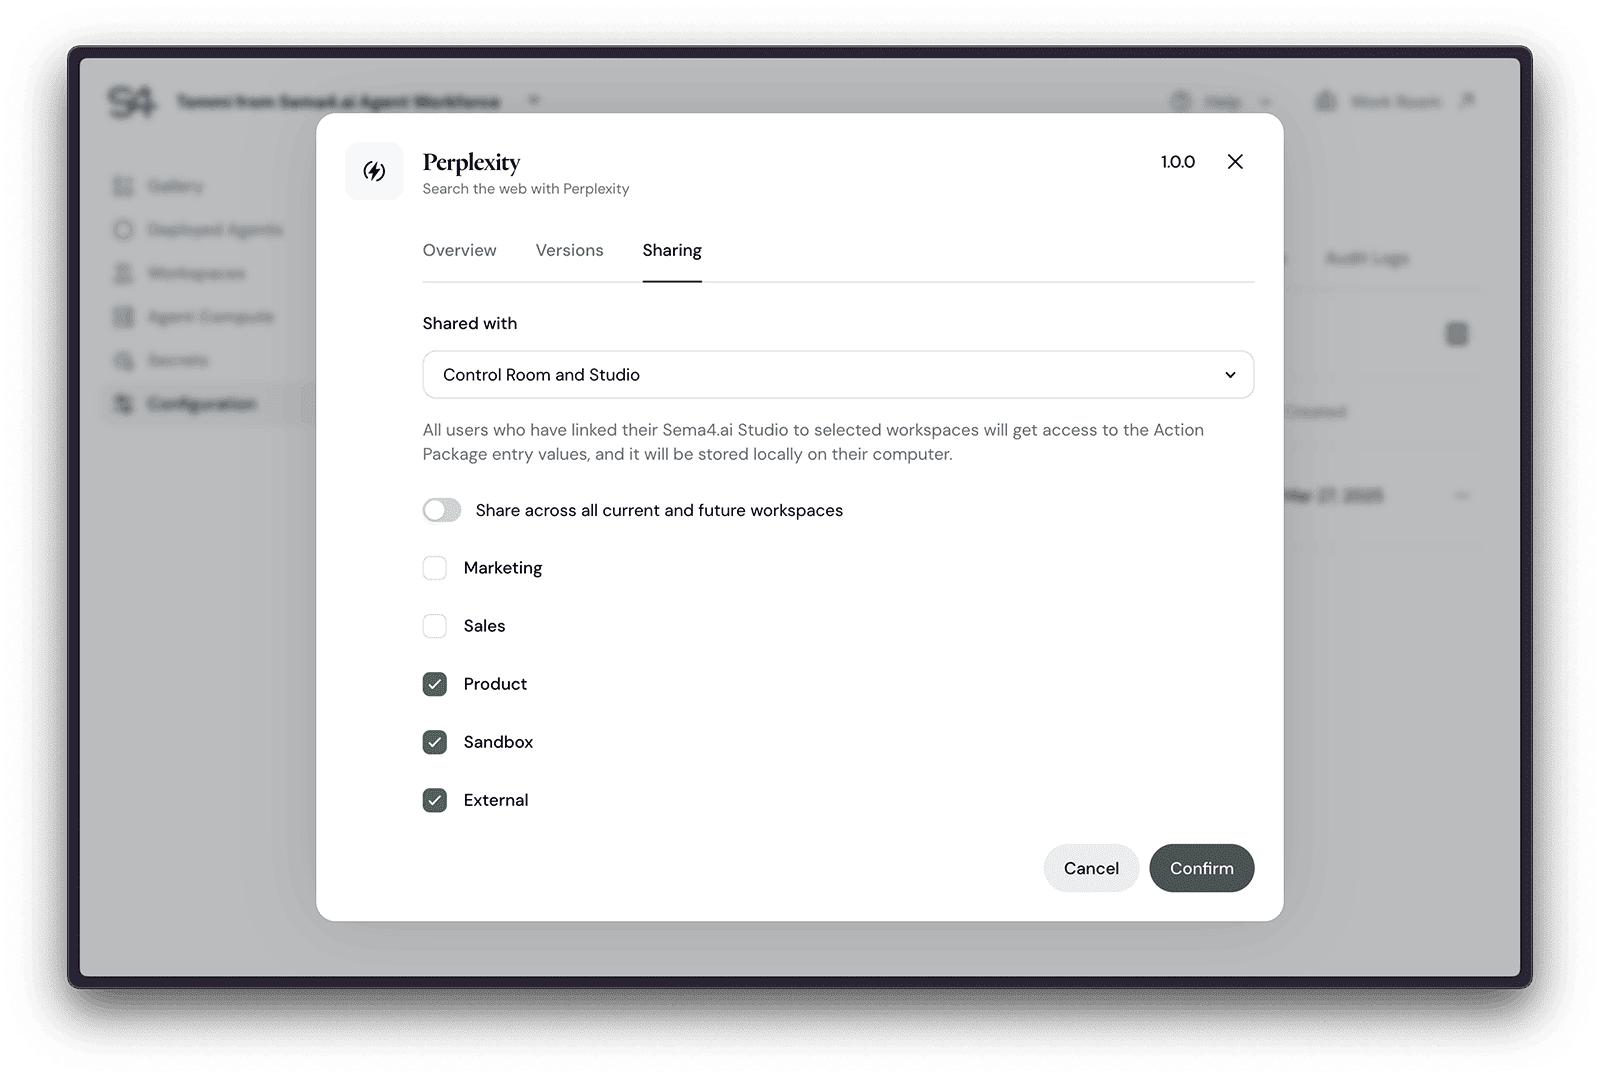
On Control Room you'll find a new "Shared with" block with all the configurables. It allows you to choose the option "Control Room and Studio", which means that also the Studio users will have access to the shared configurations. You can then choose if the configuration is available to "All current and future workspaces" meaning that all linked Studio users will have access to it. Alternatively you can choose specific Workspaces. In the screenshot below you can see the Secret is share only with users that are linked to one of the three Workspaces.
Configurations available
Following chapters will cover the different configurations available and how to use them in Studio.
LLM configurations
In Control Room, head over to Configuration -> LLMs and set sharing by opening any of your current LLM configurations (or creating a new one). Then set the Shared with option to Control Room and Studio and either leave sharing on to all workspaces (the default option) or select the workspaces which can use the chosen configuration.
In Studio, the shared LLM configurations are visible under Settings -> Models where you can see both your local and shared LLM configurations.
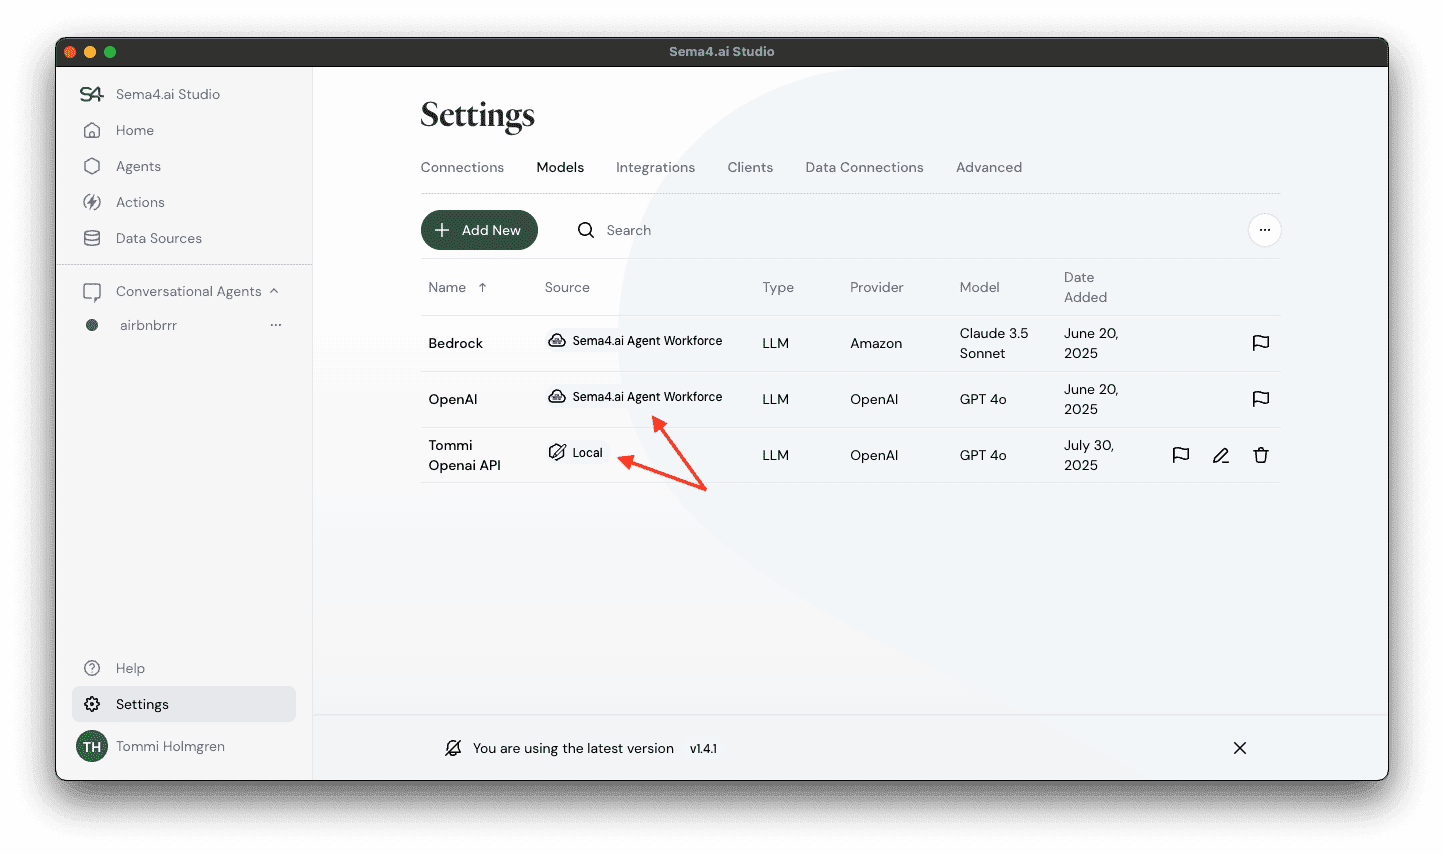
You can then select the shared LLM configuration to use it in your agent.
Important behavior notes:
- When LLM configurations change in Control Room, deployed agents continue to use the original values until redeployed
- If Studio is unlinked from Control Room, you can no longer use shared LLM configurations for new agents, but existing agents continue to work
- Local configurations always take priority over shared configurations if both exist
Secrets
In Control Room, navigate to Secrets and configure sharing for your organization's secrets. Set the Shared with option to Control Room and Studio and choose whether to share with all workspaces or specific ones.
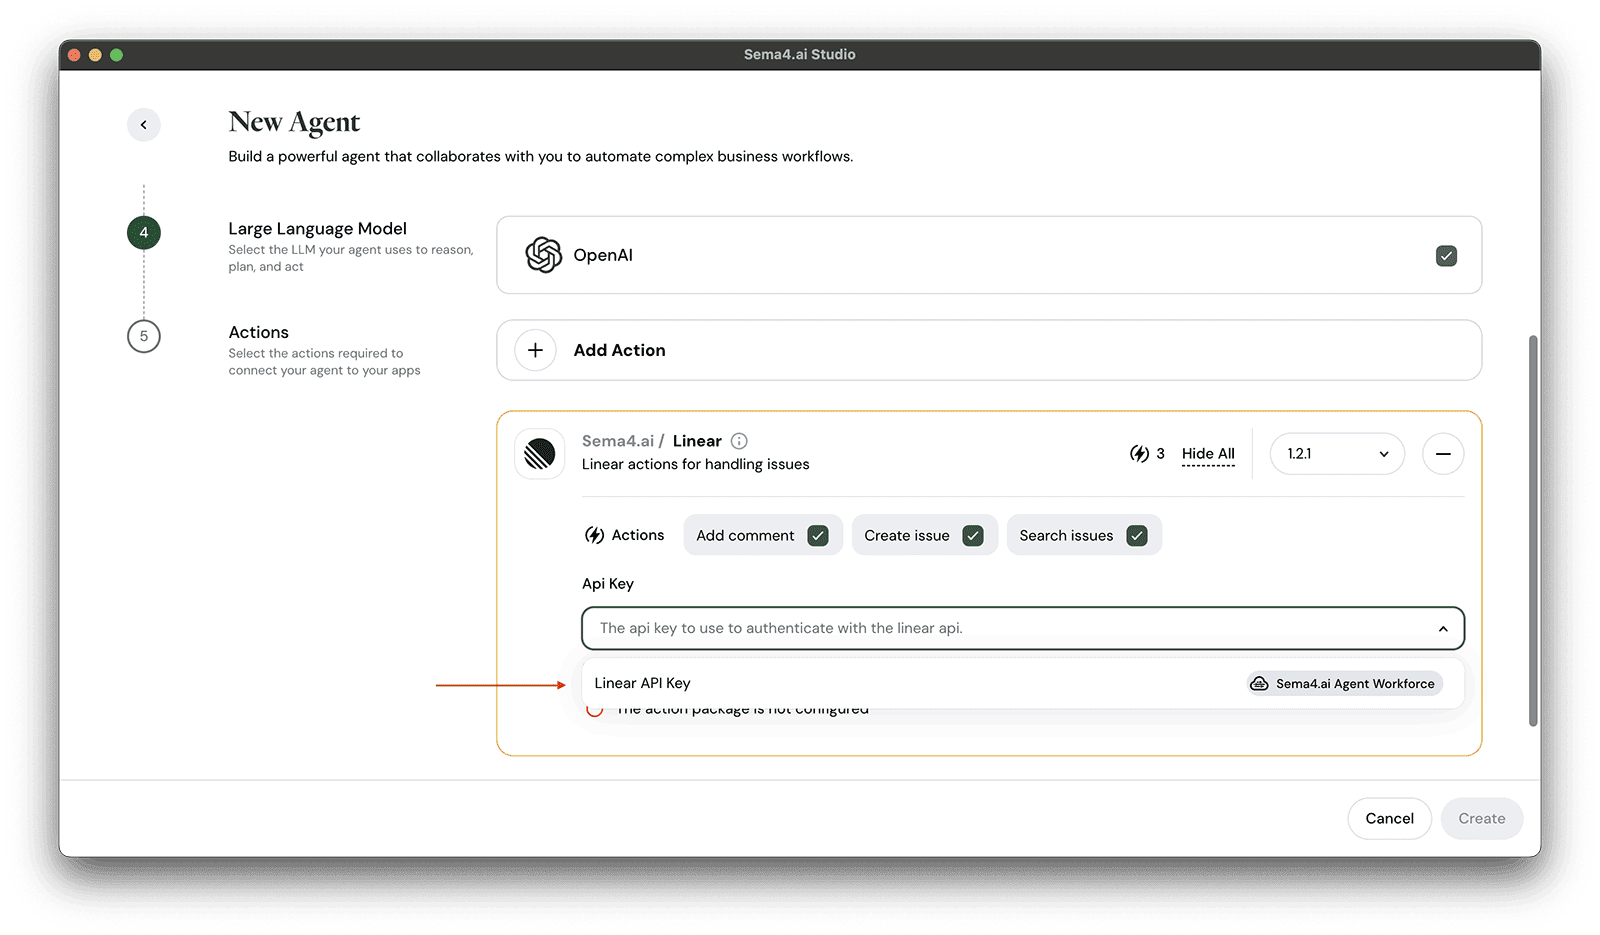
In Studio, shared secrets are available under Settings -> Secrets where you can see both local and shared secrets. You can select shared secrets when configuring actions that require authentication, without needing to know the actual secret values.
Key features:
- You can see the name and description of shared secrets, but not their actual values
- When using shared secrets in actions, the actual values are securely retrieved from Control Room
- If a shared secret is changed in Control Room, existing agents continue to use the original value until redeployed
Data connections
In Control Room, go to Configuration -> Data to share your organization's data connection details. Set the Shared with option to Control Room and Studio and configure workspace access as needed.
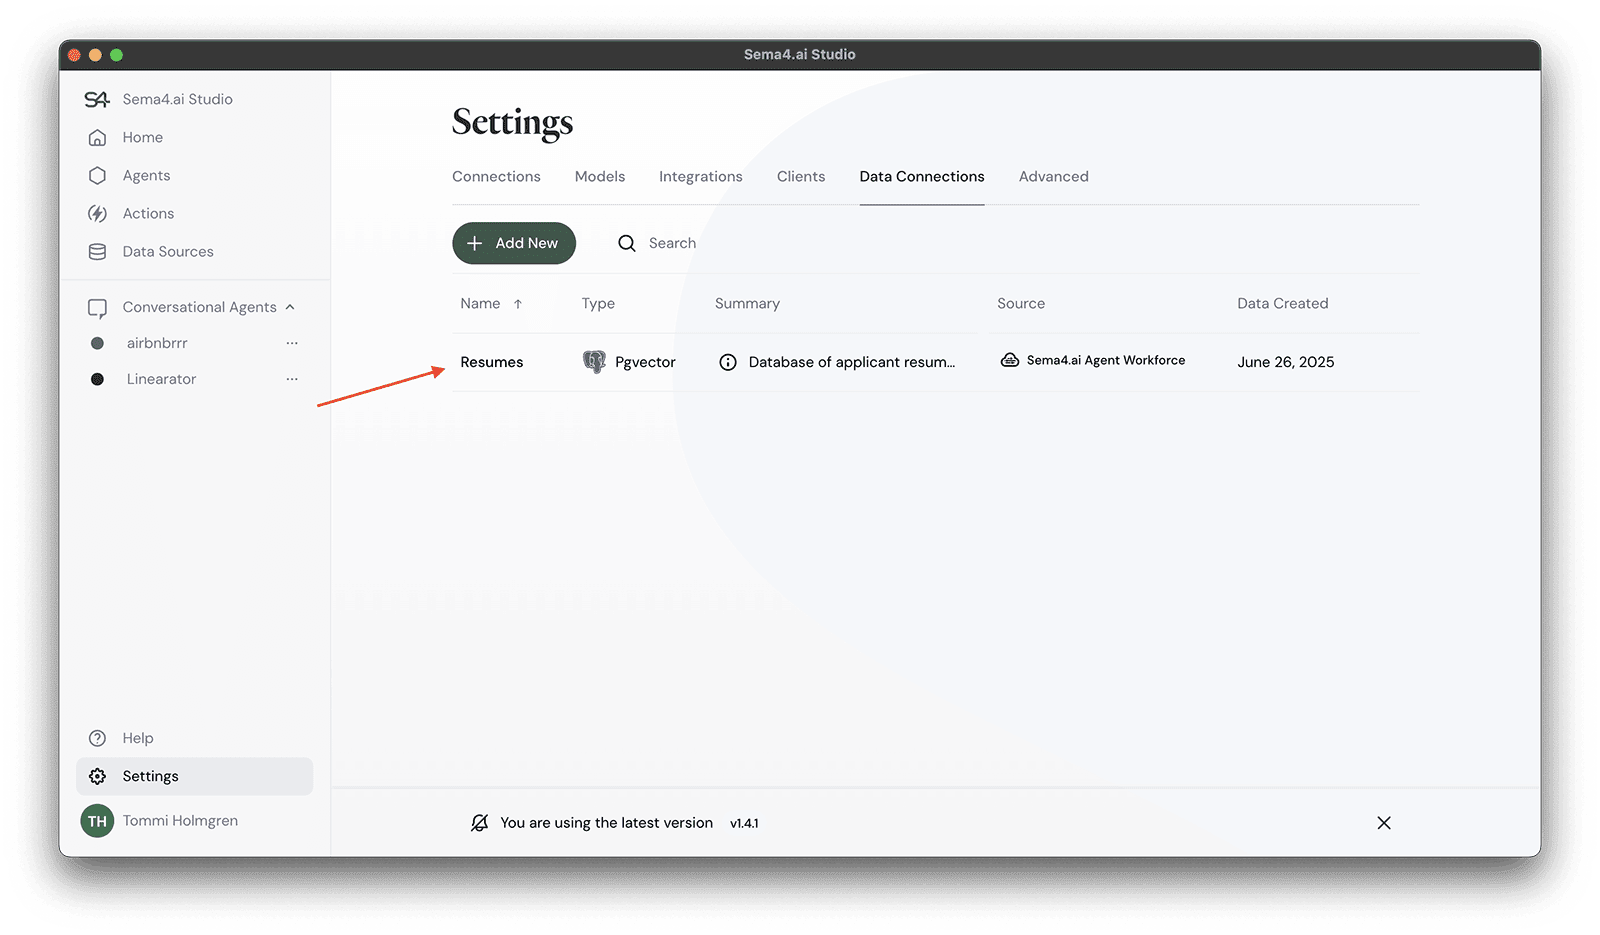
In Studio, shared data connections appear under Settings -> Data Connections. You can select them when configuring data sources for your agents, along with an option to use the locally configured connection details or creating a new one.
Benefits:
- No need to manually configure database connections in Studio
- Centralized management of connection details by administrators
- Automatic updates when connection details change in Control Room (for new configurations)
- Existing agents continue to work with original connection details until redeployed
OAuth clients
In Control Room, navigate to Configuration -> OAuth Providers to share OAuth client configurations. Set the Shared with option to Control Room and Studio and select appropriate workspaces.
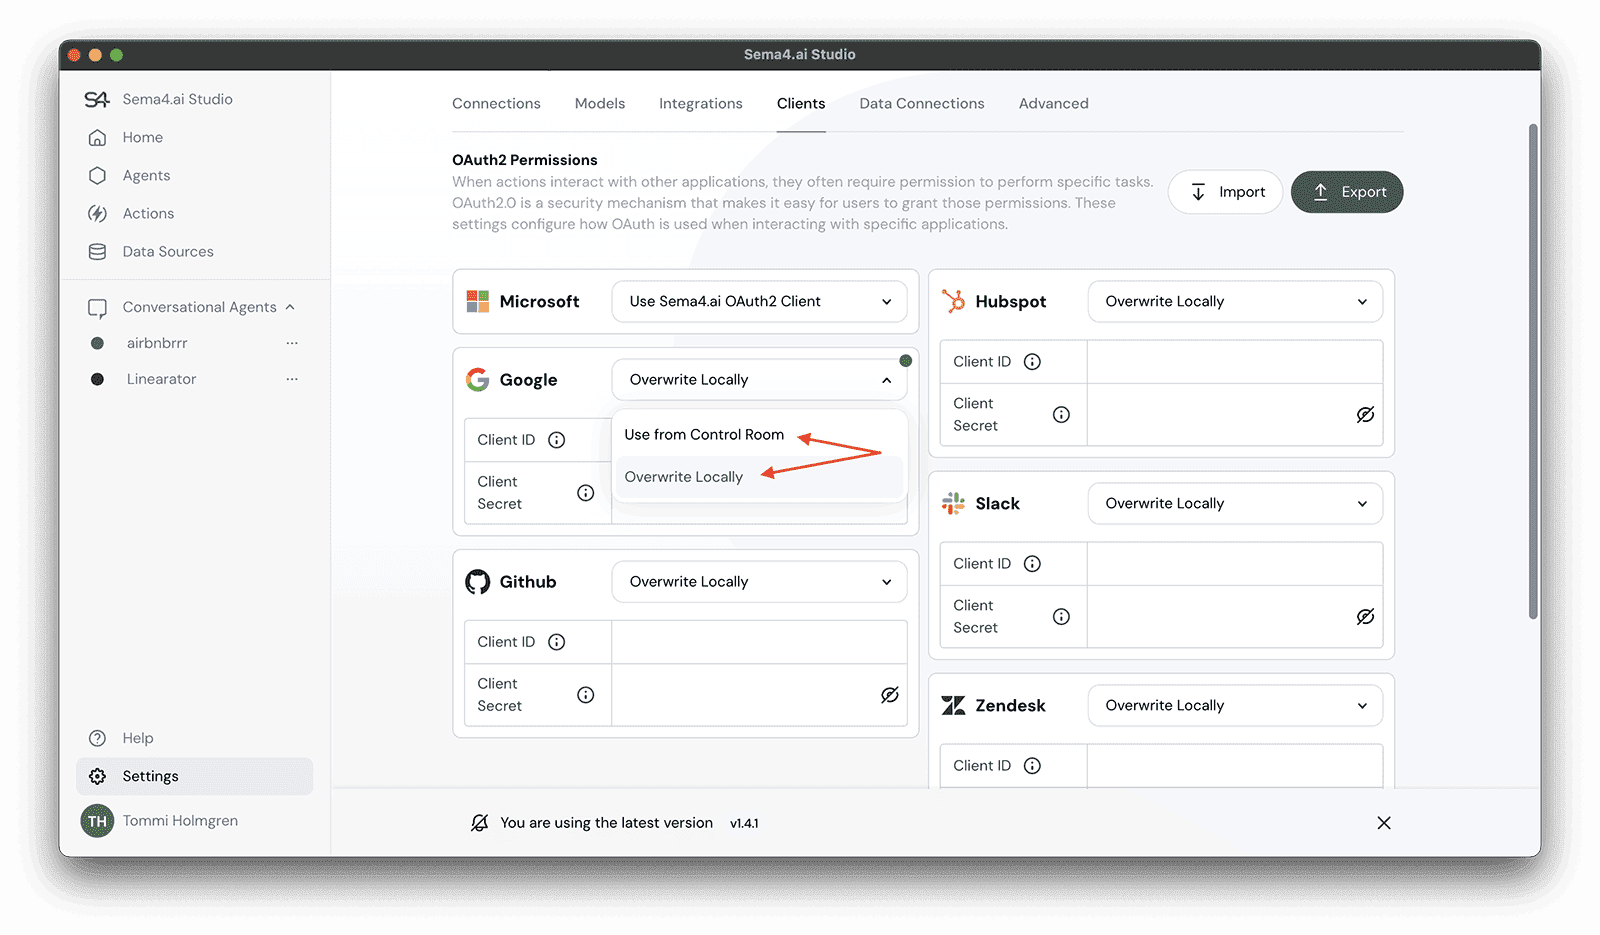
In Studio, shared OAuth clients are available under Settings -> Clients where you can choose for each supported provider if you want to use the shared configuration or use locally configured client.
Important considerations:
- OAuth clients may have different configurations for desktop apps (Studio) vs web apps (Work Room)
- Some OAuth clients may not be suitable for Studio use and should not be shared
- When OAuth client configurations change in Control Room, existing agents continue to use original values until redeployed
Action packages
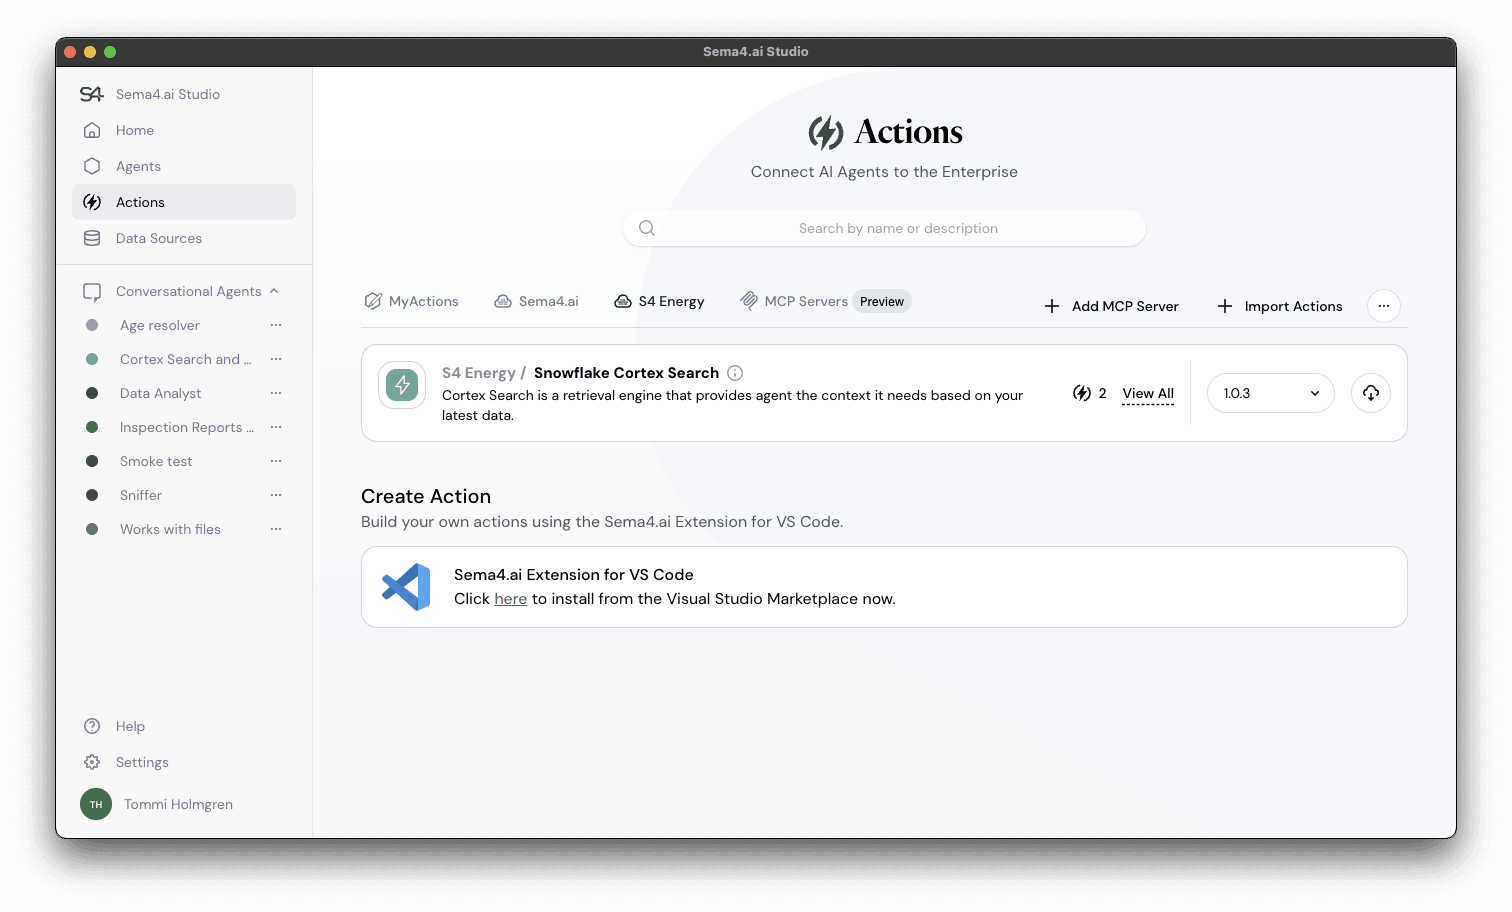
Beyond configurations, you are able to create organization's shared Actions gallery by uploading Action packages to the Control Room. This makes the collaboration between the team members easier. Studio users will then find the shared Actions in the Actions page, as well as when creating agents.
Control Room: Shared Action Package Management
Managing shared Action packages is easy and secure in Control Room under Configuration -> Actions. The list shows by default all the Sema4.ai public actions, but you can also see your own organization's actions.
Add a new action package by clicking the + Action button. You can then upload the Action package file. Once uploaded, you are able to change sharing under Sharing tab shown below, where the Control Room and Studio option makes the action available to all linked Studio users. In addition it's possible to control the visibility of the action package for each workspace.
Further, you can also:
- Delete Action Packages: You can now delete unused or obsolete Action packages directly from the Control Room interface, keeping your environment clean and organized.
- Filter Action Packages: Quickly find the packages you need with new filtering options, making it easier to manage large Action galleries.
- Scoping for Public Action Packages: Control Room now allows you to set the visibility scope for Sema4.ai public Action packages. Choose whether packages are available to all workspaces or restrict them to specific teams, improving governance and collaboration. This allows organization administrators to control which actions are available to which teams when they work in linked Sema4.ai Studios. For example, if your organization does not use Google Workspaces, you are able to remove the Google related actions from the public Action gallery for all linked Studio users.
Action Package Sharing Features
Two types of action sharing:
-
Sema4.ai Gallery Actions: Control Room administrators can limit the visibility of public action packages per workspace. For example, if your organization doesn't use Google services, you can hide Google-related actions from Studio users.
-
Organization's Own Action Packages: Administrators can upload and maintain organization-specific action packages and their versions, choosing which workspaces can access them. These appear in Studio as "Org name/actionpack name" and behave just like Gallery actions.
In Studio:
- Shared action packages appear in the Actions page alongside local and gallery actions
- You can use shared actions when building agents without needing to import them manually
- When new versions of shared actions are uploaded to Control Room, they become available in Studio
- Existing agents continue to use the version they were configured with until redeployed
What happens when configurations change
| Scenario | Deployed Agents | Use for New Agents |
|---|---|---|
| Studio is unlinked | Continue using stored values | Cannot use shared configurations |
| Value changed in Control Room | Continue using original values until redeployed | New configurations use updated values |
| Configuration removed in Control Room | Continue using stored values | Configuration no longer available |
| User removed from workspace | Continue using stored values | Cannot use shared configurations |
| Network connection issues | All values remain functional | Dropdowns show connection alerts |
Best practices
- Use shared configurations when possible: This ensures consistency across your organization and reduces configuration overhead
- Let administrators manage sensitive data: Use shared secrets and OAuth clients instead of storing credentials locally
- Regular updates: Redeploy agents when shared configurations are updated to benefit from the latest changes
- Clean up local configurations: Consider removing local configurations that duplicate shared ones to keep your Studio environment clean