Create your first Worker Agent in Sema4.ai Studio
Creating a Worker Agent in Sema4.ai Studio follows the same intuitive process as creating a Conversational Agent. The key difference is how you test: instead of having a conversation, you create Work Items for the agent to process.
Similar to how you write a runbook for a Conversational Agent, you define the steps your Worker Agent should take in a runbook. These instructions are applicable for each Work Item the agent picks up. Every Work Item includes a message, an optional JSON payload, and file attachments. The Worker Agent processes these according to your runbook instructions.
Example Scenario: Sales Order Processing Agent
In this tutorial, we will build a Worker Agent that processes new sales orders. The agent will:
- Read sales order details from the Work Item payload
- Verify the order amount meets business rules
- Create Sales order and update a business system (simulated with logging)
- Generate a confirmation message
- Mark the Work Item as completed
Steps to create a Worker Agent
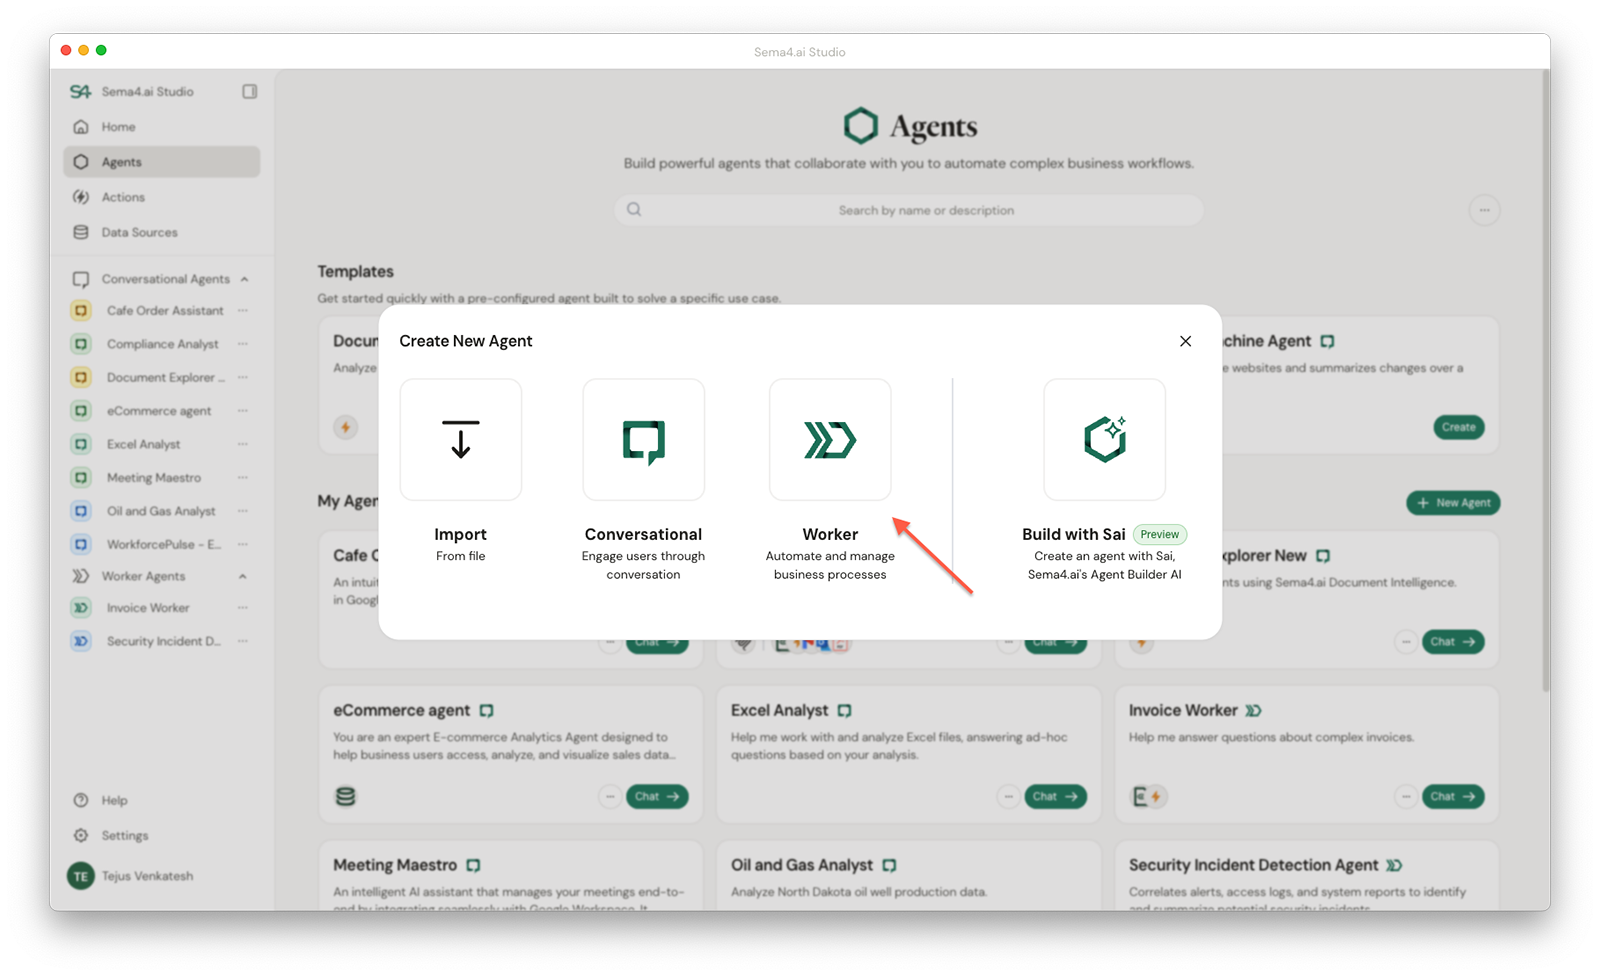
Create a new Worker Agent in Studio
- Open Sema4.ai Studio and navigate to the Agents tab.
- Click on the + New Agent button.
- Select Worker Agent as the agent type.
- Provide a name (e.g., "Sales Order Processor") and description for your agent.
Write the runbook
Use the Runbook Editor to define how your Worker Agent processes each Work Item. Write clear, step-by-step instructions in plain English.
## Objective:
Create Sales Orders from incoming Work Items.
## Instructions:
When a new sales order Work Item arrives:
- Extract the order details from the payload (orderId, customerName, amount)
- Verify the work item has all the details - OrderID, Customer Name, Product ID, Quantity.
- If verification fails, mark the Work Item as Failed with an error message
- Check if the order amount is greater than $0 and less than $10,000
- If verification passes, log "Order [orderId] for [customerName] verified successfully"
- If Order is above $10000 or less than $0 mark the work item for review
- Generate a confirmation message: "Order [orderId] confirmed. Amount: $[amount]"
- Mark the Work Item as Completed
Worker agent will not mark a work item as completed automatically unless you explicitly instruct it to do so in the runbook. In our example, we would need to add a final step in the runbook to mark the work item as completed after successfully processing the order.
Configure your agent
- Choose the appropriate Large Language Model (LLM) for your agent
- Add Actions or MCP Servers if your agent needs to interact with external systems
- Review your configuration
- Click Create to create your first Worker Agent
Test your Worker Agent with Work Items
Once your Worker Agent is created, you can test it by creating Work Items. Each Work Item would include:
- A message describing the task.
- (Optional) A JSON payload with the sales order details (e.g., order ID, customer name, amount).
- File attachments if needed.
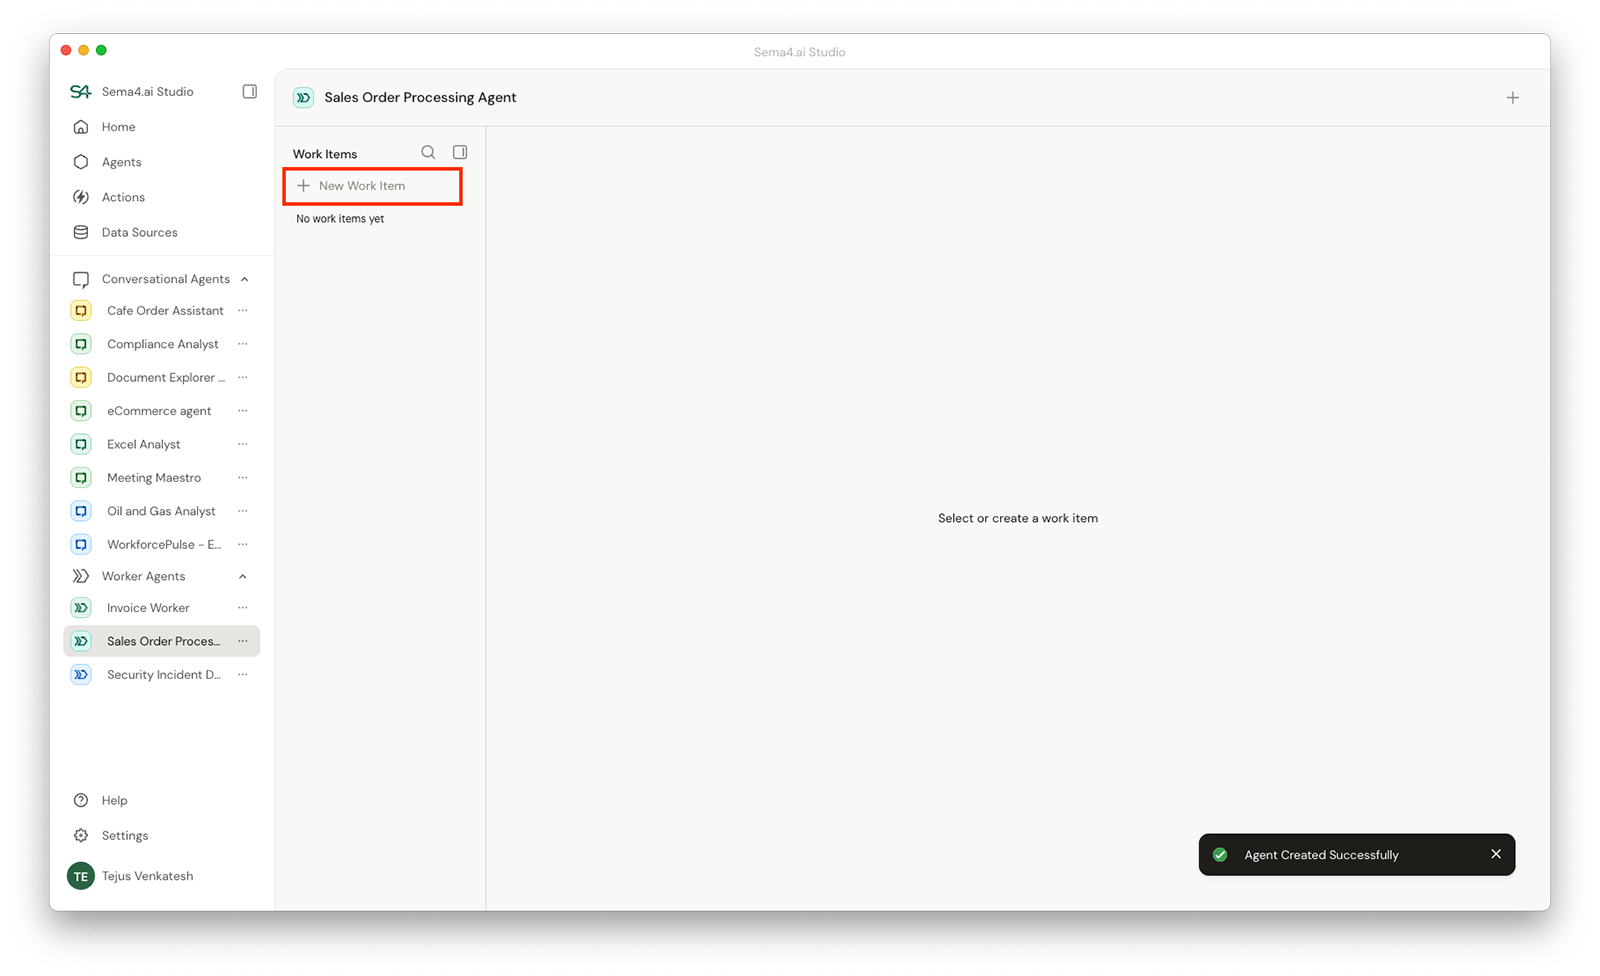
Create a Work Item
- Click the + New Work Item button on the left sidebar in Studio. (Similar to where you create new conversation thread)
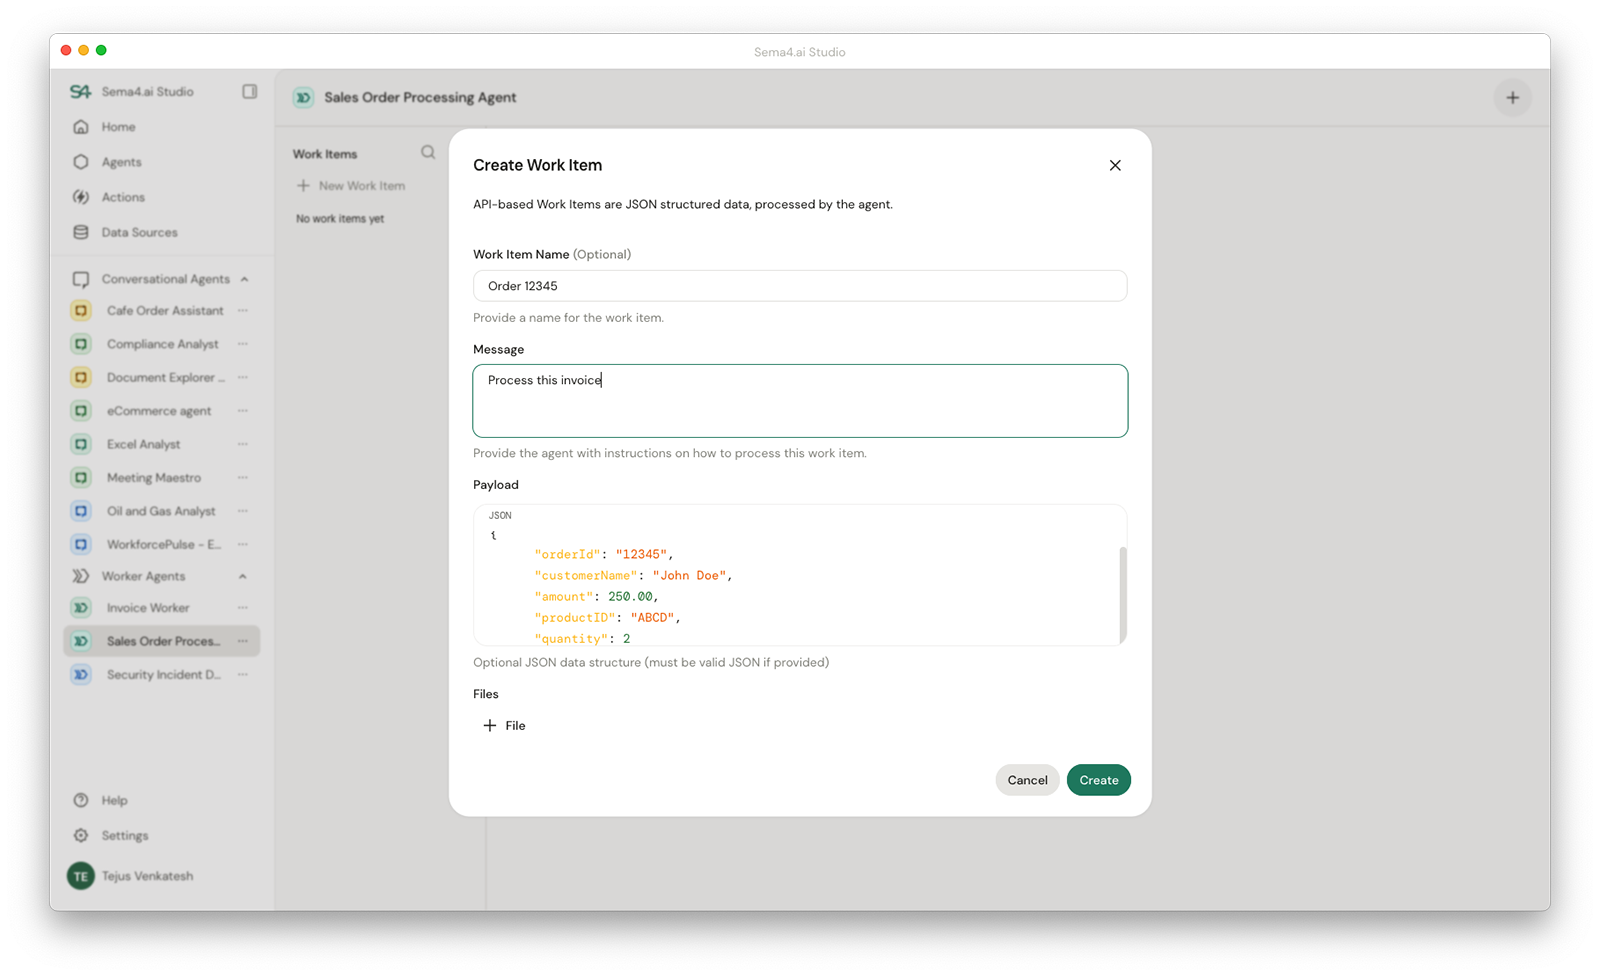
Create new worker agent - In the Create Work Item modal, fill in the details for your Work Item:
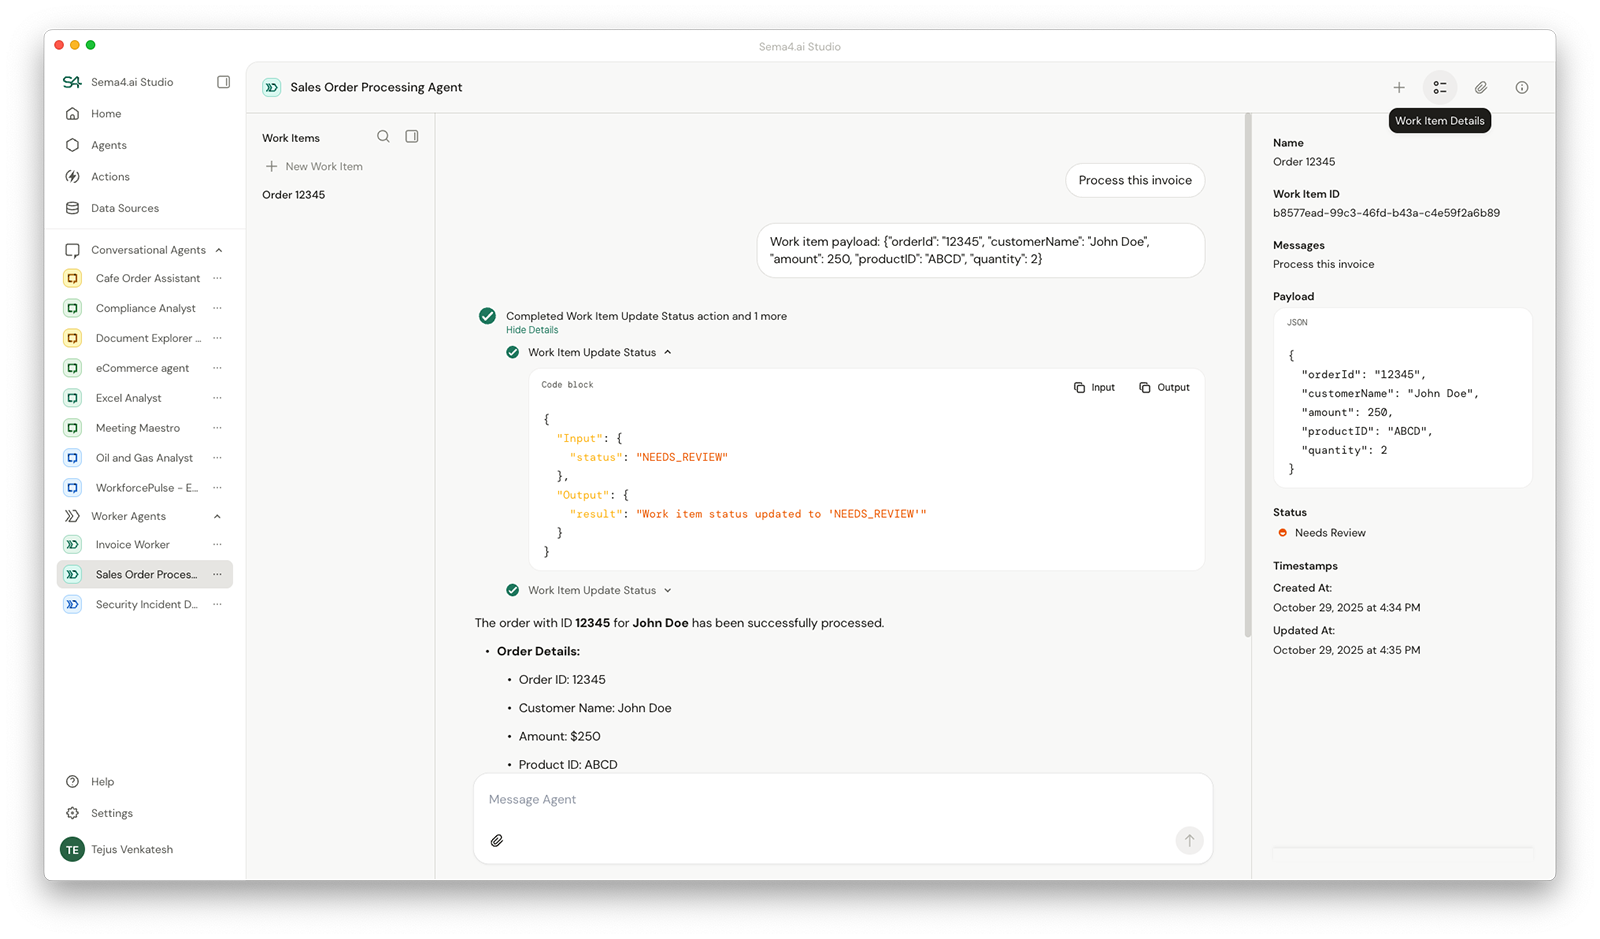
- Enter a name for the Work Item (e.g., "Order 12345") - This is optional but helps with identification. Agent will update the name automatically once the work item is picked for processing.
- Provide a descriptive message. This is the instruction to the worker agent when it picks up the work item.
- Optionally, add a JSON payload. For example, in the sales order details, you could include:
{ "orderId": "12345", "customerName": "John Doe", "amount": 250.00, "productID": "ABCD", "quantity": 2 } - Attach any relevant files if necessary.
- Click Create to submit the Work Item.
Monitor Work Item processing
Once created, the Work Item enters the Pending state. The Worker Agent automatically picks it up and begins processing. Track progress in real-time:
- The Work Item moves to Executing status
- View details in the Work Item Details tab on the right sidebar
- See the complete payload, attachments, and execution history
- Monitor as the agent works through each runbook step
- Work item will be marked as Completed or Failed based on the outcome.
- In the runbook, you can instruct the agent to mark the Work Item as Needs Review when you want manual intervention. This is useful for exceptions or edge cases that require human judgment. Or when you want to bring Human in the loop for approval.