Install from Snowflake Marketplace
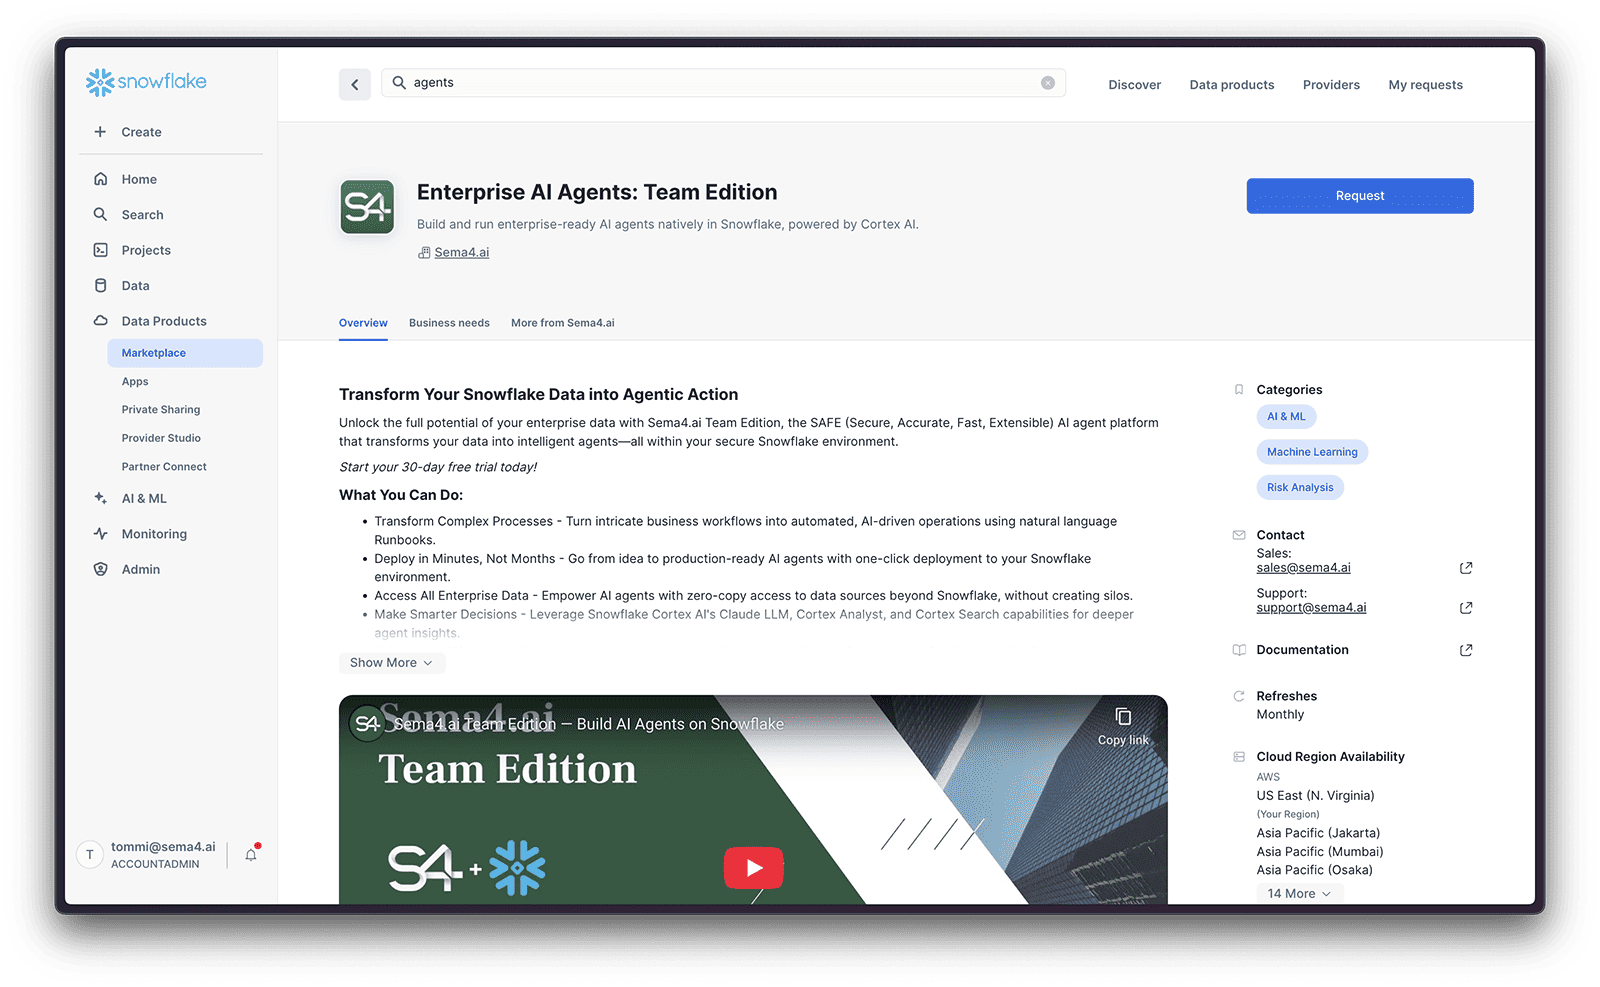
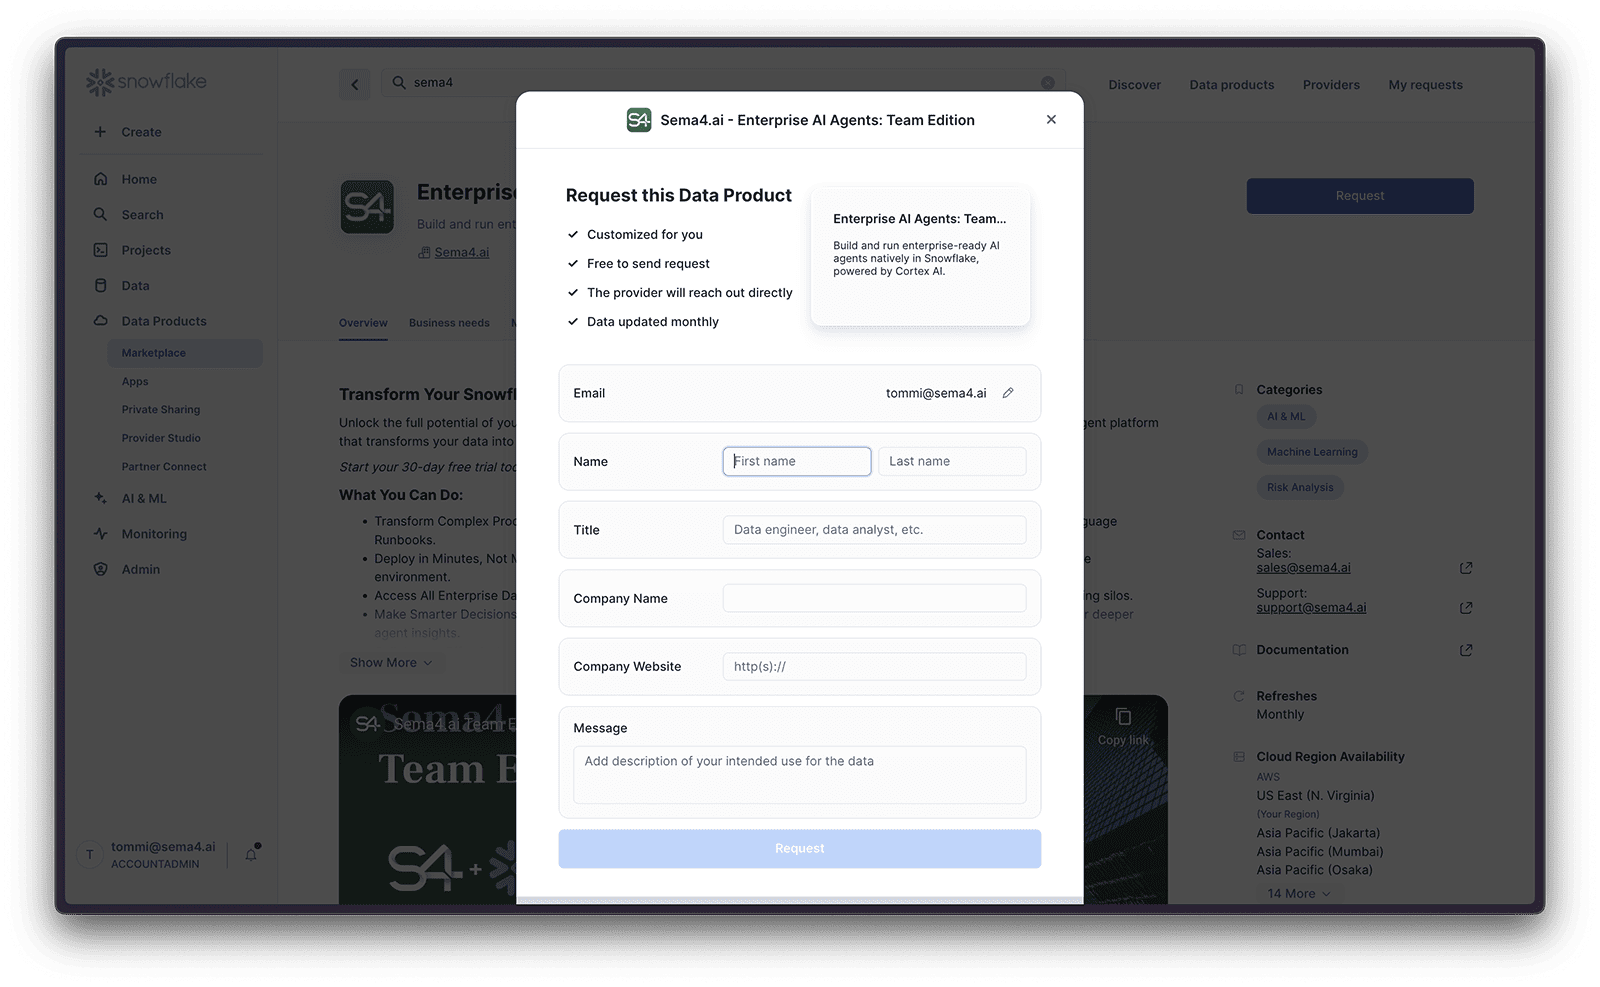
Sema4.ai Team Edition is available in the Snowflake Marketplace by request. To request access for your organization, please navigate to the marketplace listing (opens in a new tab) and click "Request" to get access. You will be asked to provide basic details about yourself and your organization.
Our team will review your request and get back to you as soon as possible.
Important note: due to current limitations of the Snowflake Marketplace, once you are provided access to the private version of the app your request will look like it's denied. Please ignore this and proceed with the installation.
When installing for the first time, you'll start a 30 days free trial of the application. If this is not your first installation, you are asked to review the pricing and provide a payment method before progressing. Note: when the trial ends, you will not be automatically charged - you still need to manually approve the pricing.
Start installation
Once your request is approved, you will get notified by email and will be able to install the app from the Snowflake Marketplace under the Data Products -> Apps view.
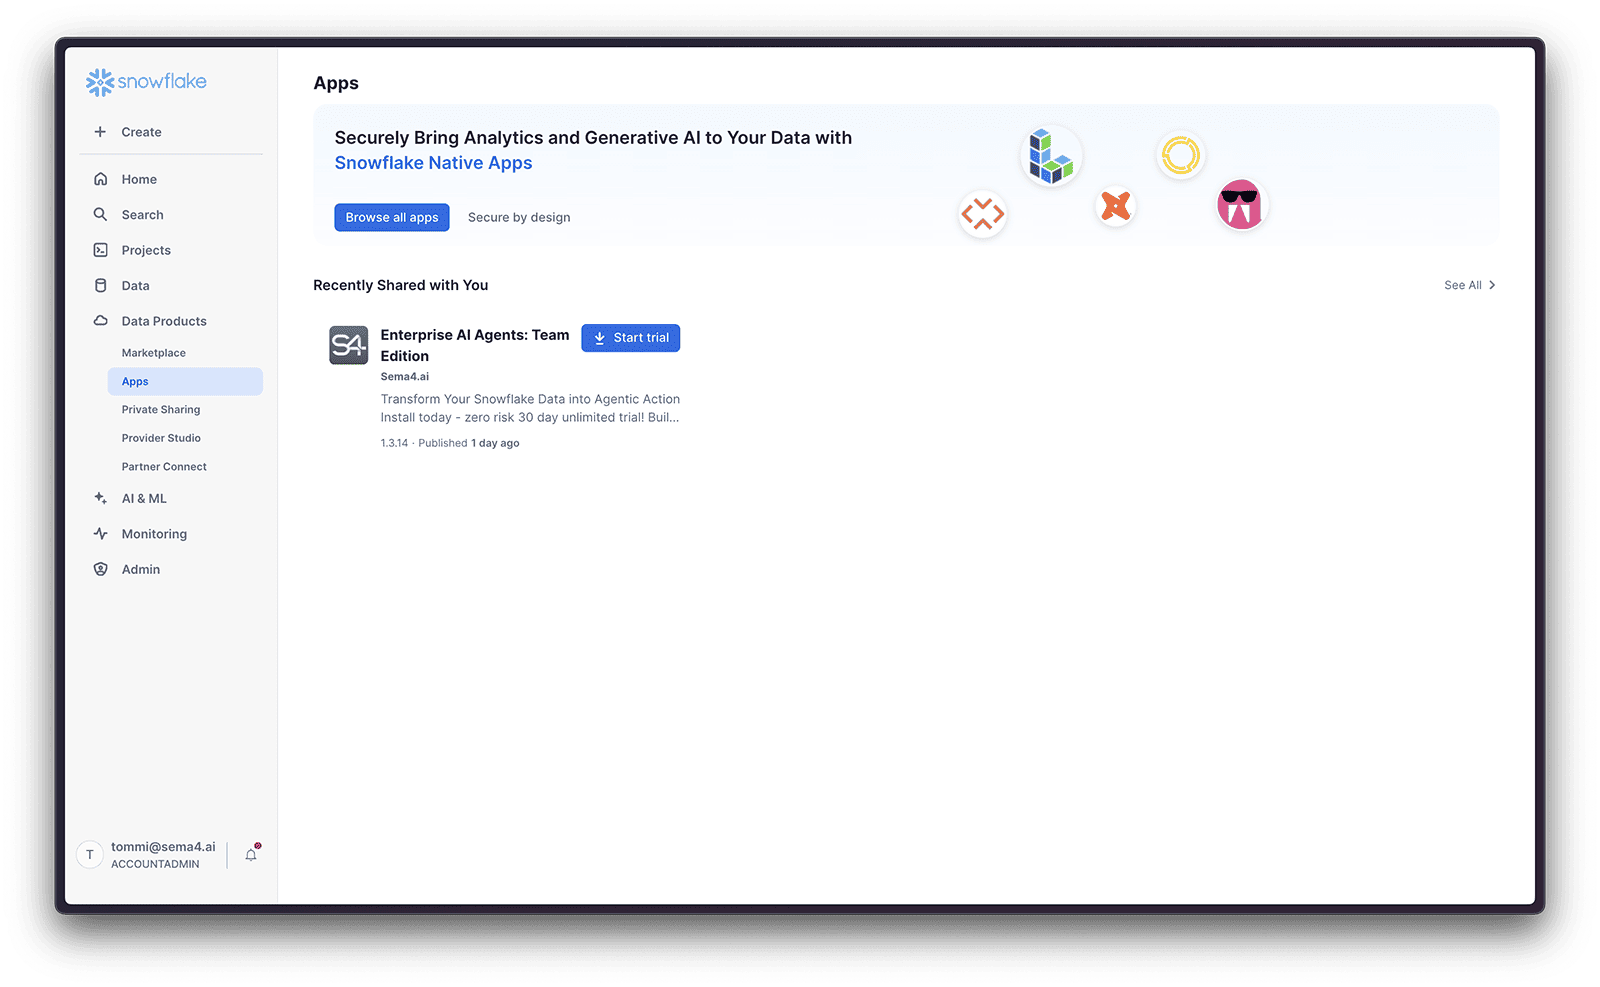
When installing for the first time, you'll start a 30 days free trial of the application. If this is not your first installation, you are asked to review the pricing and provide a payment method before progressing.
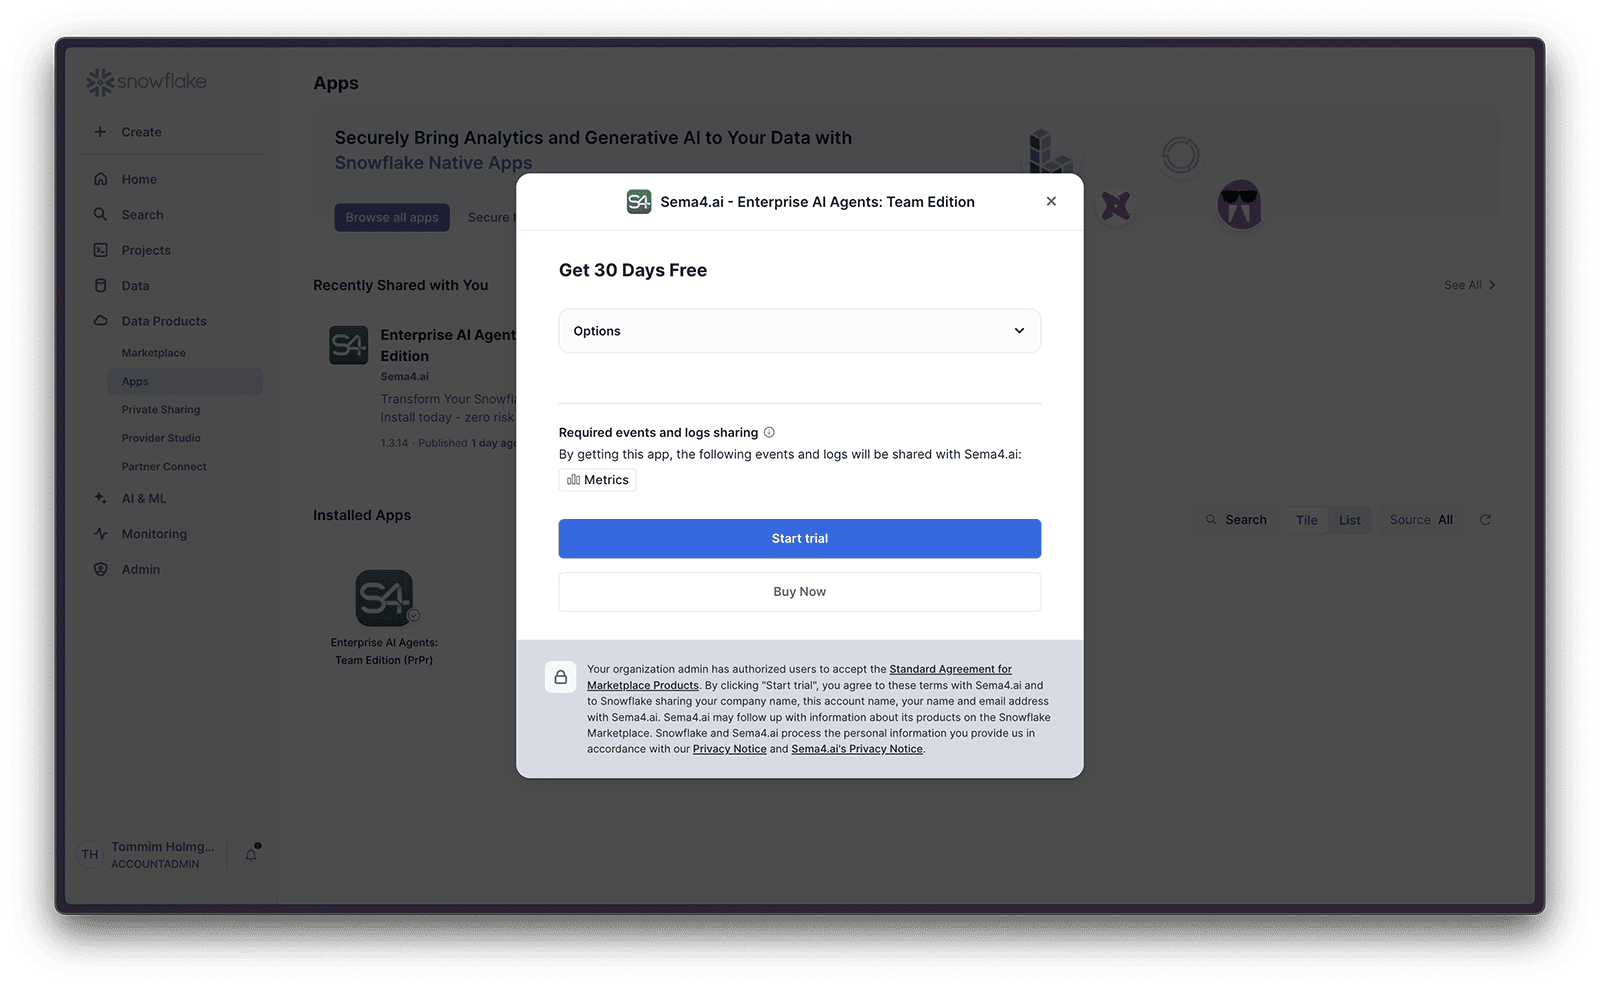
When the trial ends, you will not be automatically charged - you still need to manually approve the pricing.
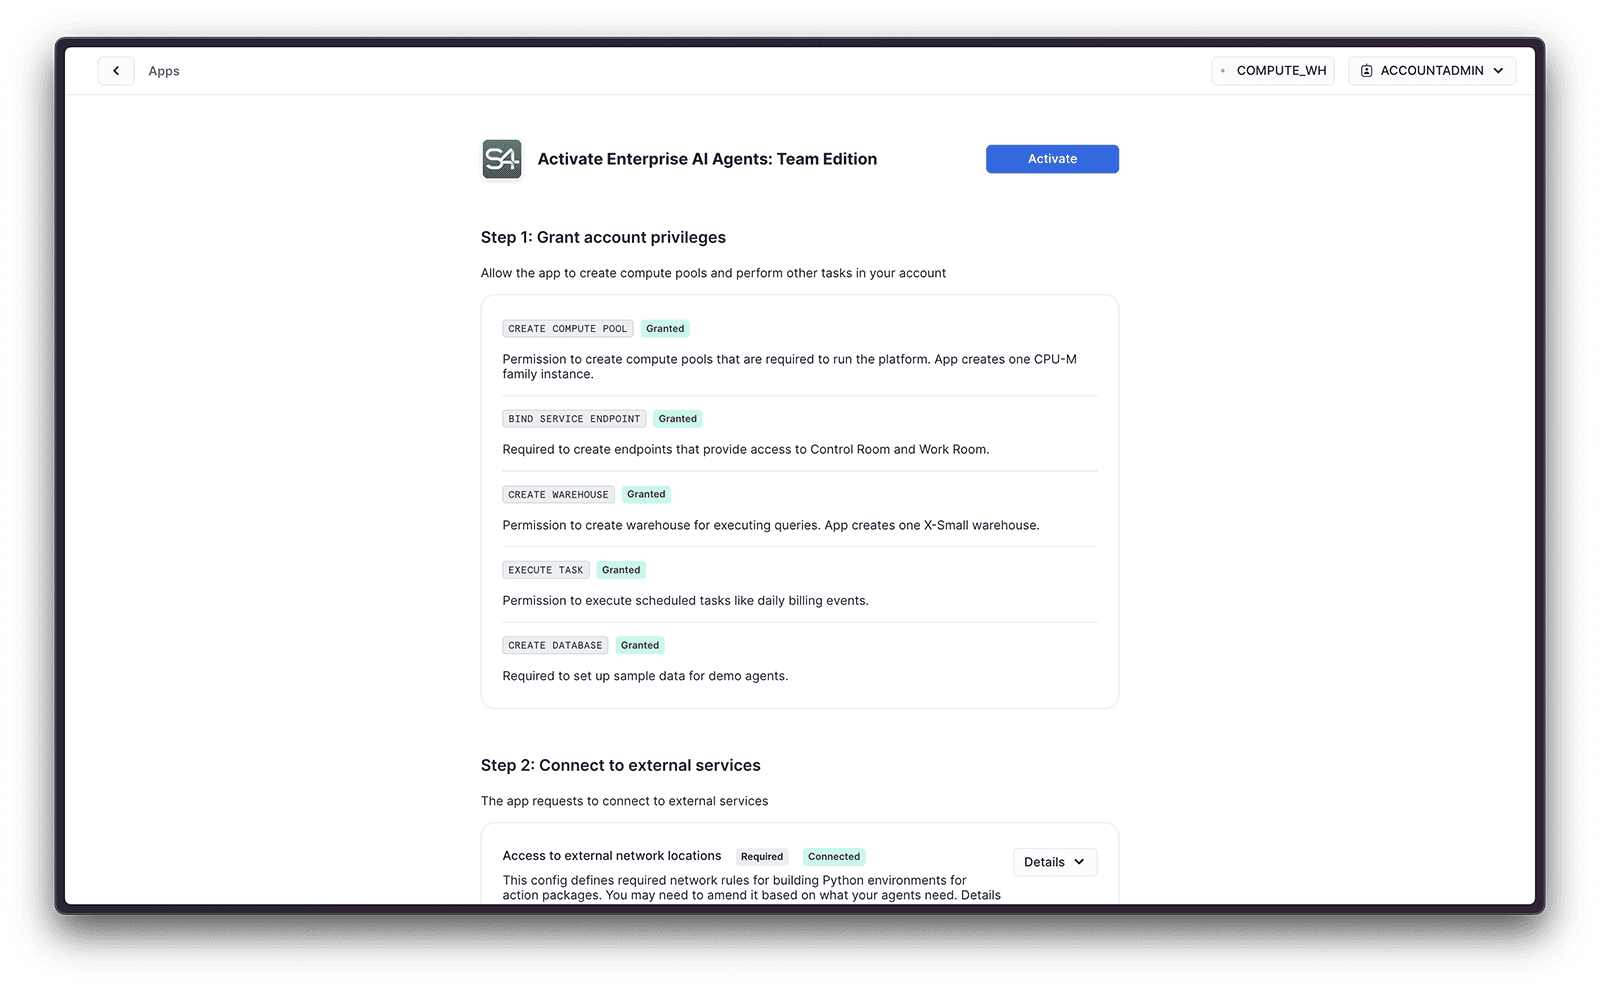
Grant Account Privileges
During the installation process, you'll be asked to grant the application the necessary permissions to access the objects it needs to use. You will see the following screen where you are expected to review the permissions and grant them by clicking the Grant button. Each permission is described in the user interface explaining what it is for and why it is needed.

Allow Connections
On the same screen with the account privileges, you'll be asked to grant the application the necessary External Access Integrations to access the endpoints it needs to use. Click the Review button to view the details of the allowed connections. Then click Connect to allow the application to access the endpoints it needs.
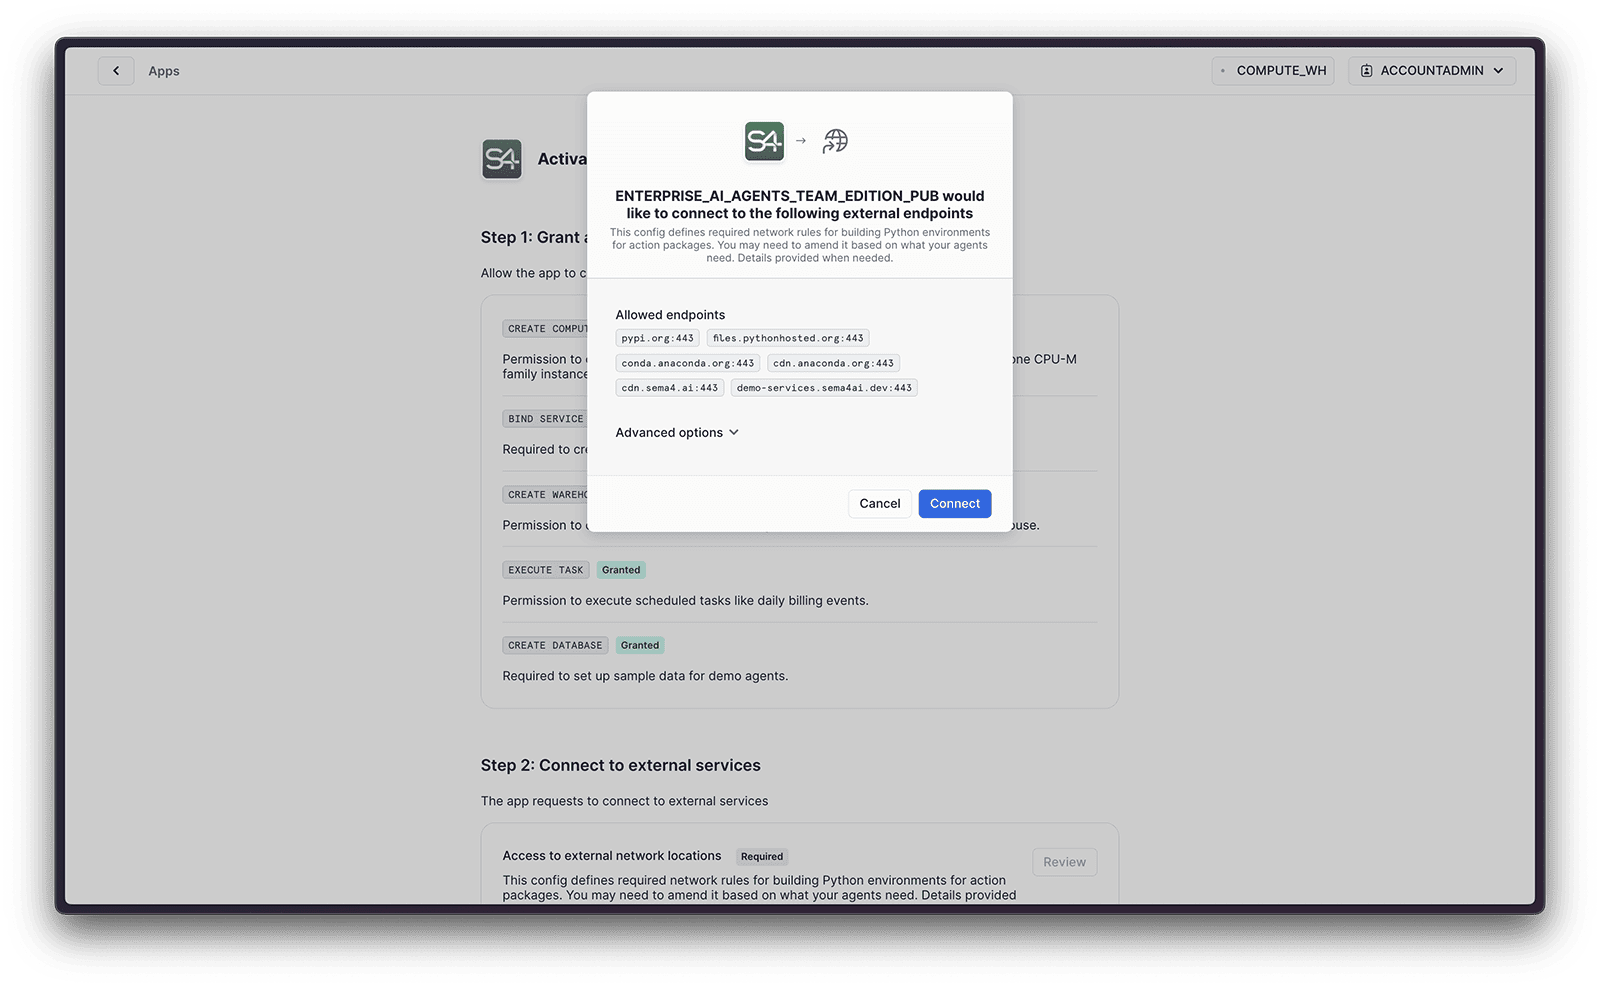
The application by default requires access to following endpoints:
| Endpoint | Purpose |
|---|---|
cdn.sema4.ai | To fetch the prebuilt action packages when users build agents with additional tools |
pypi.org | Primary repository for python dependencies |
files.pythonhosted.org | Package storage for python dependencies |
conda.anaconda.org | Main repository for conda dependencies |
cdn.anaconda.org | Content delivery for conda dependencies |
demo-services.sema4ai.dev | API services used by the demo agents |
Each agent, new LLM configuration, Oauth client etc will typically require new external access integrations to be added. Please refer to our Admin Guide for more details on managing the external access integrations.
Activate the application
All necessary permissions and external access integrations are granted, you are ready to click the Activate button, and then click the Launch app button to get to the actual application!
Wait for a few moments while the Streamlit admin view of the Sema4.ai Team Edition application is being activated.
Create services
Sema4.ai Team Edition application consists of three main components:
- Admin view - use this Streamlit view to configure the service and manage it's state like suspending and resuming the service
- Control Room - this is what the operator uses to deploy and manage agents and configurations
- Work Room - this is what the business users use to get work done with agents
When landing the Admin view for the first time, you'll need to create the services, which starts the Control Room, Work Room and all necessary services in Snowpark Container Service. Click the Create button to start the process, and wait for the service to be created. You may refresh the page to see the status of the service.
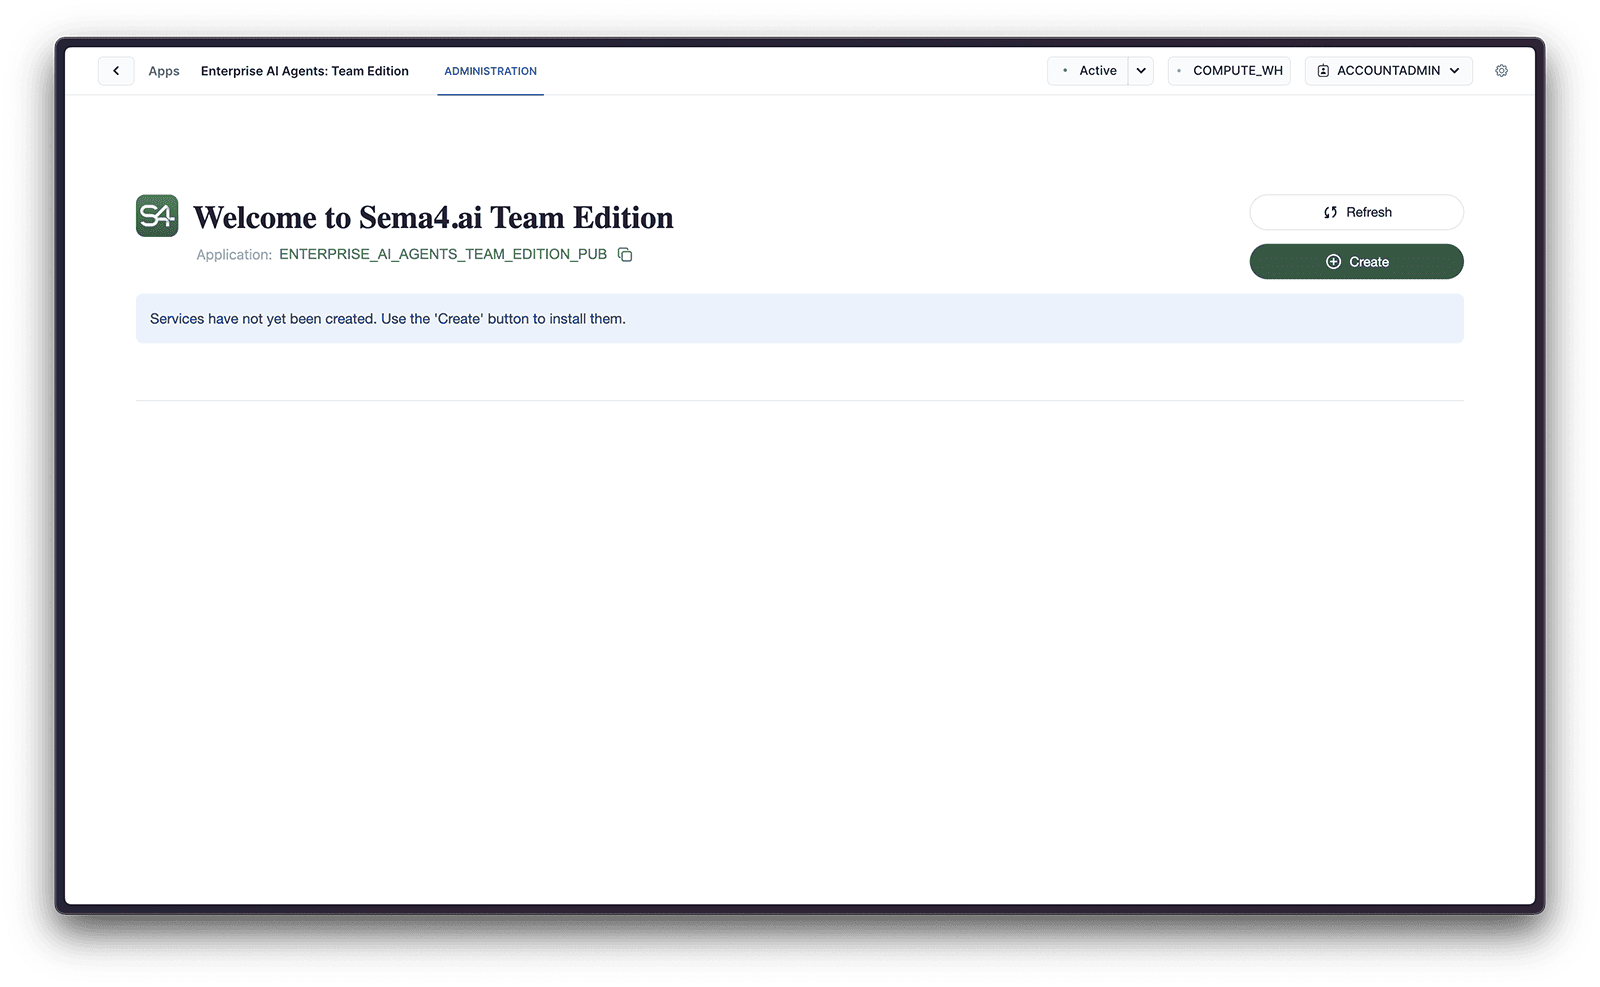
The service creation process will take several minutes to complete. Patience, young grasshopper!
After a few minutes, try hitting the Refresh button to see the status of the service.
Grant application access to Cortex
Agents are using Cortex LLMs by default, so you need to grant the application access to the Cortex user role and Cortex models. Also make sure to enable cross-region inference if you are using LLMs in other regions than where they are available natively.
For more information about the Cortex model configurations and RBAC see https://docs.snowflake.com/en/user-guide/snowflake-cortex/aisql#role-based-access-control-rbac (opens in a new tab)
ALTER ACCOUNT SET CORTEX_ENABLED_CROSS_REGION = 'ANY_REGION';
GRANT DATABASE ROLE SNOWFLAKE.CORTEX_USER TO APPLICATION ENTERPRISE_AI_AGENTS_TEAM_EDITION;
CALL SNOWFLAKE.MODELS.CORTEX_BASE_MODELS_REFRESH();
GRANT APPLICATION ROLE SNOWFLAKE."CORTEX-MODEL-ROLE-ALL" TO APPLICATION ENTERPRISE_AI_AGENTS_TEAM_EDITION;
Grant user role an access to application
ACCOUNTADMIN has all roles enabled by default. You may skip this step and come back later to grant the necessary permissions to your other users.
For your users to be able to use the application, you need to map an account role to an application role. Sema4.ai application has three roles:
SEMA4_APP_ADMIN- allows the role to manage the native application, including starting and stopping the service, managing users and their access, and configuring the application in the Streamlit Admin view.SEMA4_APP_OPERATOR- allows the role to access the Control Room application via the service URL, by logging in with their own Snowflake credentials, where users can publish and deploy agents as well as to maintain configurations such as secrets, OAuth and LLMs. This role also allows publishing agents from Sema4.ai Studio to Snowflake.SEMA4_APP_WORK_ROOM- allows the role to access the Work Room application via the service URL, by logging in with their own Snowflake credentials and using the deployed agents.SEMA4_APP_PUBLIC_API- allows the role to access the public API.
In order to have an account role that can link Studio to Snowflake to publish agents, deploy them in Control Room and use them in Work Room we'll show how to create a new account role and grant it the necessary application roles.
You can use your existing account roles, just replace them in the SQL statements below, or use the Snowsight user interface to perform the same steps. Follow instructions here.
USE ROLE SECURITYADMIN;
CREATE ROLE AGENT_OPERATOR;

USE ROLE ACCOUNTADMIN;

-- If you changed the application name, replace it with your own
USE DATABASE ENTERPRISE_AI_AGENTS_TEAM_EDITION;
GRANT APPLICATION ROLE SEMA4_APP_OPERATOR TO ROLE AGENT_OPERATOR;
GRANT APPLICATION ROLE SEMA4_APP_WORK_ROOM TO ROLE AGENT_OPERATOR;

-- Replace warehouse and user name with your own values
GRANT USAGE ON WAREHOUSE <your_warehouse> TO ROLE AGENT_OPERATOR;
GRANT OPERATE ON WAREHOUSE <your_warehouse> TO ROLE AGENT_OPERATOR;
GRANT ROLE AGENT_OPERATOR TO USER <your_user_name>;
Test application
Once the role is granted head back to the Streamlit admin view and you should see the statuses turn to "Running", and you'll see the service endpoints in the Admin view.
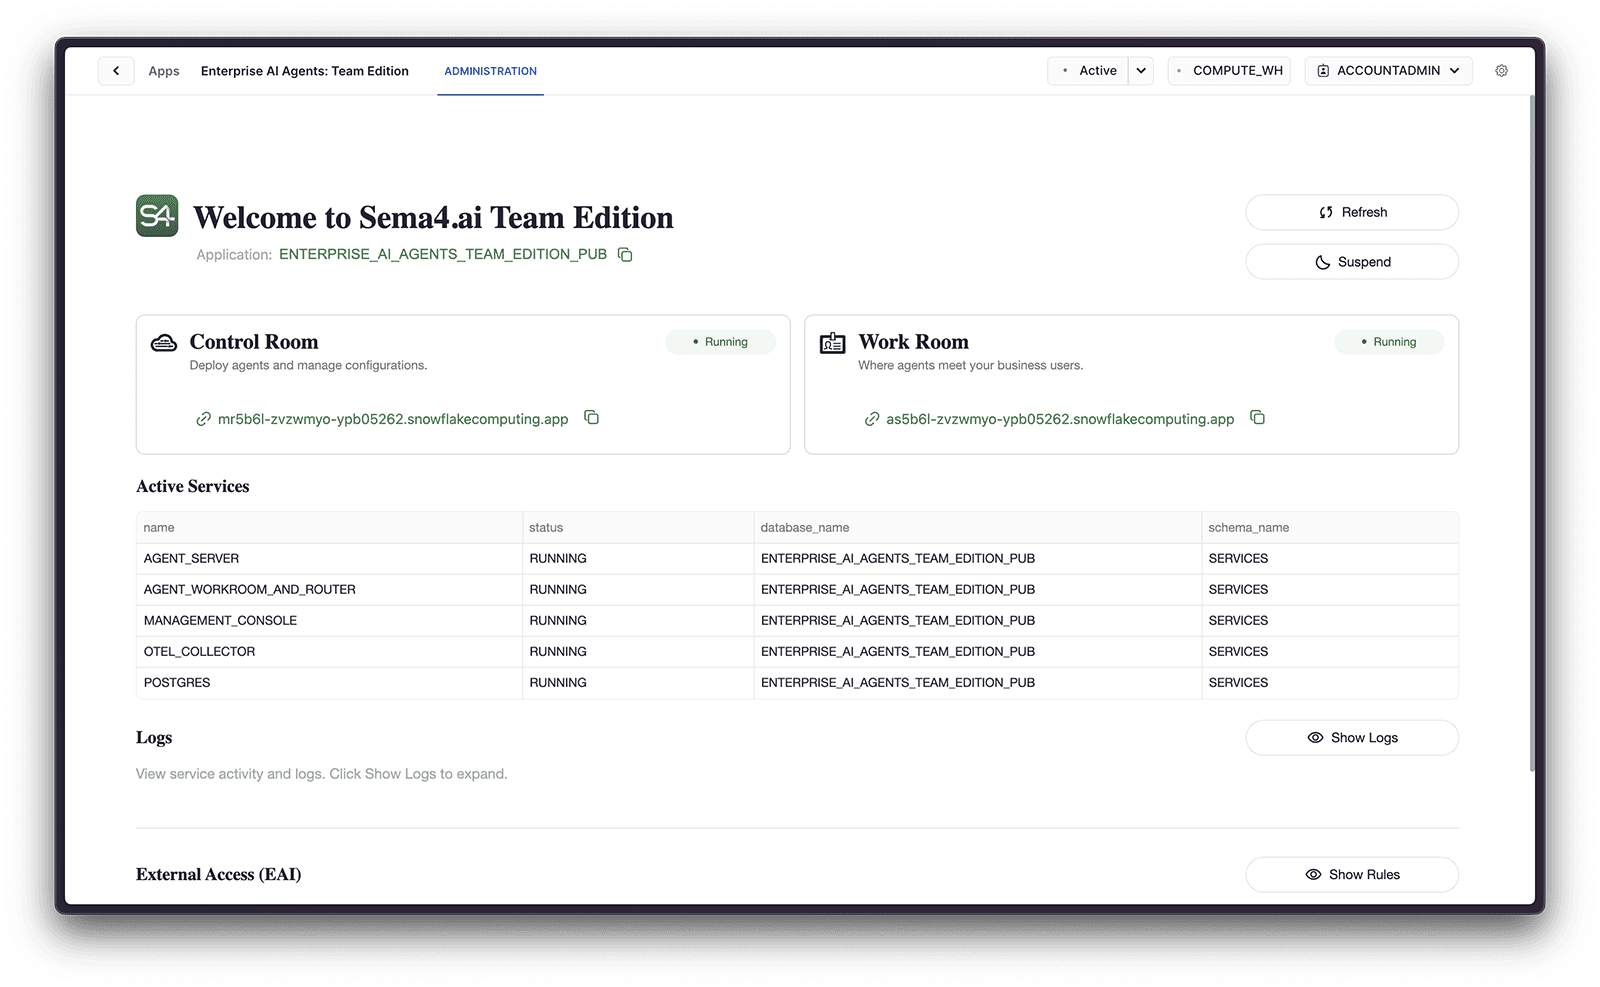
Now it's time to test the application! Copy the Control Room URL provided in the Admin view to access the Team Edition application's Control Room, and open a new tab with this URL. You should see the Sema4.ai Control Room , and showing you a home screen with tips to get started. 🎉
End users in your organization should bookmark the direct URLs to the Control Room and Work Room applications. This will make it easier for them to access the application they need!