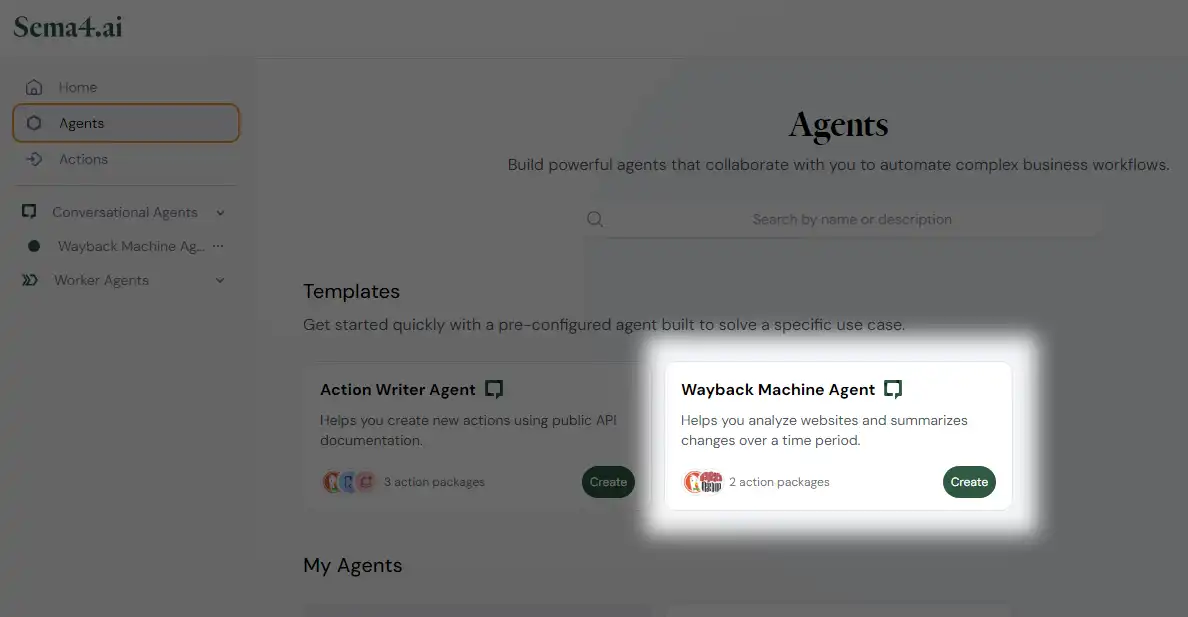
Set up and deploy the Wayback Machine agent
- In Sema4.ai Studio, go to the Agents screen using the main navigation on the left.
- Click Create in the Wayback Machine Agent card.
This is a safe testing space
Don't worry. You can't destroy anything. All you do here runs only in your instance of Studio. We'll let you know once you get to publishing anything beyond the gates of your computer.
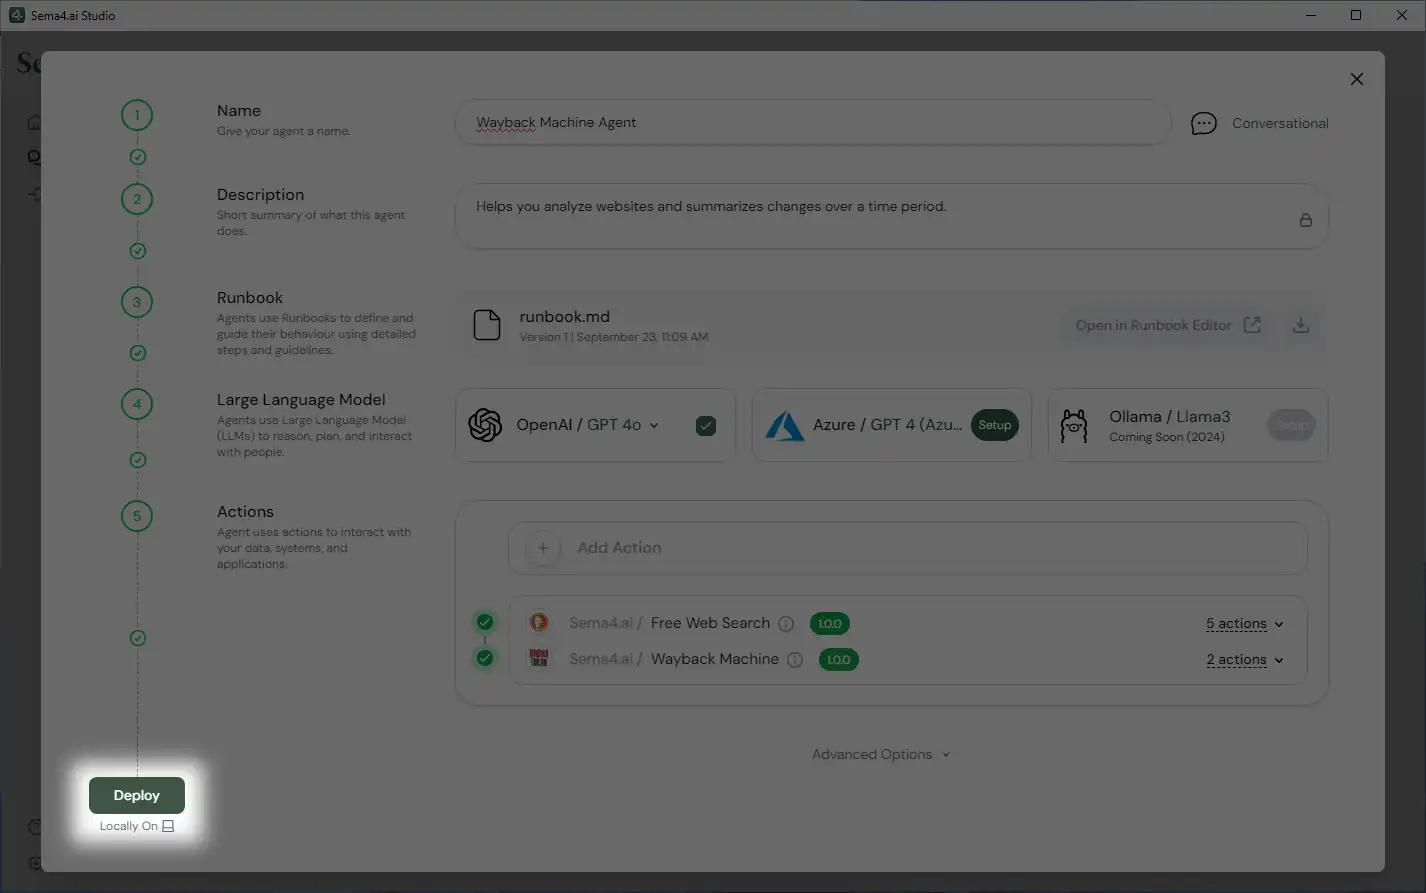
Set up the agent
The screen you see is the primary 5-step agent setup screen screen where you define the core settings of your agent:
- Name and describe your agent
- Write its runbook
- Select an LLM configuration for the agent
- Select actions the agent will use

The only parameter you need to set up in pre-configured agents is the LLM. The other settings are already prepared for you and you can't edit them.
In section 4 of the setup screen, you have several LLM options to choose from. Which option you pick depends mostly on what's available to you. By now, you should have at least one LLM configuration saved.
To set up the option you've selected:
- Click Setup.
- Select a configured LLM.
- Click Confirm to save the settings.
Deploy the agent
After you successfully set up the LLM, click Deploy in the bottom-left corner of the screen.
Once you click the Deploy button, Studio starts preparing the agent for the first run. This may take a minute or two.
When the loading is done, you arrive to the chat interface which you'll use to interact with your brand new agent.