Quickstart
Prerequisites
Before starting this tutorial, make sure you have:
- Installed Sema4.ai Studio and connected it to Snowflake
- Installed the Sema4.ai SDK extensions
- Completed the Data setup guide to create the required database objects and load sample data
- The following Snowflake requirements:
- Admin level access to a Snowflake account
- Key-pair authentication set up for your Snowflake user
- Cortex AI LLM usage granted to your account/role (and cross-region inference enabled in case your Snowflake account is in a region where it's needed, read more here (opens in a new tab))
Import an existing agent
You'll learn how to:
- Import an agent to Sema4.ai Studio
- Connect Studio to your Snowflake data sources
- Connect your agent to Snowflake Cortex Analyst
- Open an agent package using your IDE
- Test your agent locally
Open Sema4.ai Studio
We'll get started using Sema4.ai Studio. Open it up and take a moment to look around the Studio. These are the main tabs you'll be using:
- Agents - This is where you'll see all your agents, create and manage agents.
- Actions - Home of the actions that your agents can use. We've included a gallery of pre-built actions to common platform (tagged with prefix
Sema4.ai) and you can also create your own (will be tagged with prefixMy Actions). - Data Sources - Connections to data sources that you can use in your agents.

Download and import an agent package
We'll start by downloading an agent pacakge zip file from here (opens in a new tab).
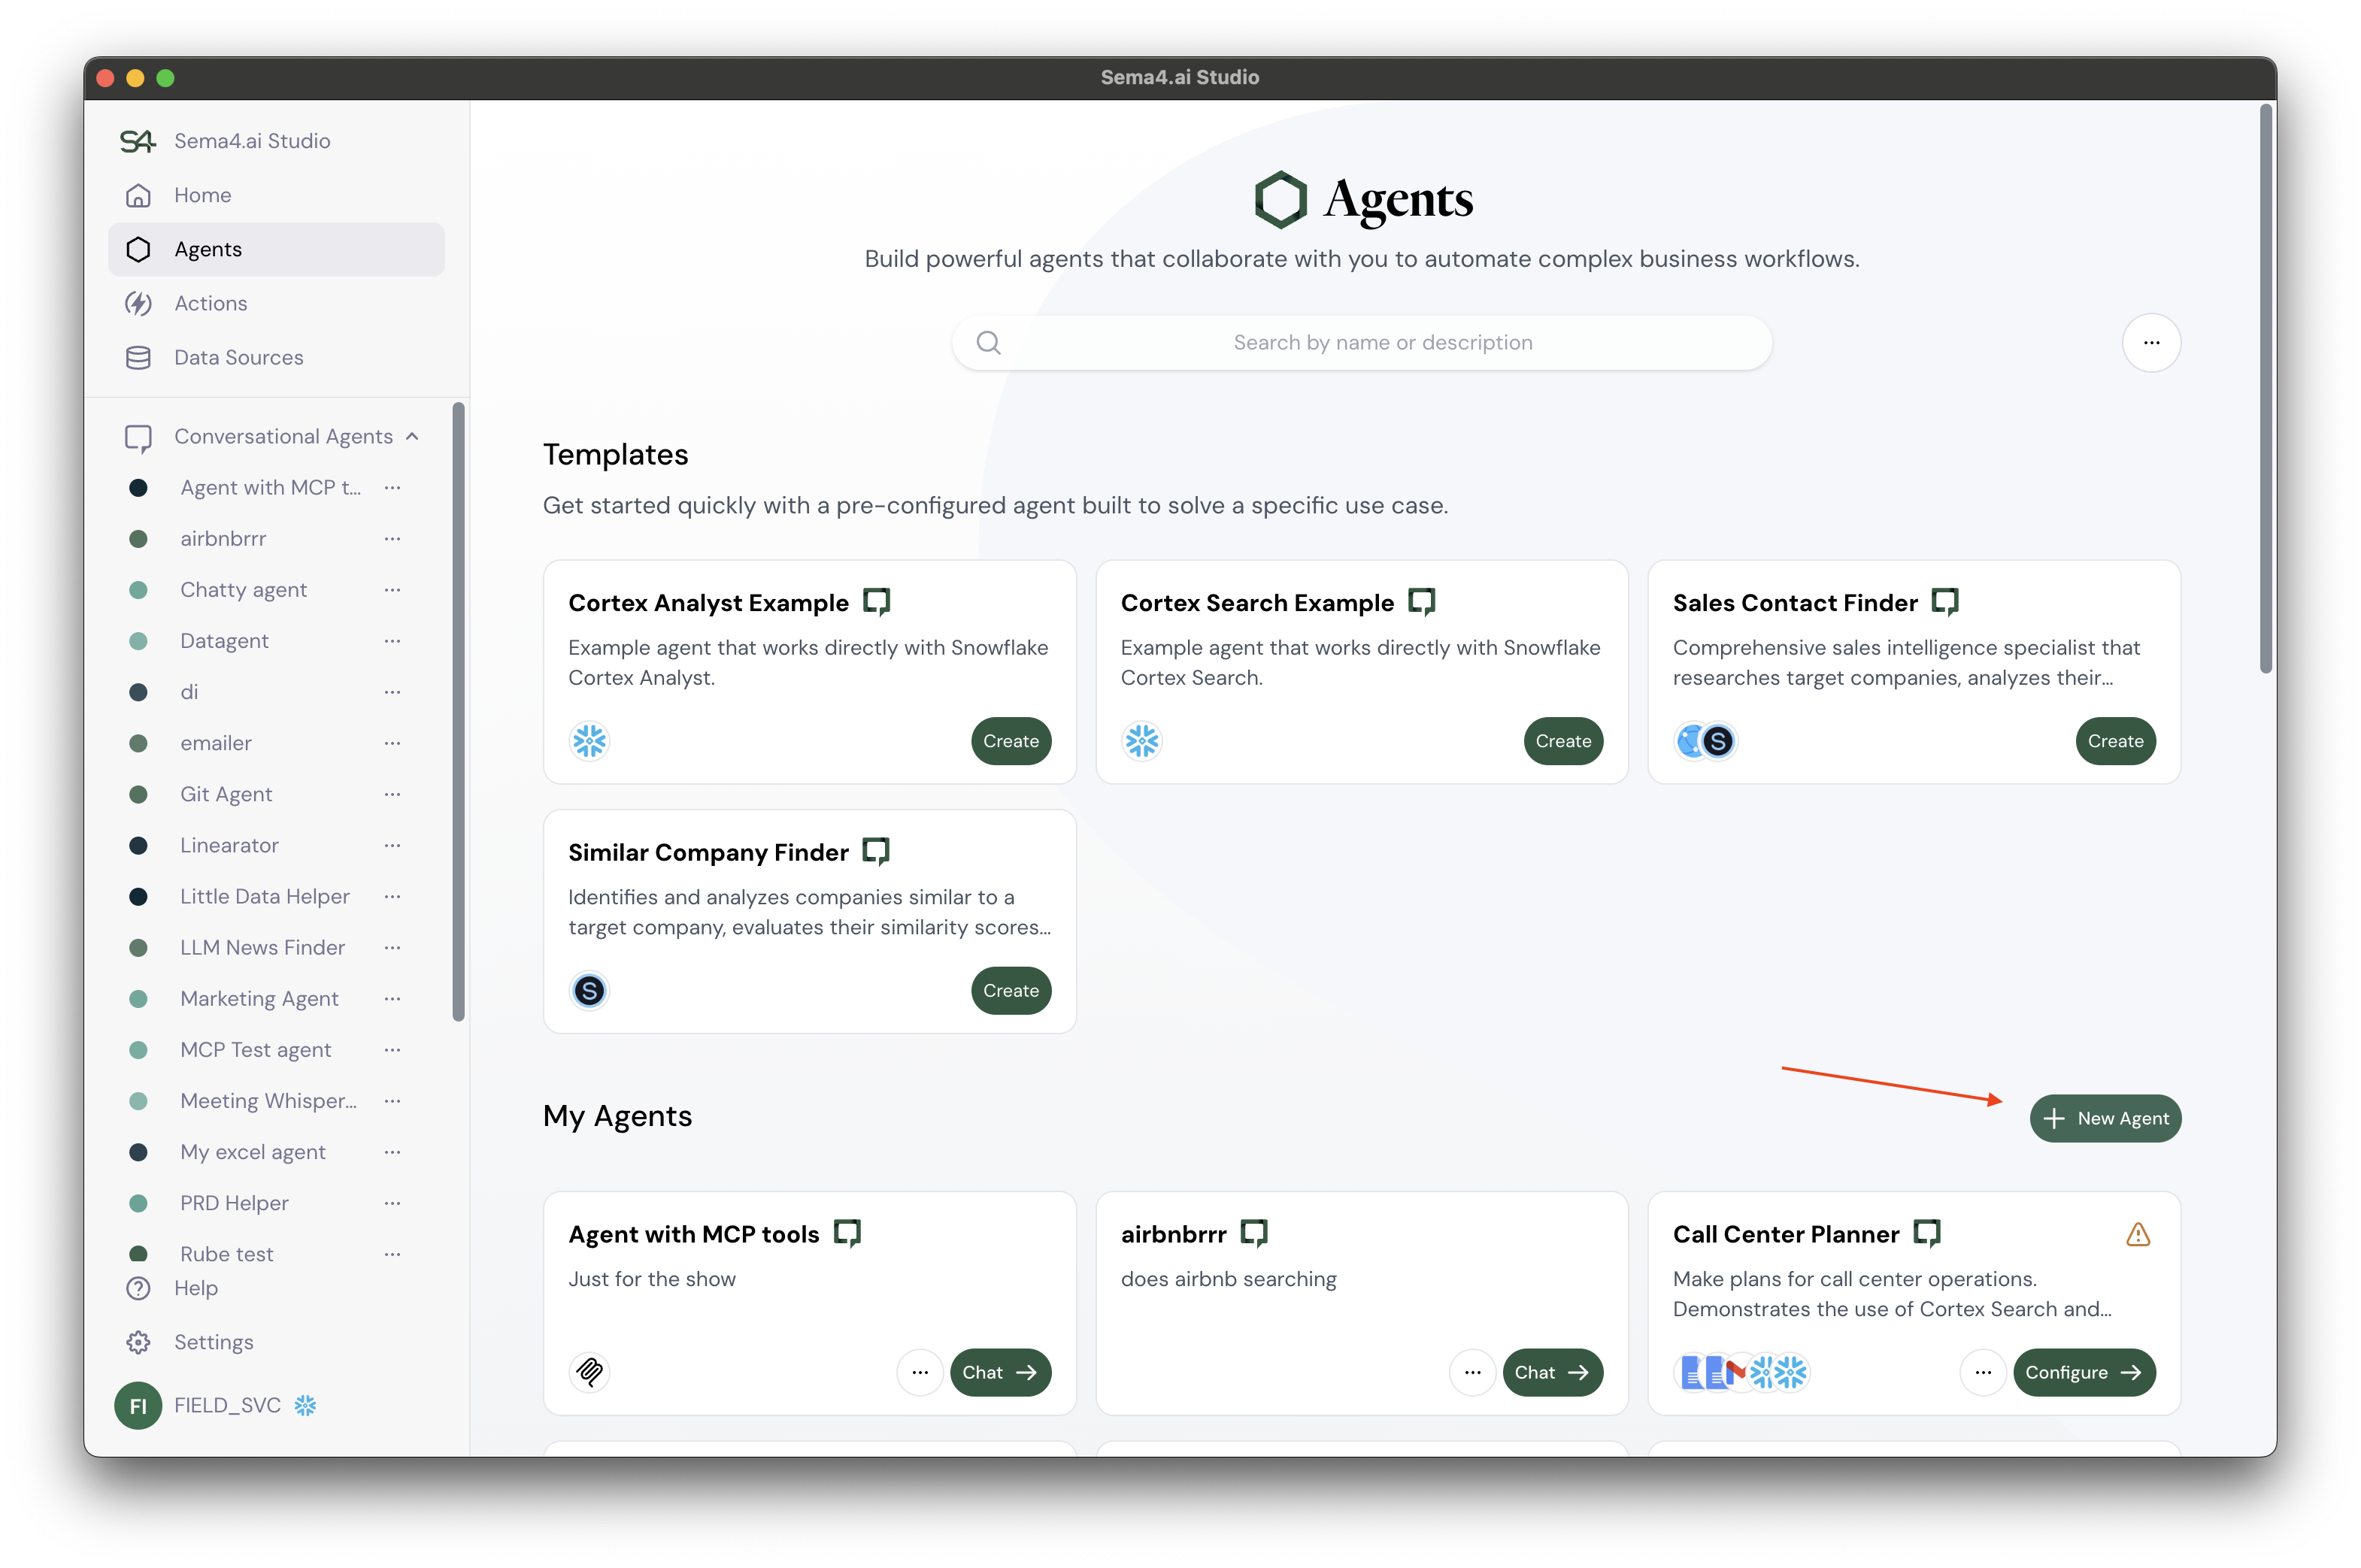
Once you have the file downloaded, navigate to the Agents tab in Sema4.ai Studio and click the New Agent button.
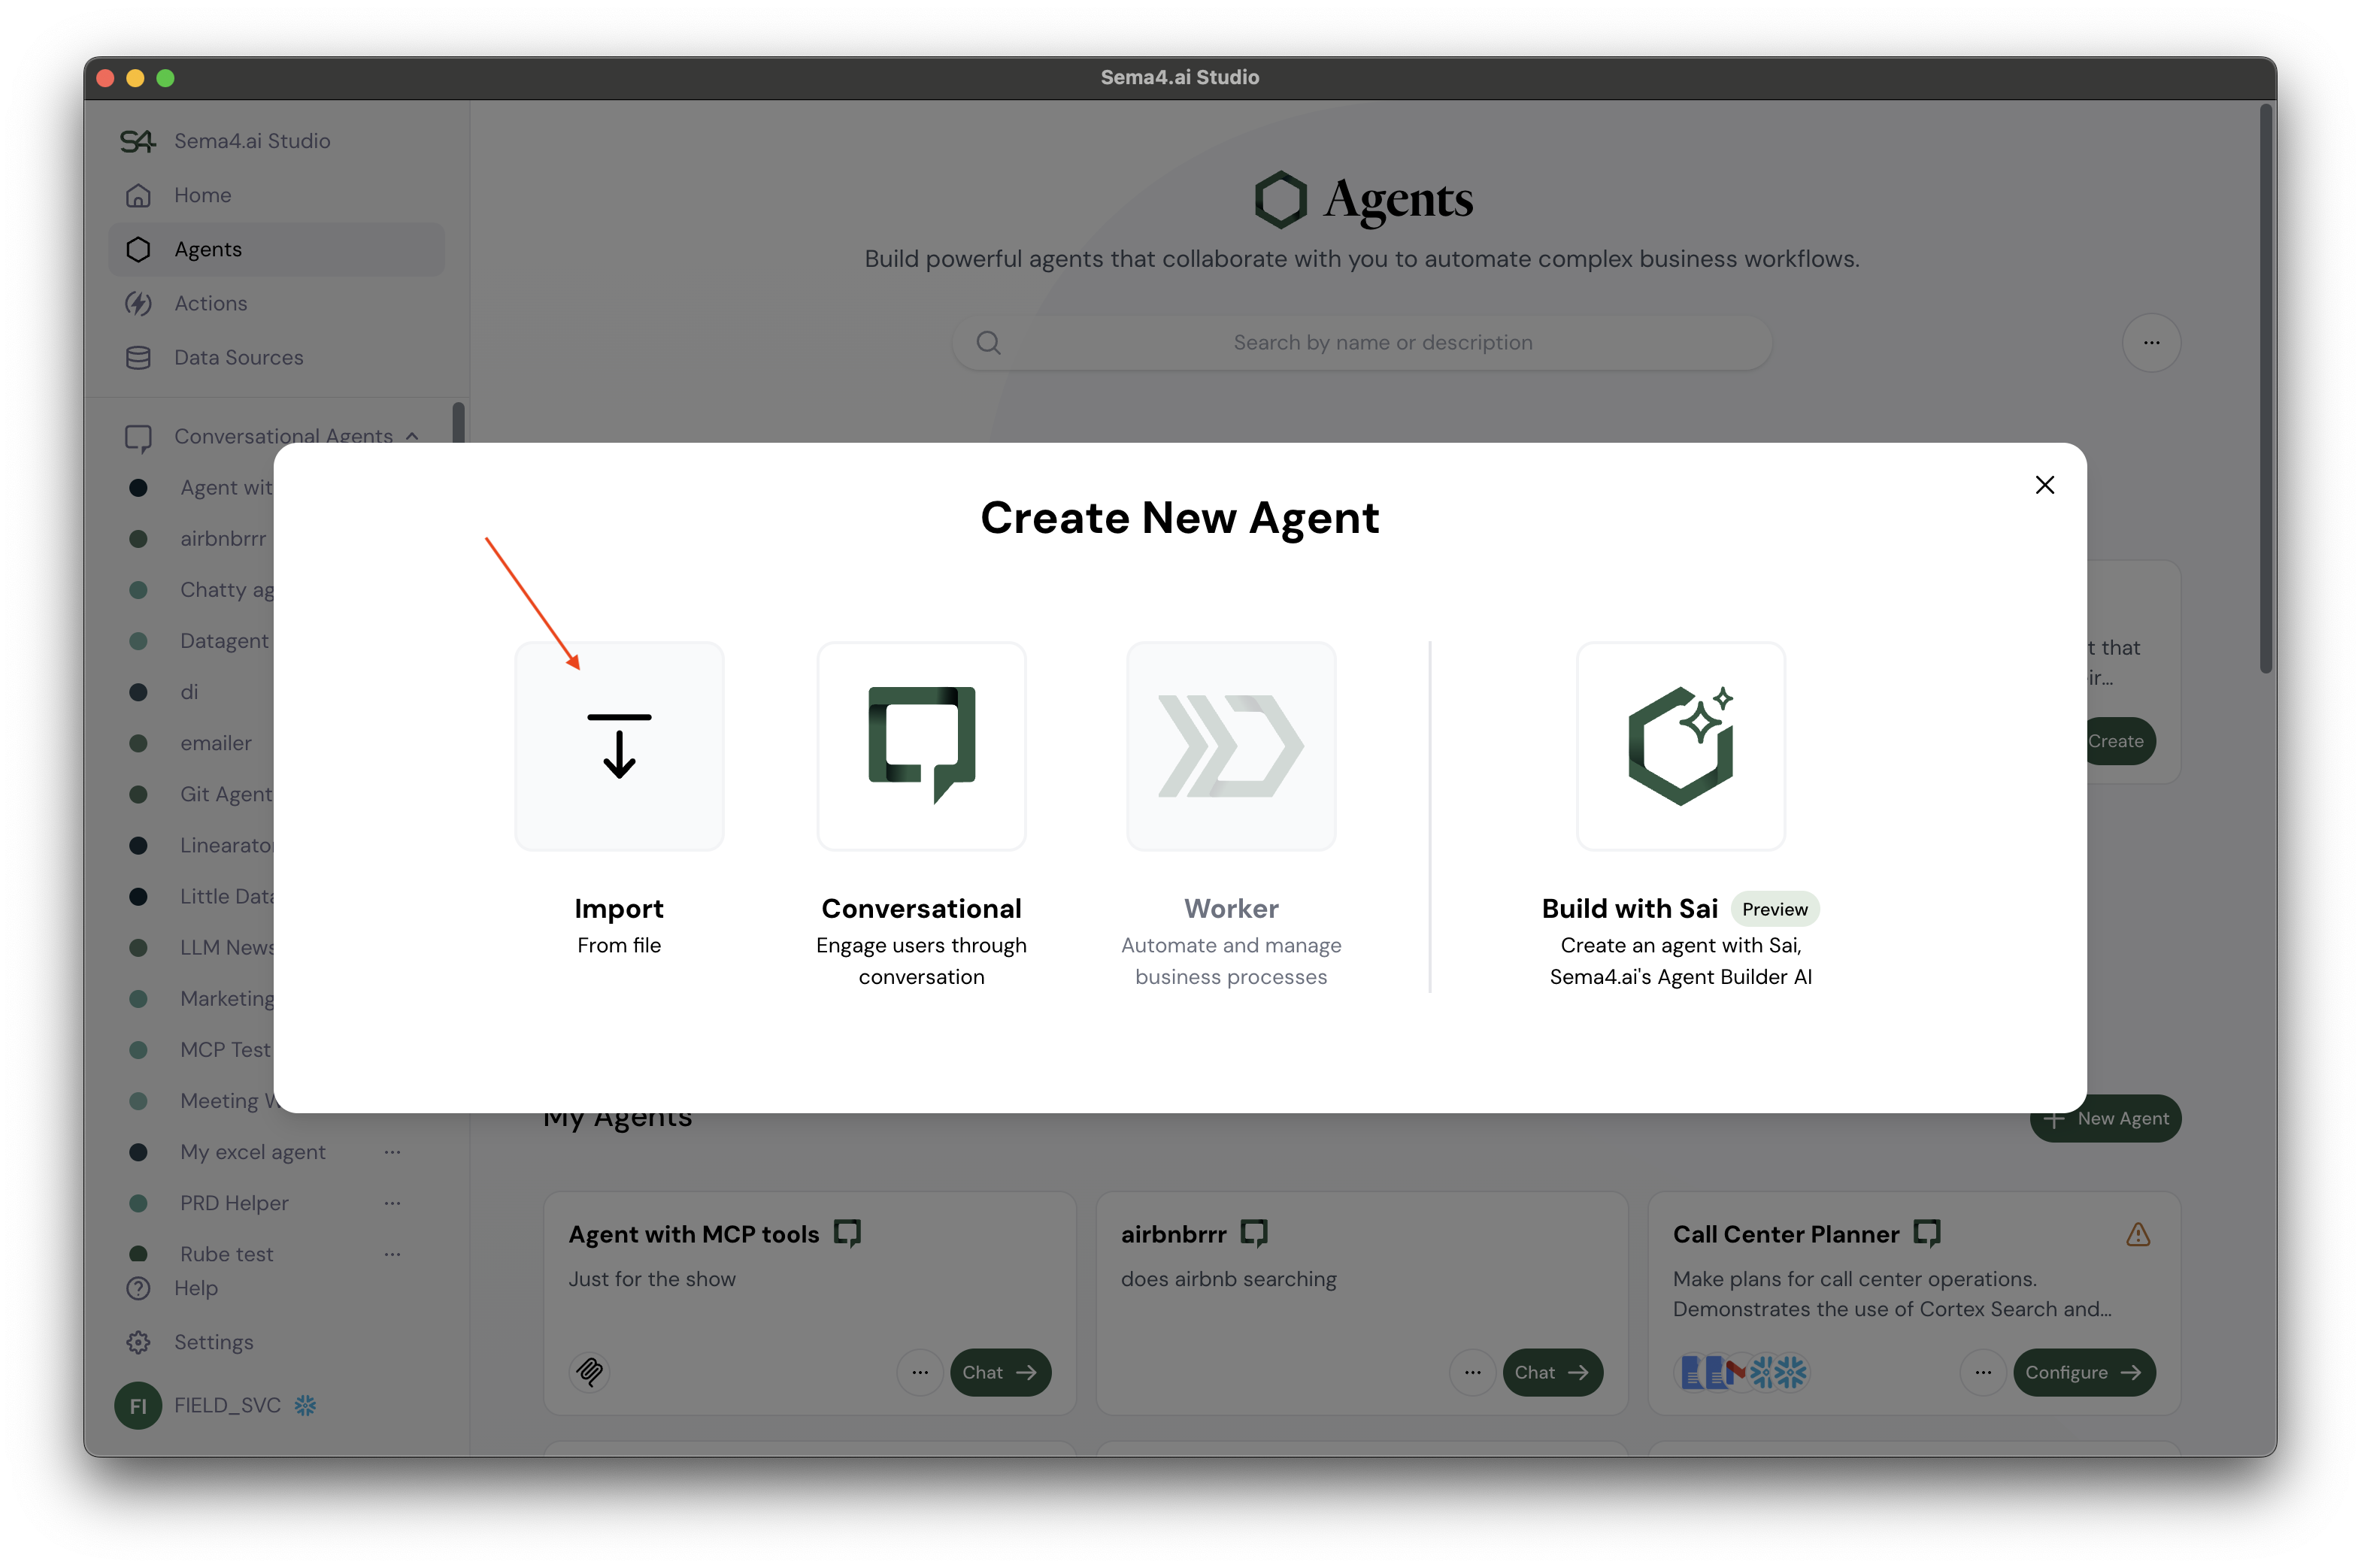
From the dialog that appears, click the Import from file button and select the zip file you downloaded.
Configure the agent
- Open Sema4.ai Studio - you should automatically be redirected to the Agents tab where you can see your agent importing.
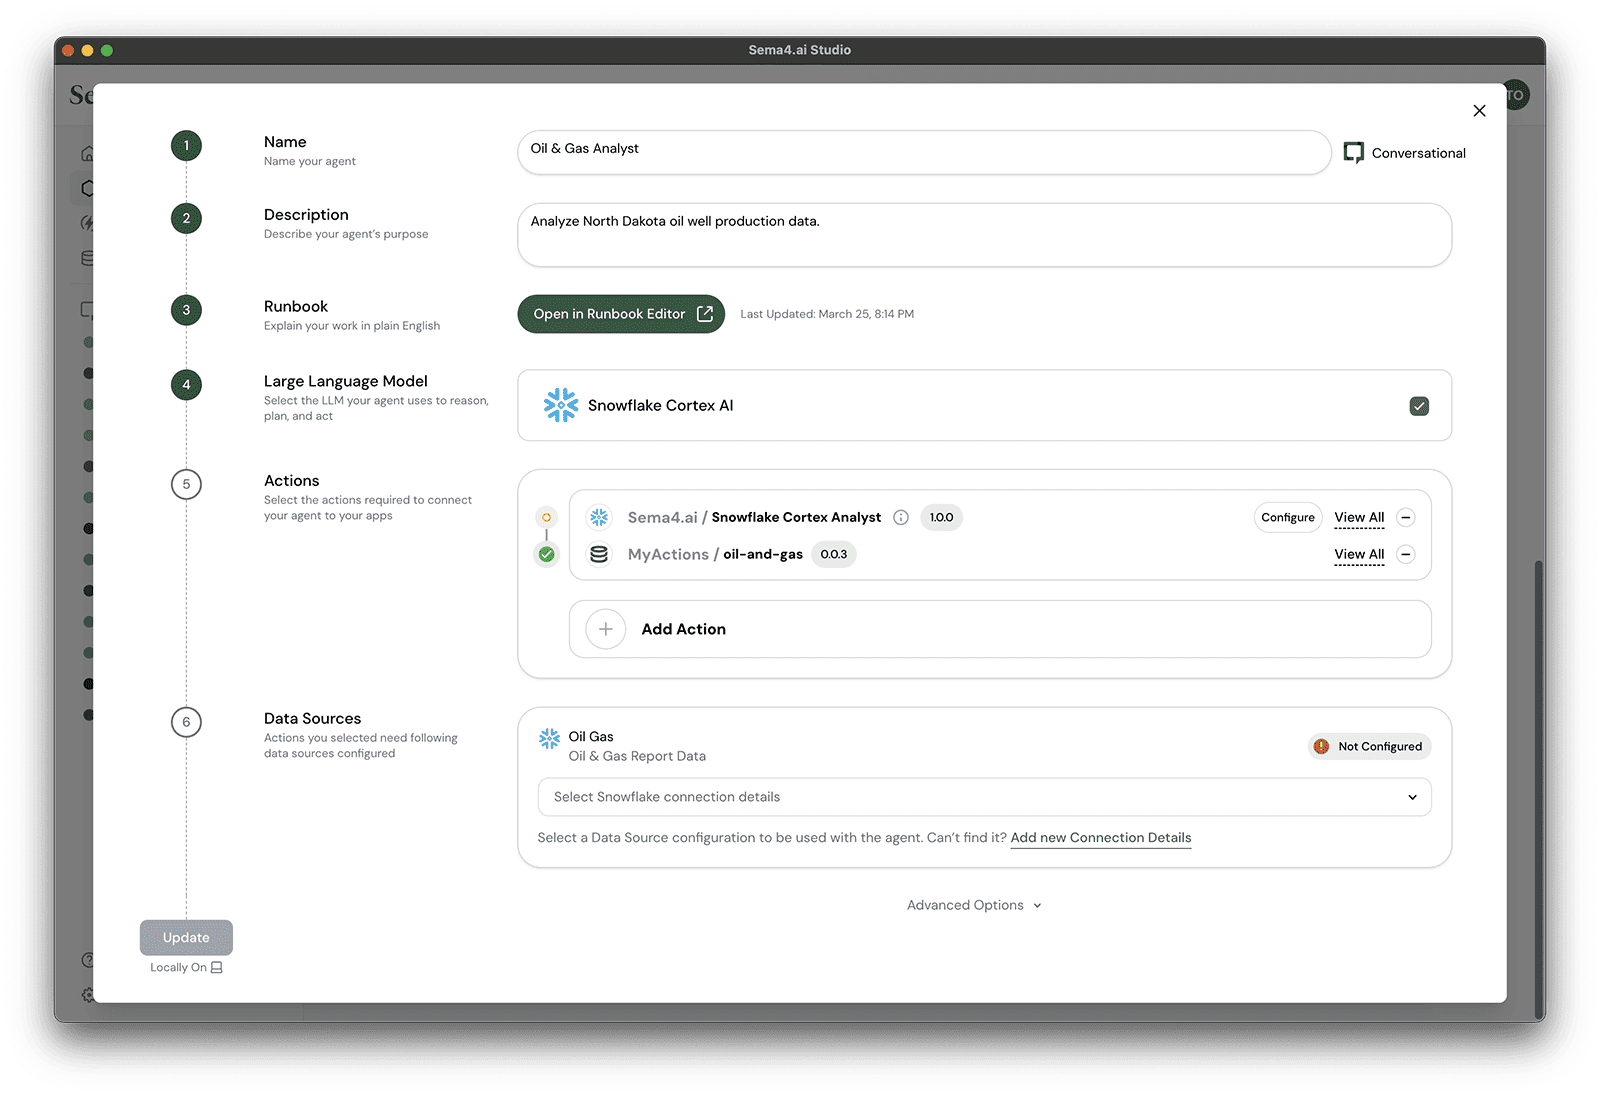
- Once your agent is imported, you'll automatically see the agent import screen where we need to configure it to connect to your Snowflake data sources and Cortex Analyst.
Configure the Snowflake Cortex Analyst action
- Under Actions, click the Configure button for the Snowflake Cortex Analyst action.
Enter the following information:
| Configuration | Value |
|---|---|
| Database | OIL_AND_GAS |
| Schema | PUBLIC |
| Semantic model file | @OIL_AND_GAS.PUBLIC.CORTEX_ANALYST/oil_gas.yaml |
| Warehouse | SEMA4_DEMO_WH |
You can click the icon in any input field to reveal its contents.
- Click Confirm when done.
Configure the Data Source
- Under Data Sources, click the Add new Connection Details link to add a new connection to your Snowflake data.
- In the pop-up window, enter the following information:
| Setting | Value |
|---|---|
| Name | Oil & Gas |
| Description | Quickstart Oil & Gas Production Results |
| Engine | Snowflake |
| Credentials | Linked Account - (Your Snowflake account name) |
| Warehouse | SEMA4_DEMO_WH |
| Database | OIL_AND_GAS |
| Schema | PUBLIC |
- Click Save Connection when done.
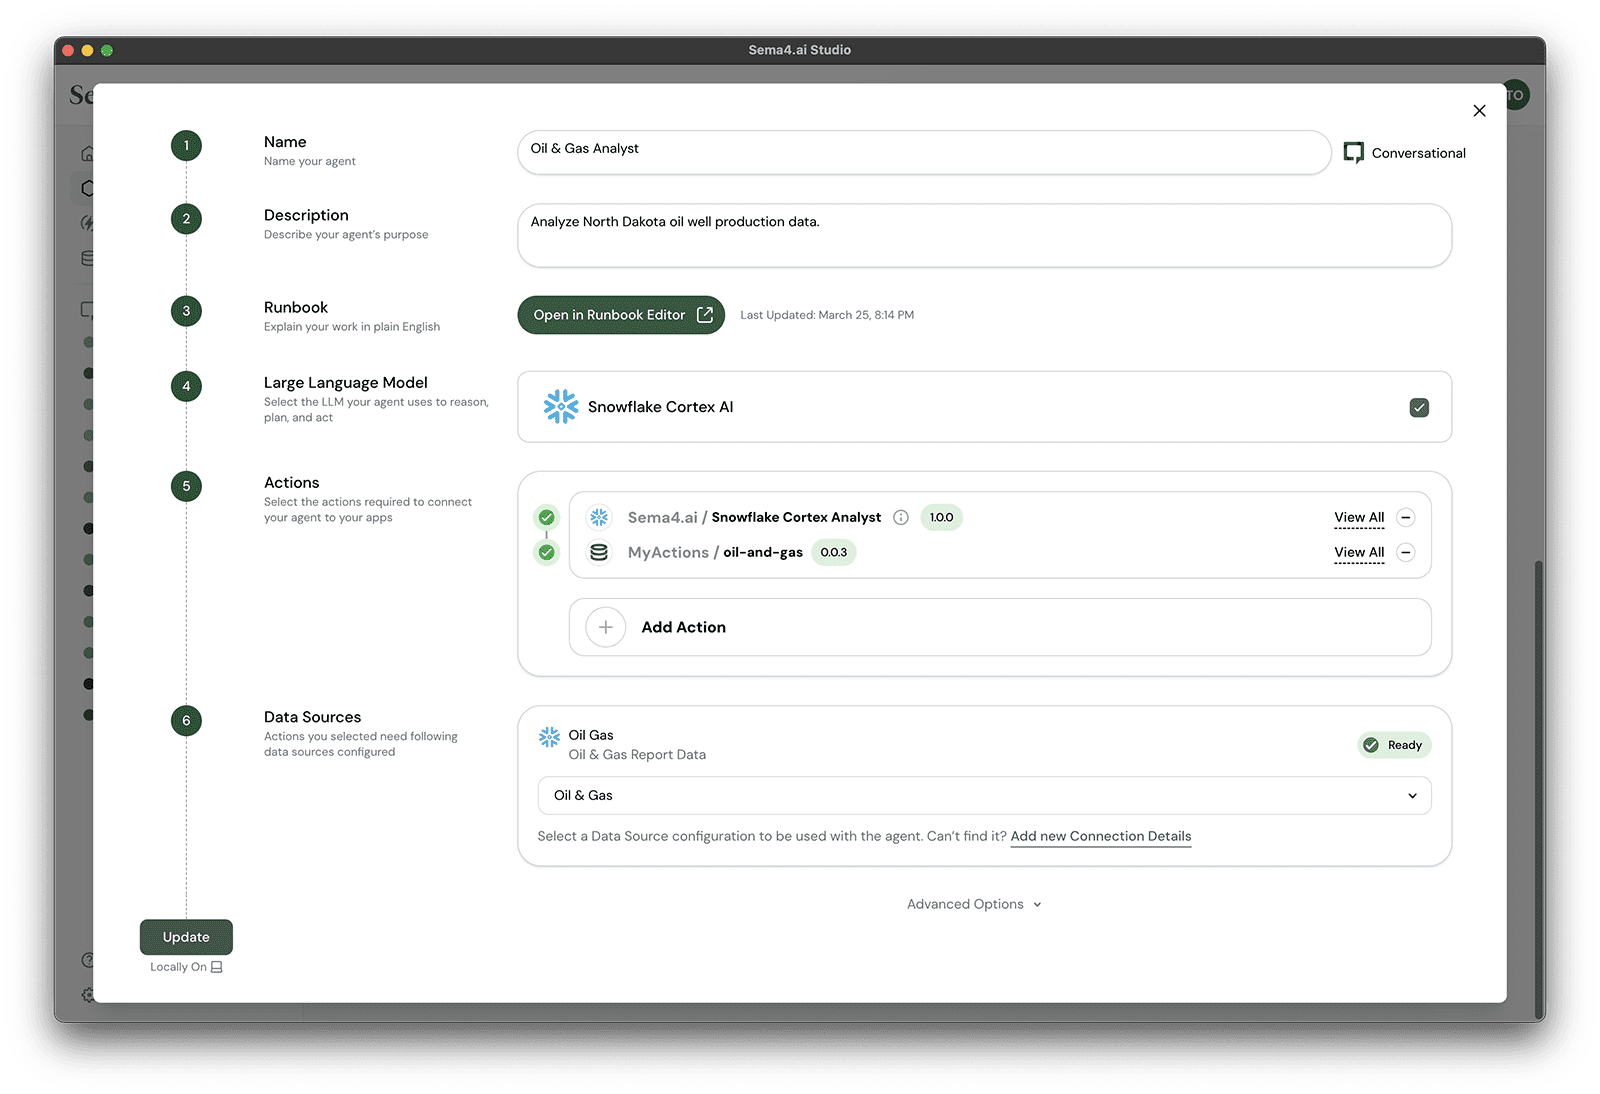
- Click Update in the lower-left corner to start your agent.
Once deployed, you can start working with your agent.
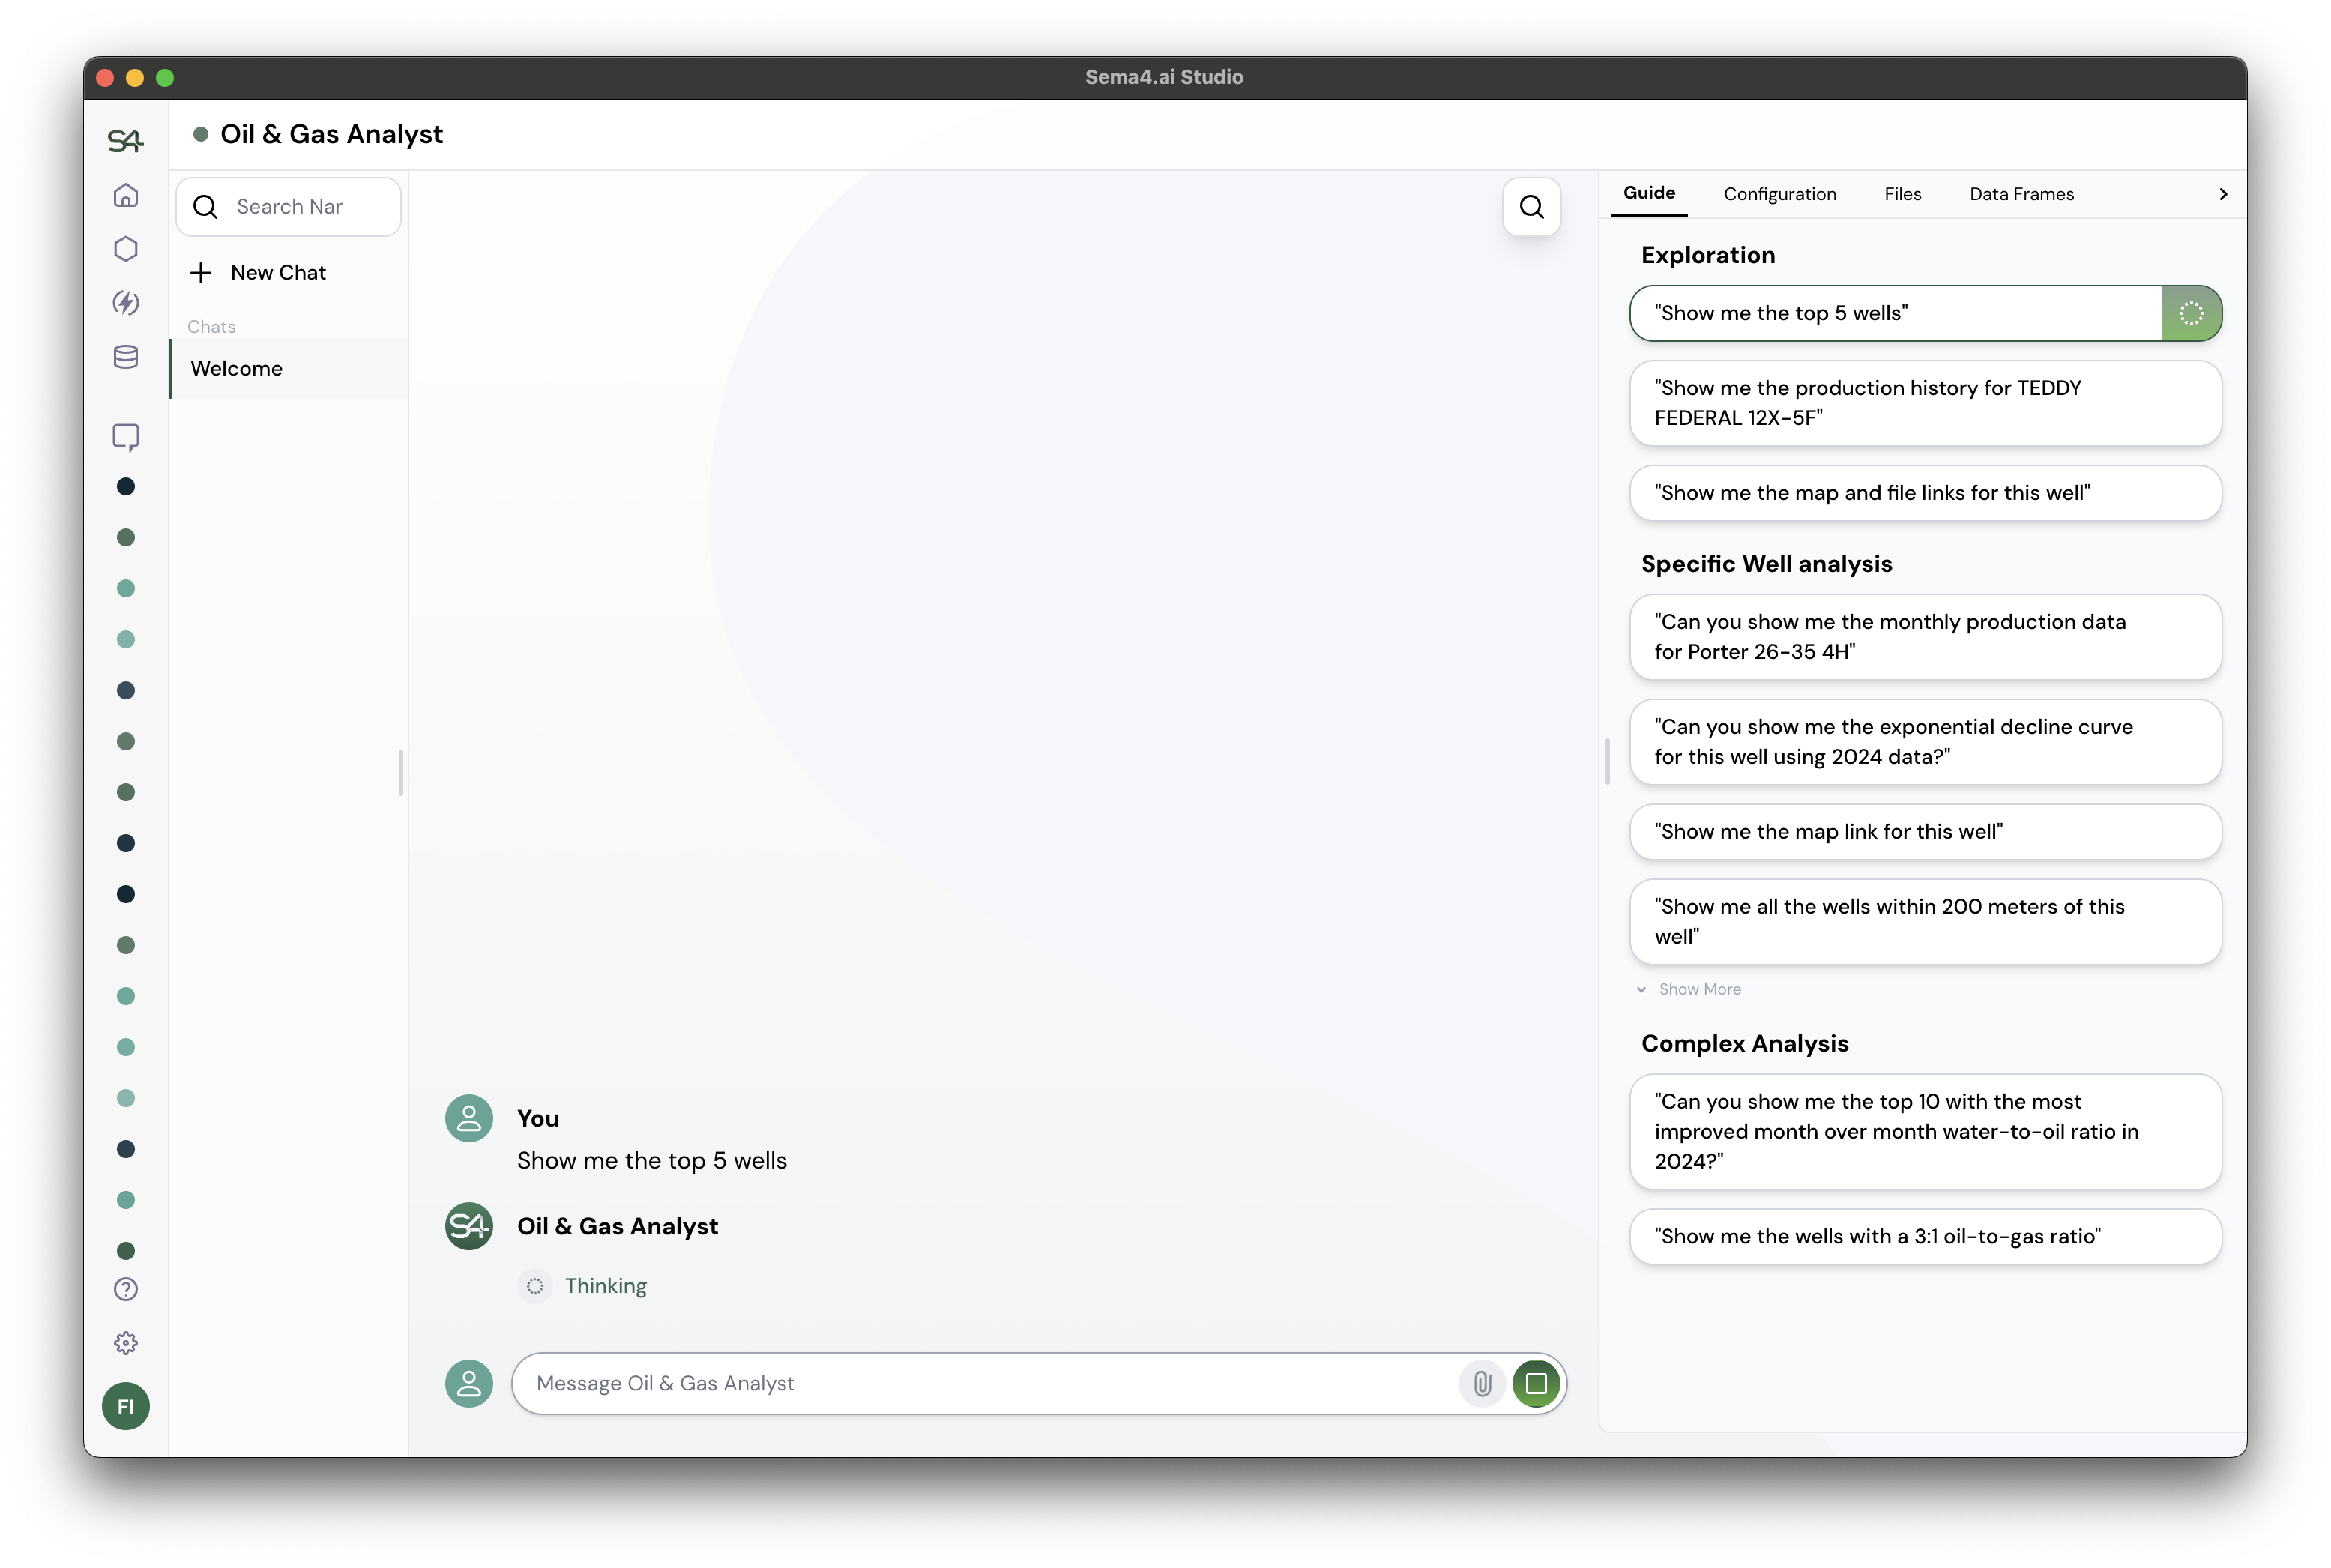
Use your agent
Create a new Chat for each of these sections to keep your conversations organized and in-context.
Choose Guide tab from the agent's right sidebar, and you will see a list of example questions you can ask the agent! Try asking a few of them to see how the agent uses both Cortex Analyst and the data actions to answer specific questions.
Open an agent package in your IDE
Following steps are optional, but recommended if you want to explore the agent package in more detail.
- In Studio and agent view make sure you are on the Configuration tab (right sidebar).
- Click the button to open the menu and select Open in your IDE
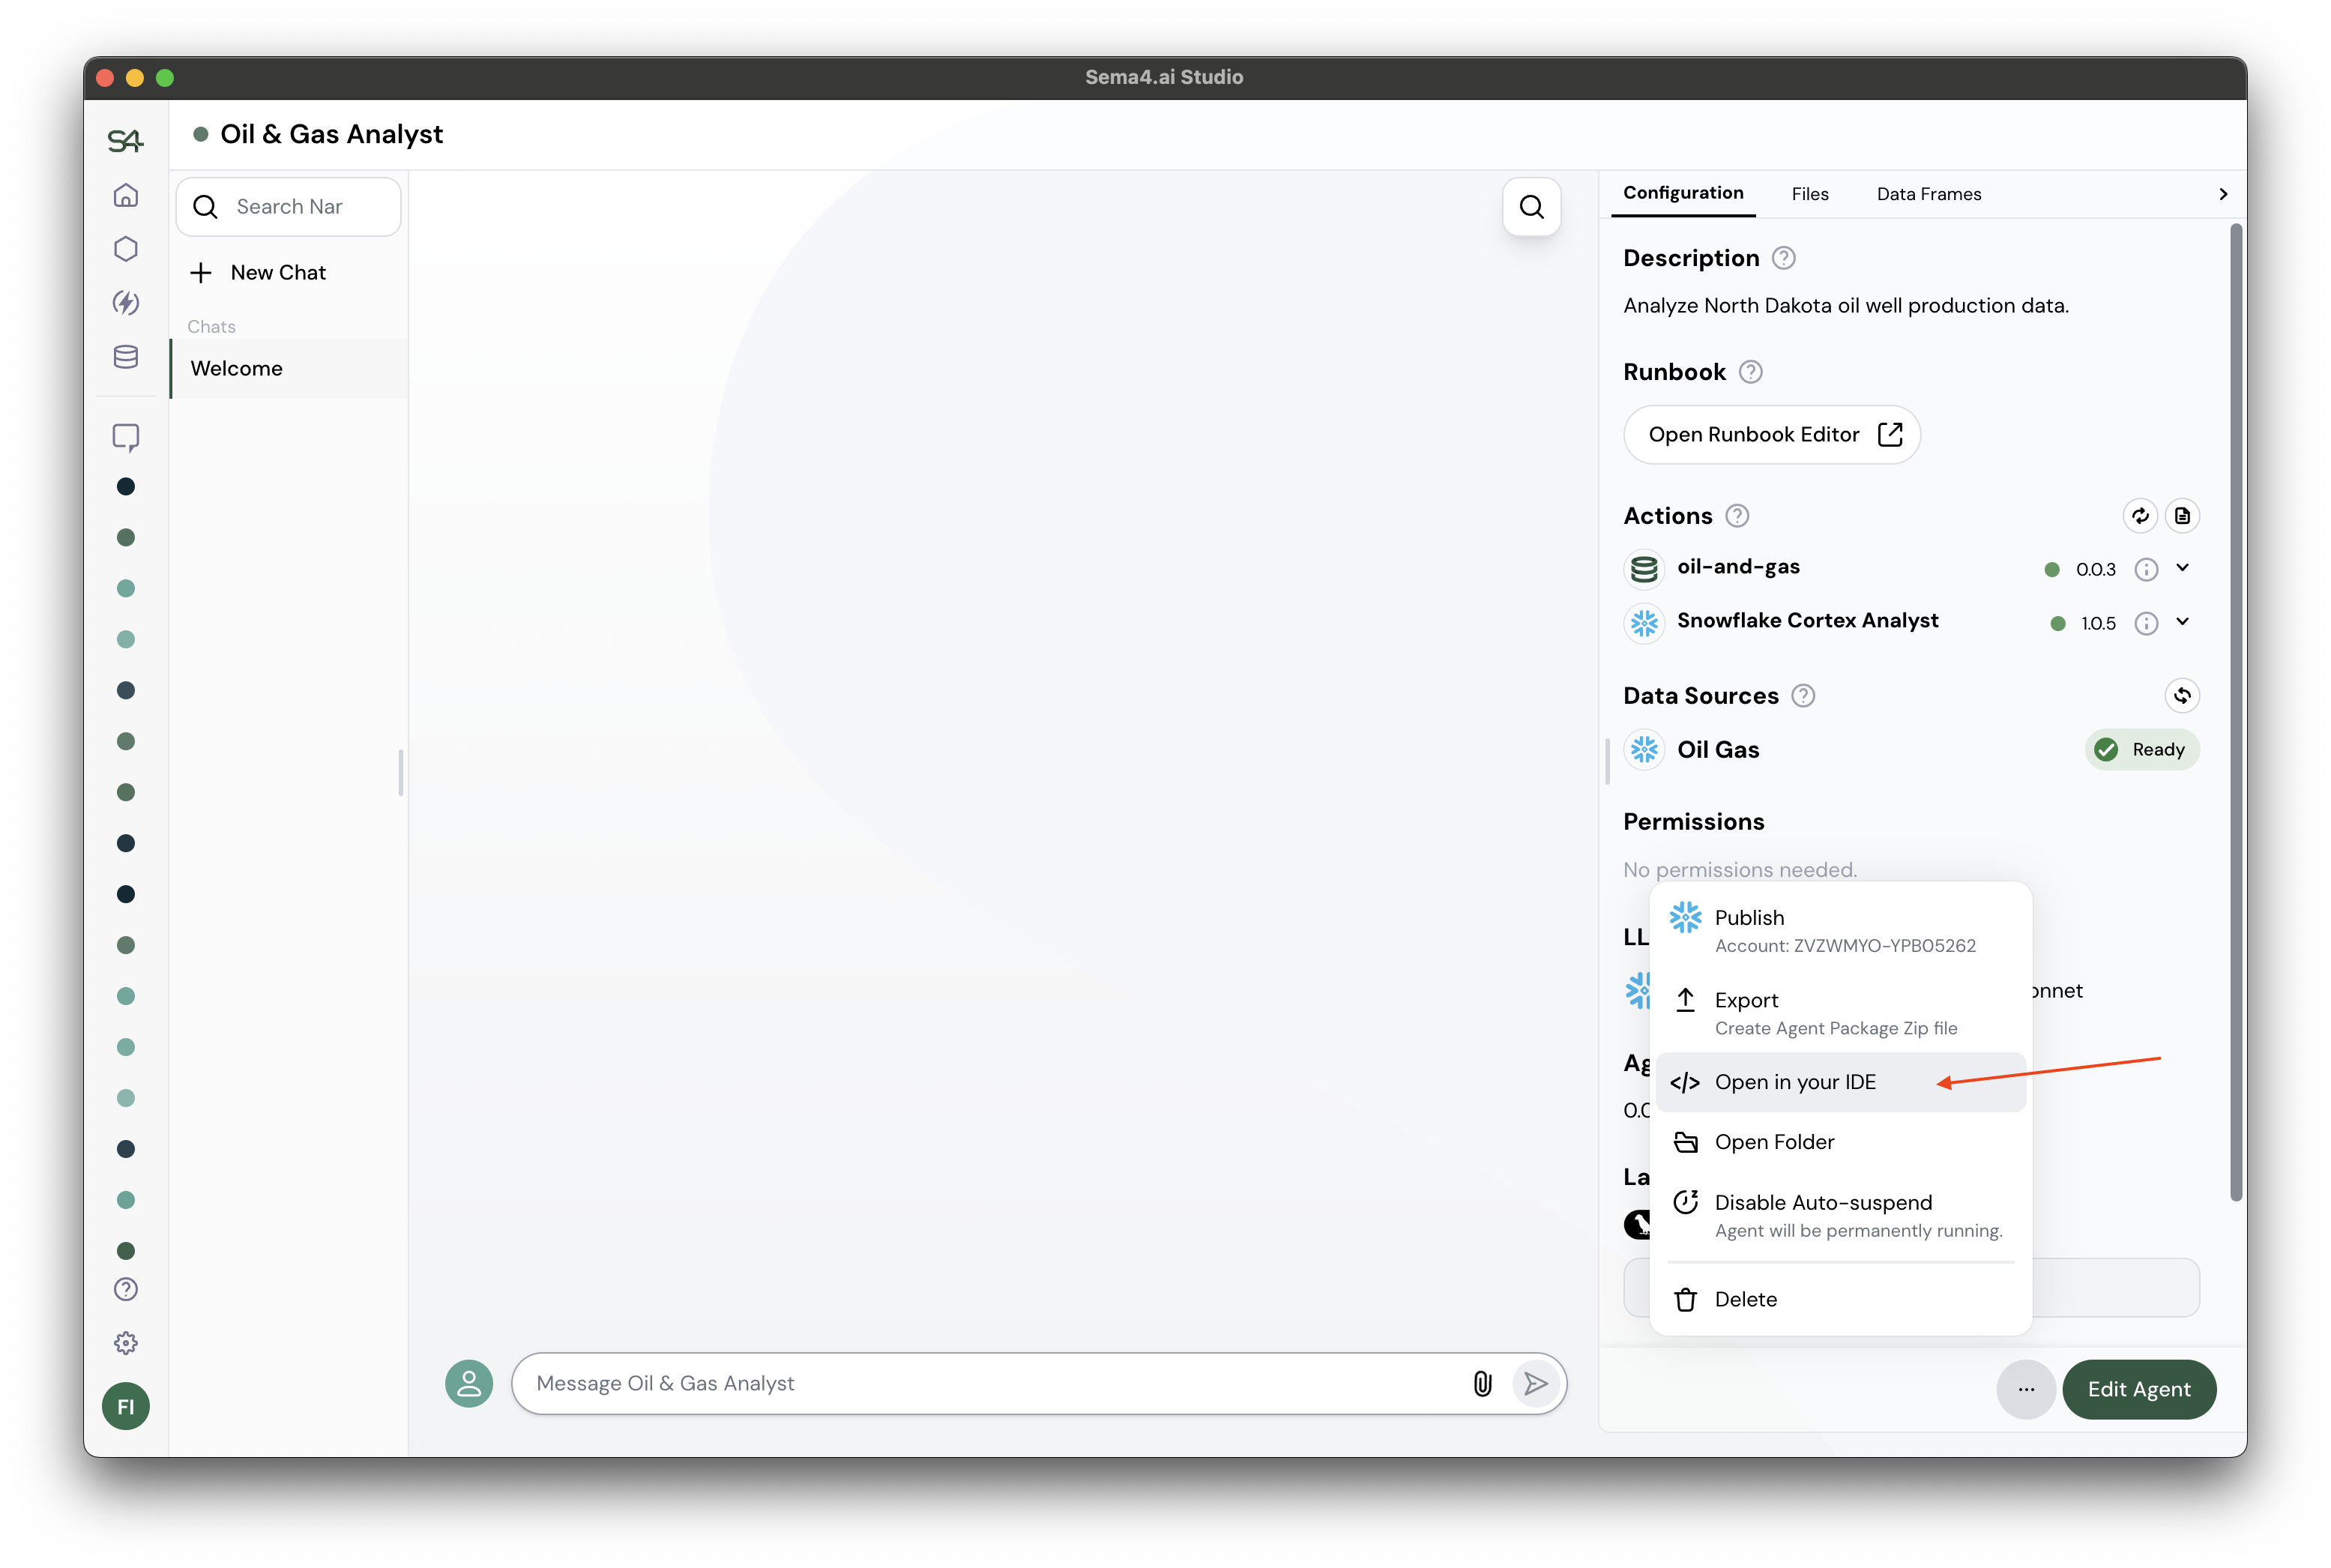
Your agent gets opened in your default IDE.
- Expand the
MyActionsandoil-and-gassections to see the data actions included in the project.

Click any of the actions, then click on the Open Action button to see the Python code used to create the action.
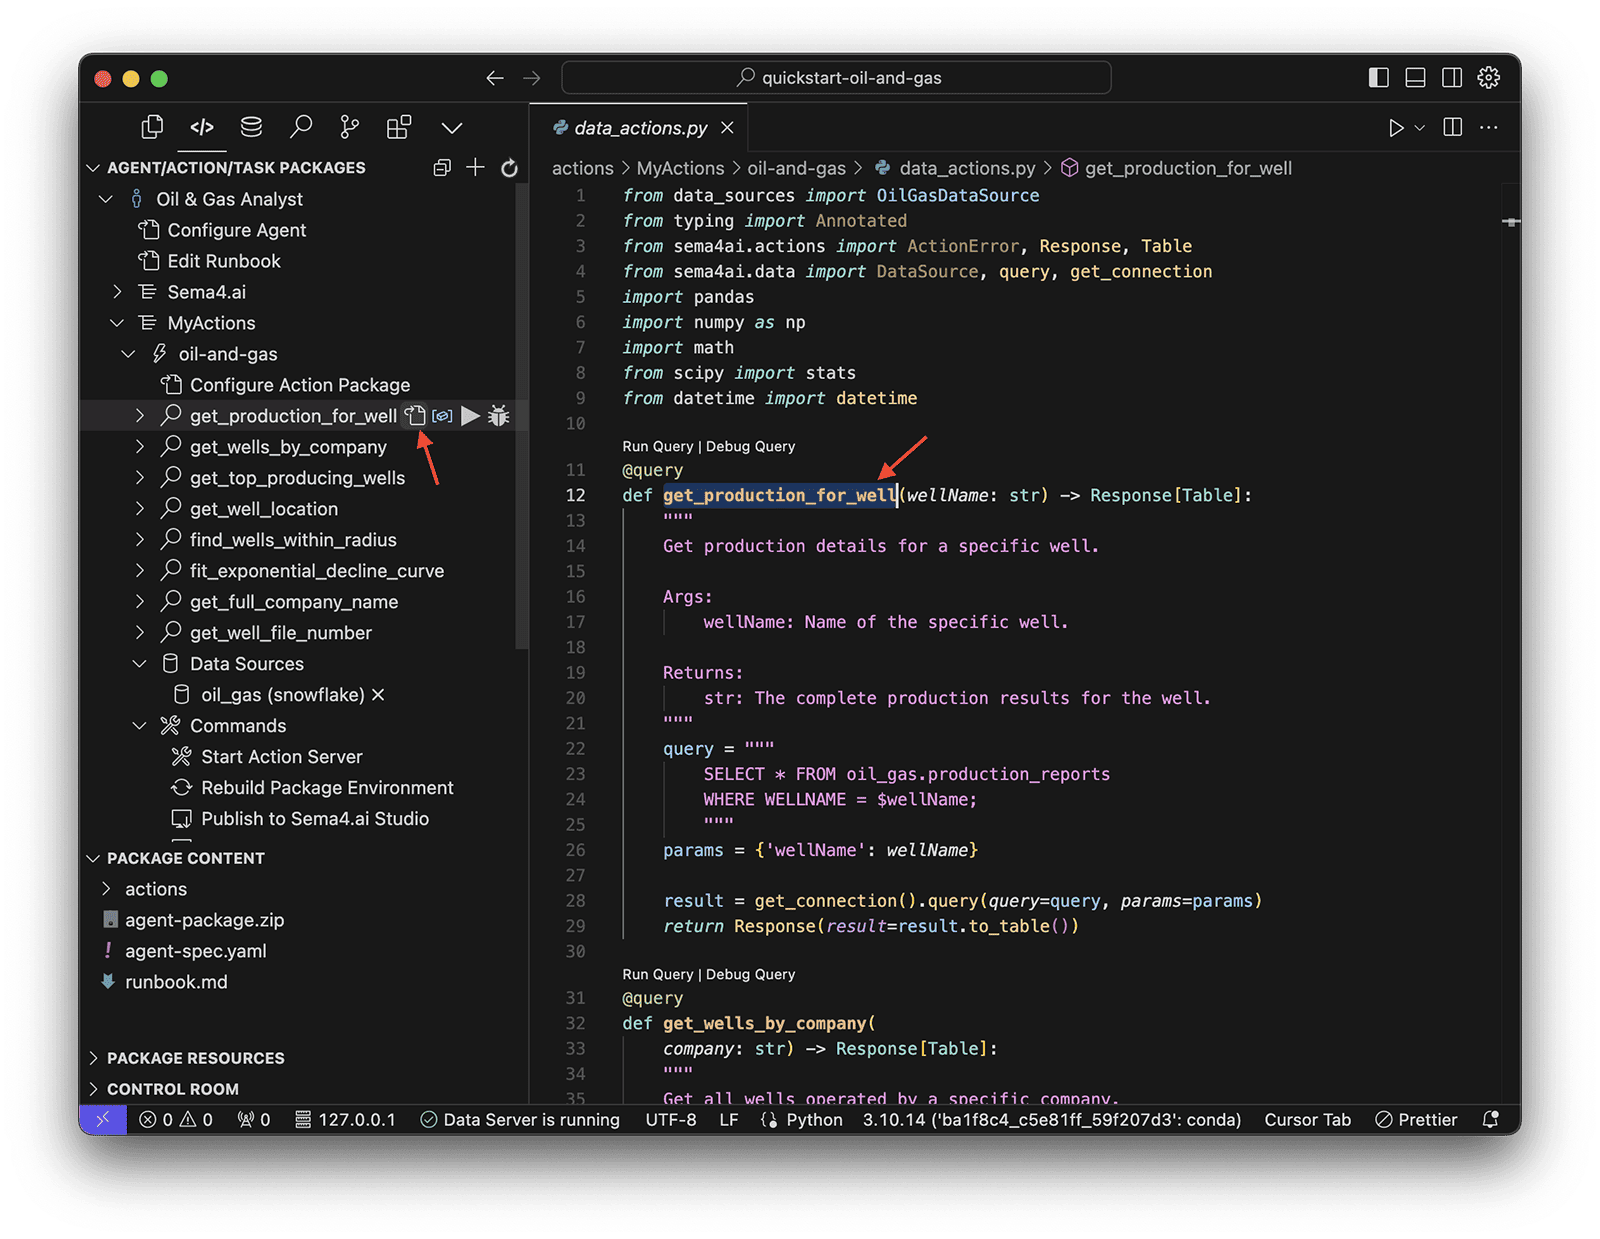
The @query decorator exposes this function to the agent. The docstring helps the agent understand how and when it should be used, and the parameters with their type hints (e.g. wellName: str) informs the agent what parameters are required to invoke this data action.
Publish changes to your agent to Sema4.ai Studio
Change in your agent can be published to Sema4.ai Studio in a single click. Scroll down to the bottom of the agent package section and under Commands, click Publish to Sema4.ai Studio.
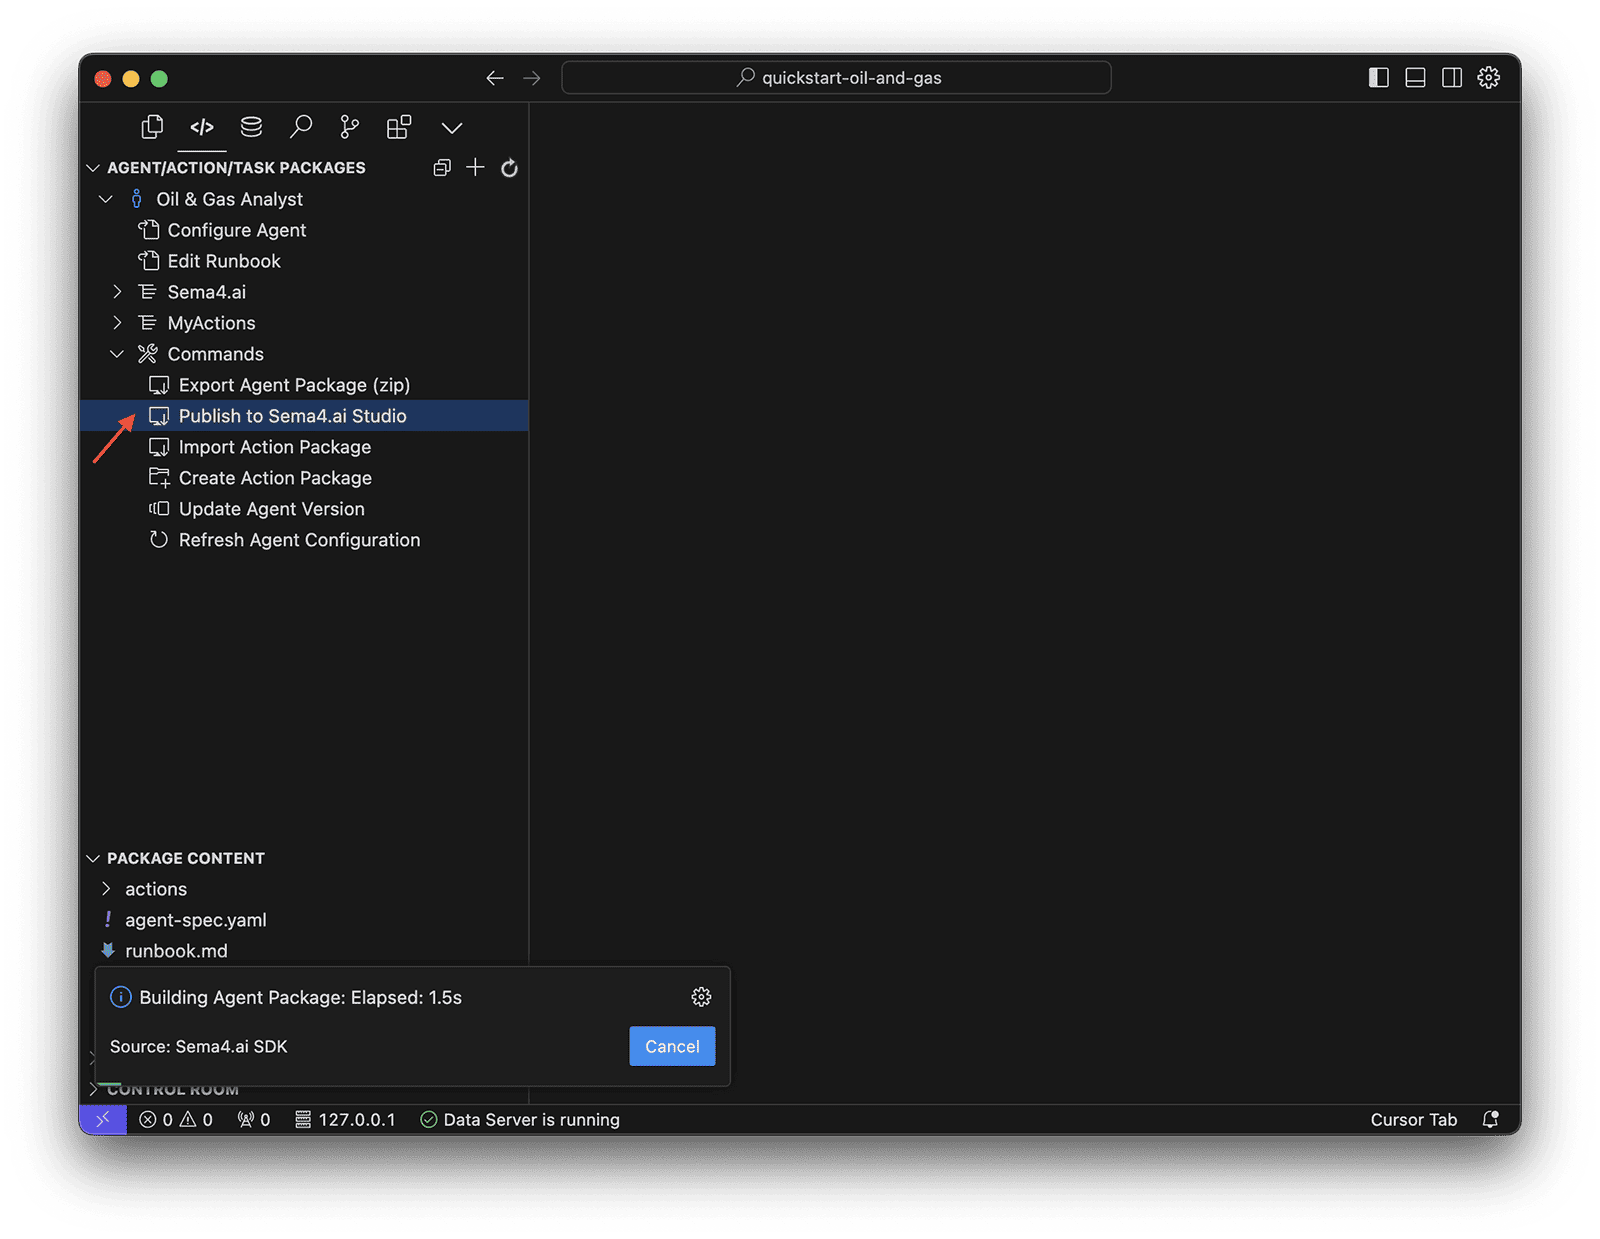
Publishing your agent may take a few minutes to complete.
Recommended resources
Congratulations on making it through this quickstart! We hope you enjoyed it, and to learn more about each of the specific steps you followed, feel free to review the Step-by-step walkthrough.