Linking Studio with key-pair authentication
Key-pair authentication is a secure way to link your Studio to your Snowflake account. It requires every user to perform the steps to create their own key-pair, but once the setup is done this method is easy and effortless. Typically people using Snowflake CLI already have a key-pair set up, so this method is a great choice for them!
You can also watch our tutorial video here (opens in a new tab) to see how to link your Snowflake account to Sema4.ai Studio, including how to set up key-pair authentication.
Setting up key-pair authentication
Before using key-pair authentication in Studio, you will need to set a few things up in Snowflake. Easiest to follow the offical Snowflake guide for the setup here (opens in a new tab).
In short, you will need to:
- Create a rsa key pair (public and private key) on your local computer
- Add the public key to your Snowflake user account
Windows users only: when setting up Snowflake key-pair authentication, please notice that OpenSSL is not included by default on Windows operating systems and requires separate installation.
Windows users who have already installed for example Git can utilize the Git Bash application, which includes OpenSSL functionality, to run the commands specified in the above guide. Alternatively, OpenSSL can be downloaded and installed directly from the official website or trusted third-party providers. Another option is to use Windows Subsystem for Linux (WSL), which provides a Linux environment where OpenSSL is readily available or easily installable.
Using key-pair authentication in Studio
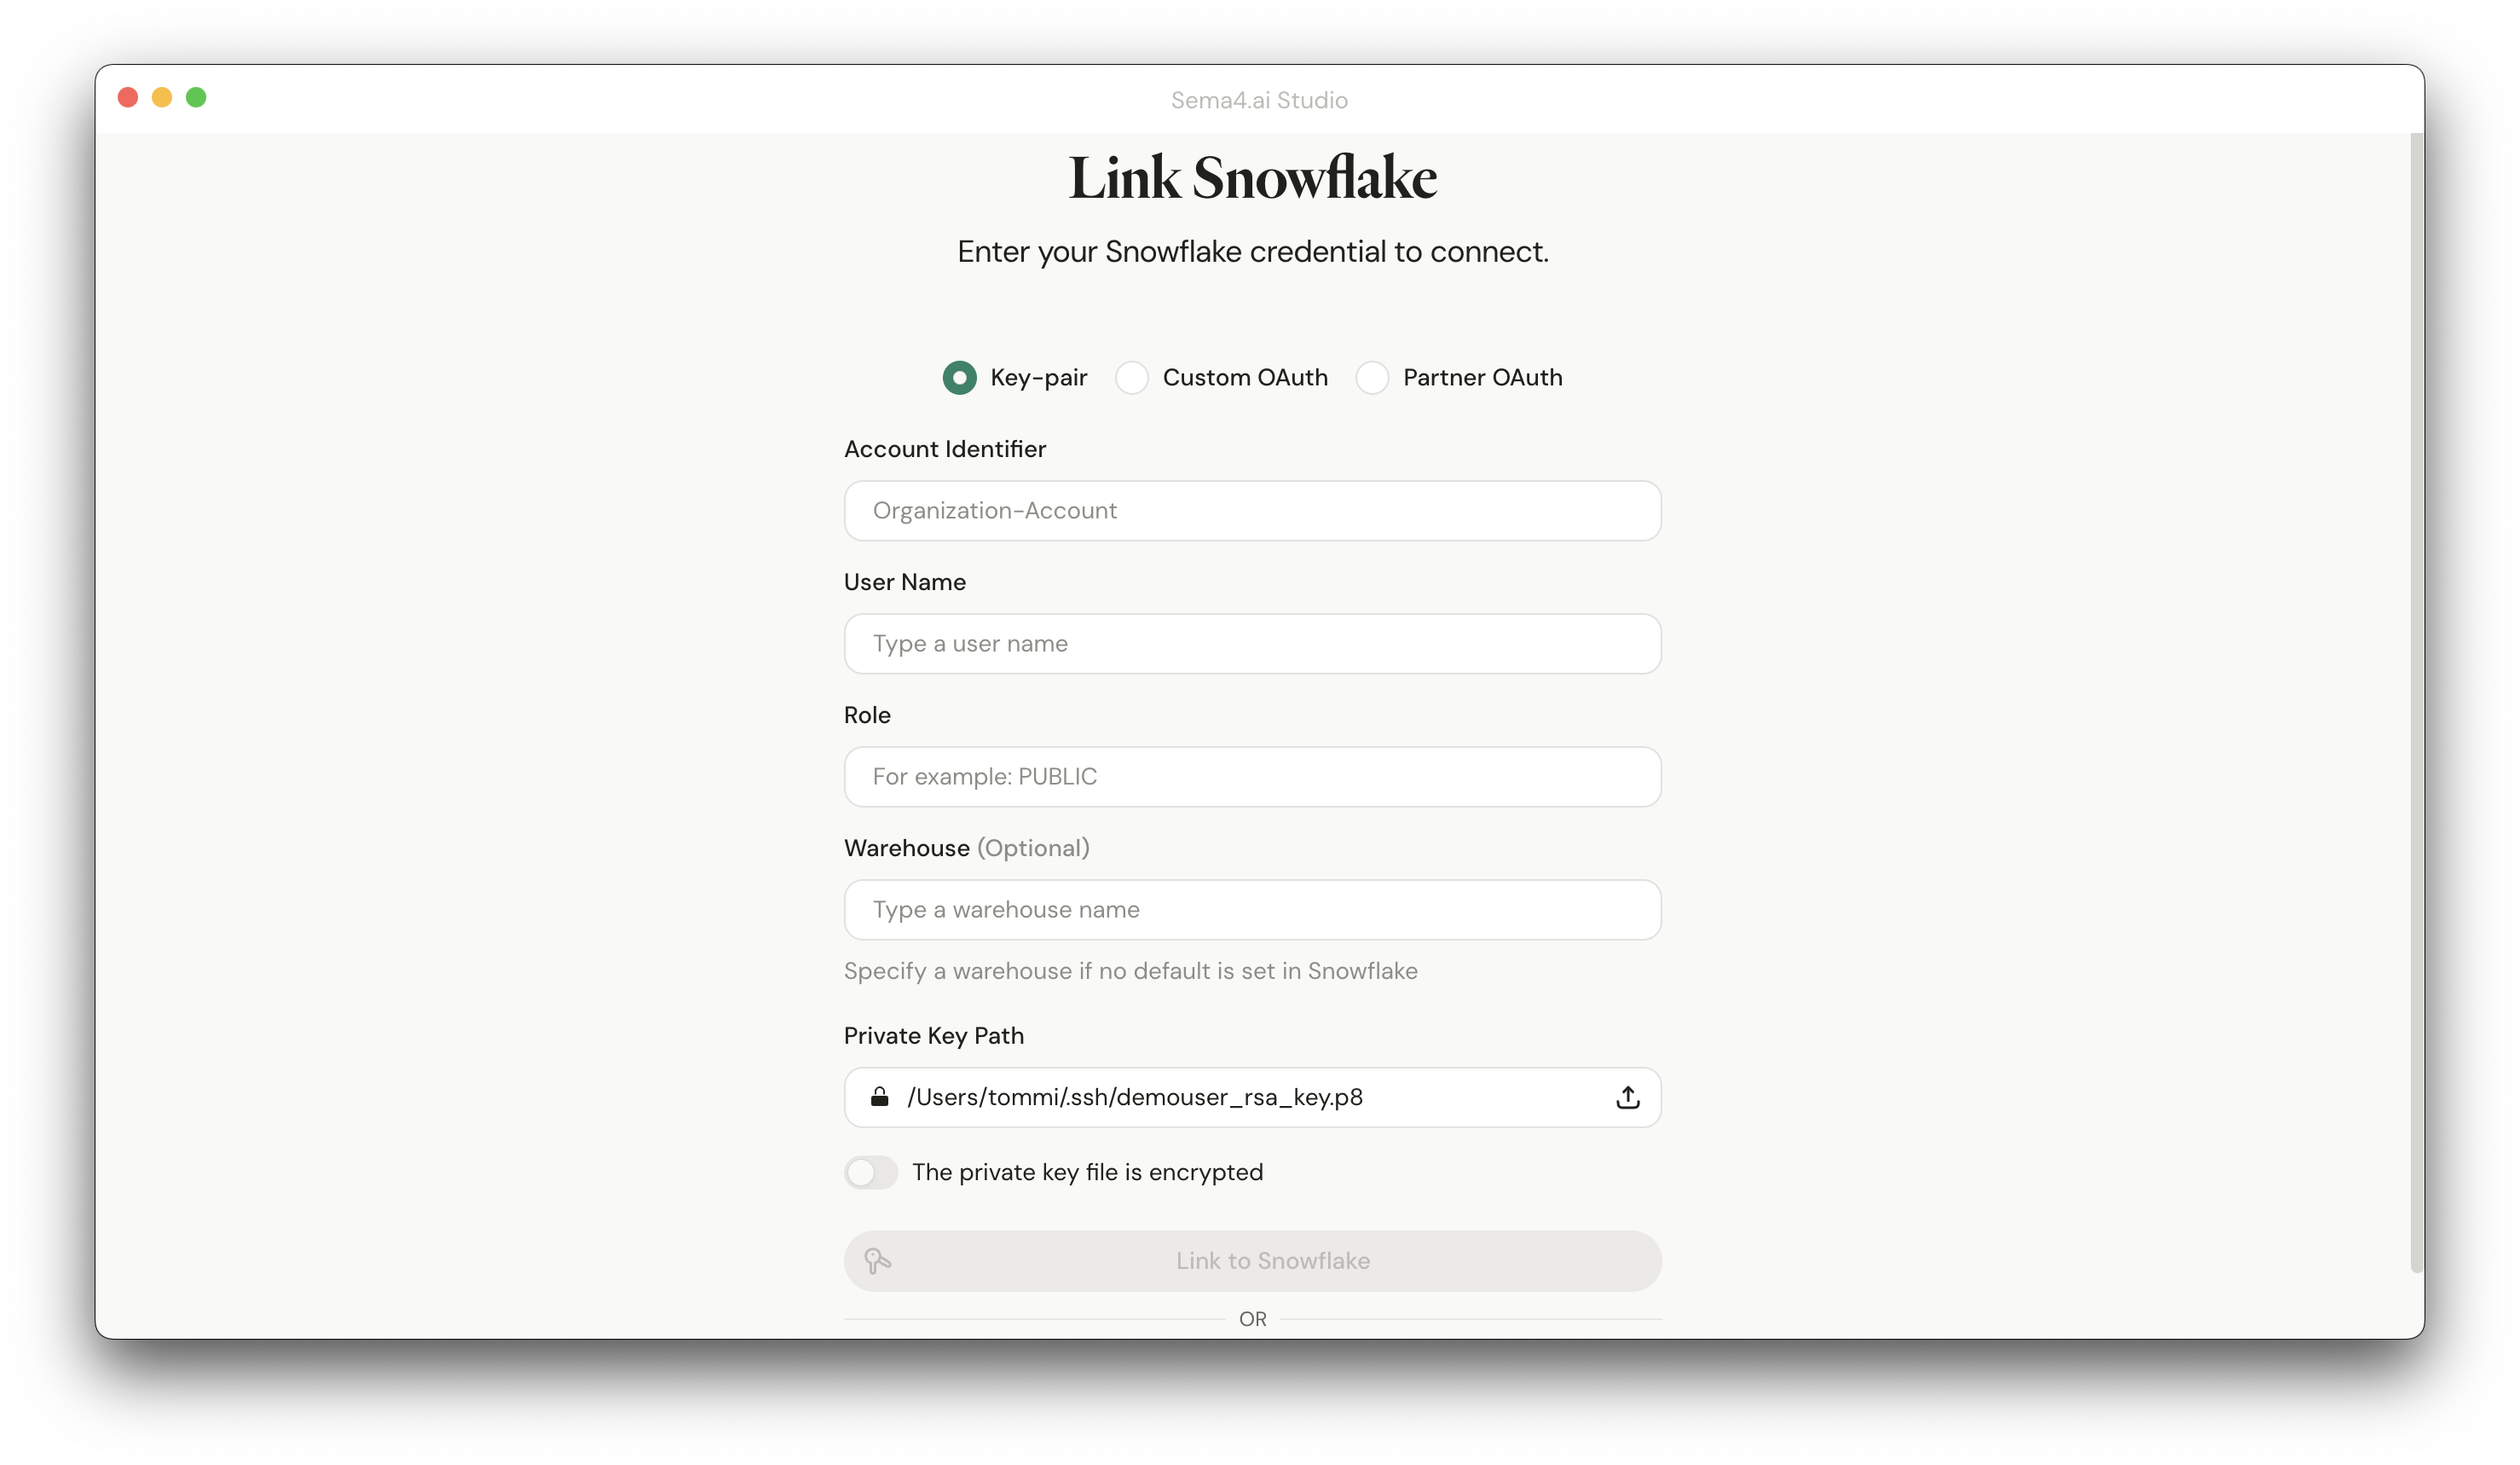
- Choose Key-pair from the selector at the top.
- Enter your Snowflake account details:
- Account identifier (e.g.,
ZVZWMYO-HP00956) - Username
- Role you want to use for the connection
- Account identifier (e.g.,
- Provide the Warehouse you want to use (optional - if not provided, the default warehouse will be used and NEEDS to be set up in Snowflake)
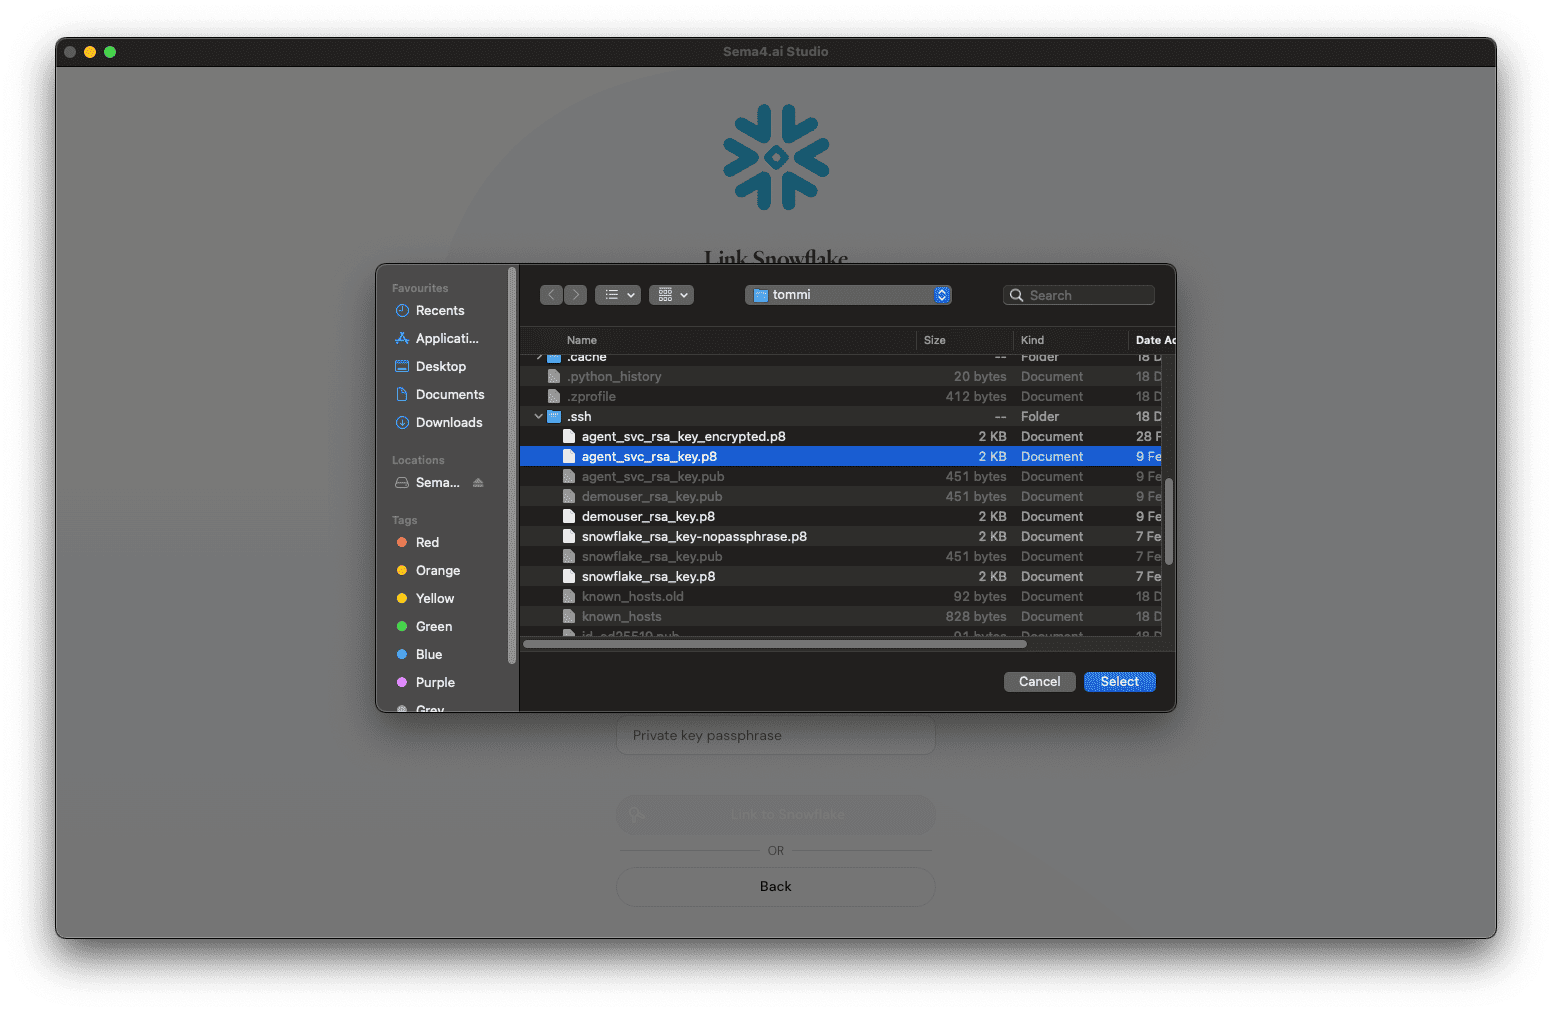
- Open a file picker to find and select the private key file you created when setting up Snowflake key-pair authentication. It's typically the one that has for example
.p8extension. - Add the passphrase if your key has one.
- Click Link to Snowflake button.
When choosing the private key file, on macOS pressing Command+Shift+. will change to the mode which reveals all folders, including the ones named for example .ssh where the private key file is typically located.
Your connection to Snowflake gets verified, and if all works well, you'll see a message confirming that you're connected. Your Studio is now ready to use!