Setting Up Your Sema4.ai Studio
Welcome to Sema4.ai Studio! This guide will walk you through the essential configuration steps to optimize your studio environment for building and managing AI agents effectively. Once you've successfully installed Sema4.ai Studio, proper configuration ensures seamless integration with your organization's infrastructure and optimal performance for your agent development workflow. This documentation covers the key setup areas that will enhance your productivity and enable advanced features.
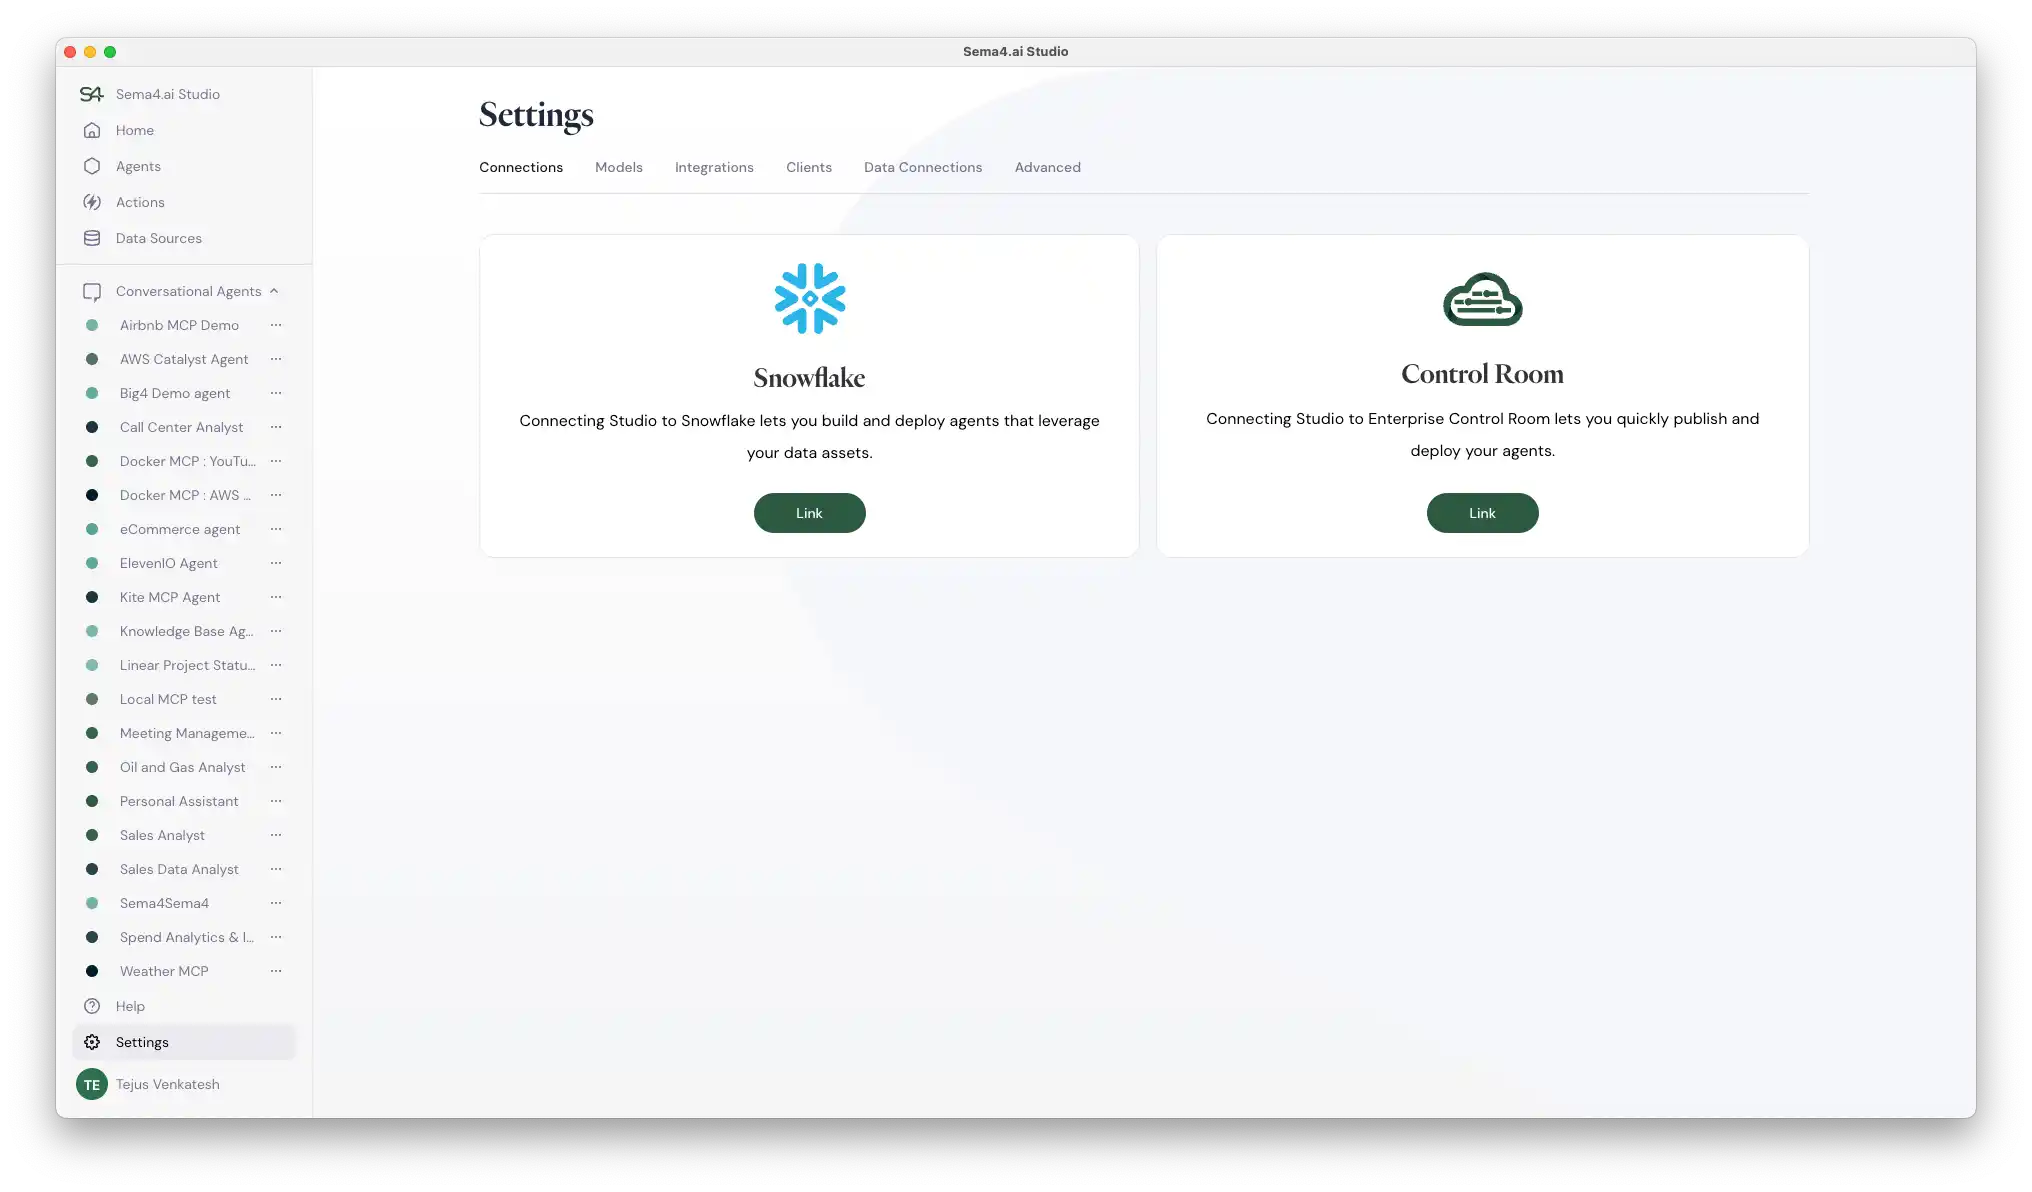
Linking Your Studio to Control Room or Team Edition
Linking your studio to either Control Room (Enterprise Edition) or Team Edition (Snowflake) provides several key benefits:
- Centralized Management: Manage all your agents and configurations from a single platform
- Team Collaboration: Share resources and collaborate on projects with your team
- Enterprise Features: Access advanced deployment, monitoring, and governance capabilities
- Resource Sharing: Leverage shared LLM models and configurations across your organization
To link your studio, follow the steps below based on your edition:
- Go to the Settings page in your studio.
- Under Connections tab, you can either select "Link" button under Snowflake if you have Team Edition or button under Control Room if you have Enterprise Edition.
Team Edition
- Click the Link button under the Snowflake section.
- Provide the Snowflake Account identifier, username, Role and private key to get connected
- Follow the detailed instructions in the Team Edition documentation to complete the setup.
Enterprise Edition
- Click the Link button under the Control Room section.
- Enter your Control Room URL and sign in with your SSO credentials.
- You could also link using access credentials. Follow the detailed instructions in the Enterprise Edition documentation to complete the setup.
Enterprise Edition uses your organization's existing SSO infrastructure, ensuring compliance with your security policies.
Configuring Your Language Model
Understanding LLM Model Selection
The Large Language Model (LLM) serves as the core intelligence for your AI agents. Choosing the right model impacts:
- Performance: Response quality and processing speed
- Cost: Token usage and operational expenses
- Capabilities: Available features and specializations
Adding and Managing Models
To add a new model configuration:
- Navigate to the Settings tab in your studio.
- Go to the Models tab.
- Click the "Add New" button to create a new model configuration.
- Fill in the required details such as model name, provider, and API credentials.
- Click Test to verify the connection and then Save.
Supported Models in Studio
Sema4.ai Studio supports a variety of LLMs, including:
- OpenAI Models: gpt-3.5-turbo, gpt-4o, gpt-4-turbo, gpt-4.1, gpt-4.1-mini, gpt-03-low, gpt-03-high, gpt-04-mini-high
- AWS Bedrock: claude-3-5-sonnet, claude-3-7-sonnet, claude-4-sonnet, claude-4-opus
- Azure OpenAI: Access to OpenAI models via Azure - Customer-specific model deployments supported
- Snowflake Cortex: (Applicable for Team Edition users) claude-3-5-sonnet, claude-3-7-sonnet, claude-4-sonnet, claude-4-opus; OpenAI models coming soon.
Setting Your Default Model
Setting up a default model streamlines your workflow by automatically pre-selecting your preferred language model for all new agents. This approach ensures consistency across your projects while eliminating repetitive configuration steps during development.
How it works:
- New agents automatically inherit your default model selection
- The model dropdown pre-populates with your chosen default during agent creation
- Individual agents can still use different models when needed—simply change the selection during creation or editing
Note: Your default model also powers SAI, Studio's built-in AI assistant that accelerates agent development. Learn more about how SAI accelerates agent building.
Configuration steps:
- Go to the Settings tab in your studio
- Navigate to the Models tab
- Review available models available for selection. If you are connected to Control Room or Team Edition, you will see models shared by your organization. You can also add your own models by clicking the "Add New" button.
- Select your preferred model and click the "Set as Default" button (flag icon)
Best Practice: Test different models with sample tasks before setting your default to ensure optimal performance for your use cases.
Managing Studio Updates
Studio offers flexible update management to match your operational requirements:
Preview Releases
- Benefits: Early access to latest features and improvements
- Best For: Development environments and users eager to test new capabilities
- Considerations: Preview releases have undergone less testing than Stable releases, and may contain incomplete features
Stable Releases
- Benefits: Thoroughly tested, production-ready updates
- Best For: Production environments requiring maximum stability
- Considerations: Features arrive later but with proven reliability
Configuring Update Preferences
- Go to Settings → Advanced tab
- Locate Application Update Channel
- Select your preferred update frequency
- Save your configuration
Recommendation: Use Preview Releases for development and testing environments, while maintaining Stable Releases for production deployments.
Exploring Experimental Features
What Are Experiments?
Experiments provide early access to cutting-edge features still in development, allowing you to:
- Preview Innovation: Test upcoming capabilities before general release
- Provide Feedback: Influence feature development with your input
- Gain Competitive Edge: Leverage new functionality ahead of the curve
Notable Experimental Features
Agent MCP Server Endpoint: You can expose your agents as an MCP Server so other agents or tools which support MCP can interact with your agents. This is useful for integrating agents into larger workflows or systems. Learn more about Agent as an MCP Server
Enabling Experiments
To activate experimental features:
- Navigate to Settings → Advanced tab
- Toggle Experiments on to access preview features
- Explore new controls and capabilities as they become available
Important: Experimental features may change significantly or be discontinued in future updates. Use them for testing and development rather than production environments.
Ready to build intelligent agents? Your studio is now configured for success!