Linking Studio with custom OAuth provider
Custom OAuth provider is a great way for enterprises to link their Studio to their Snowflake account. It requires administrator to set up the OAuth client in Snowflake, and share the details with the Studio users.
Setting up custom OAuth provider
Before using custom OAuth provider in Studio, an administrator will need to set a few things up in Snowflake. Follow these steps, and refer to additional documentation in Snowflake if needed.
- Create a network policy (opens in a new tab) (EAI) that allows the application to access the OAuth provider.
- Create a security integration (opens in a new tab) in Snowflake with type OAUTH_CLIENT = CUSTOM for roles who are allowed to use the integration.
- Run SQL query to get the Oauth (opens in a new tab)
client_idandclient_secret. - Share the
client_idandclient_secretwith the Studio users.
Using custom OAuth provider in Studio
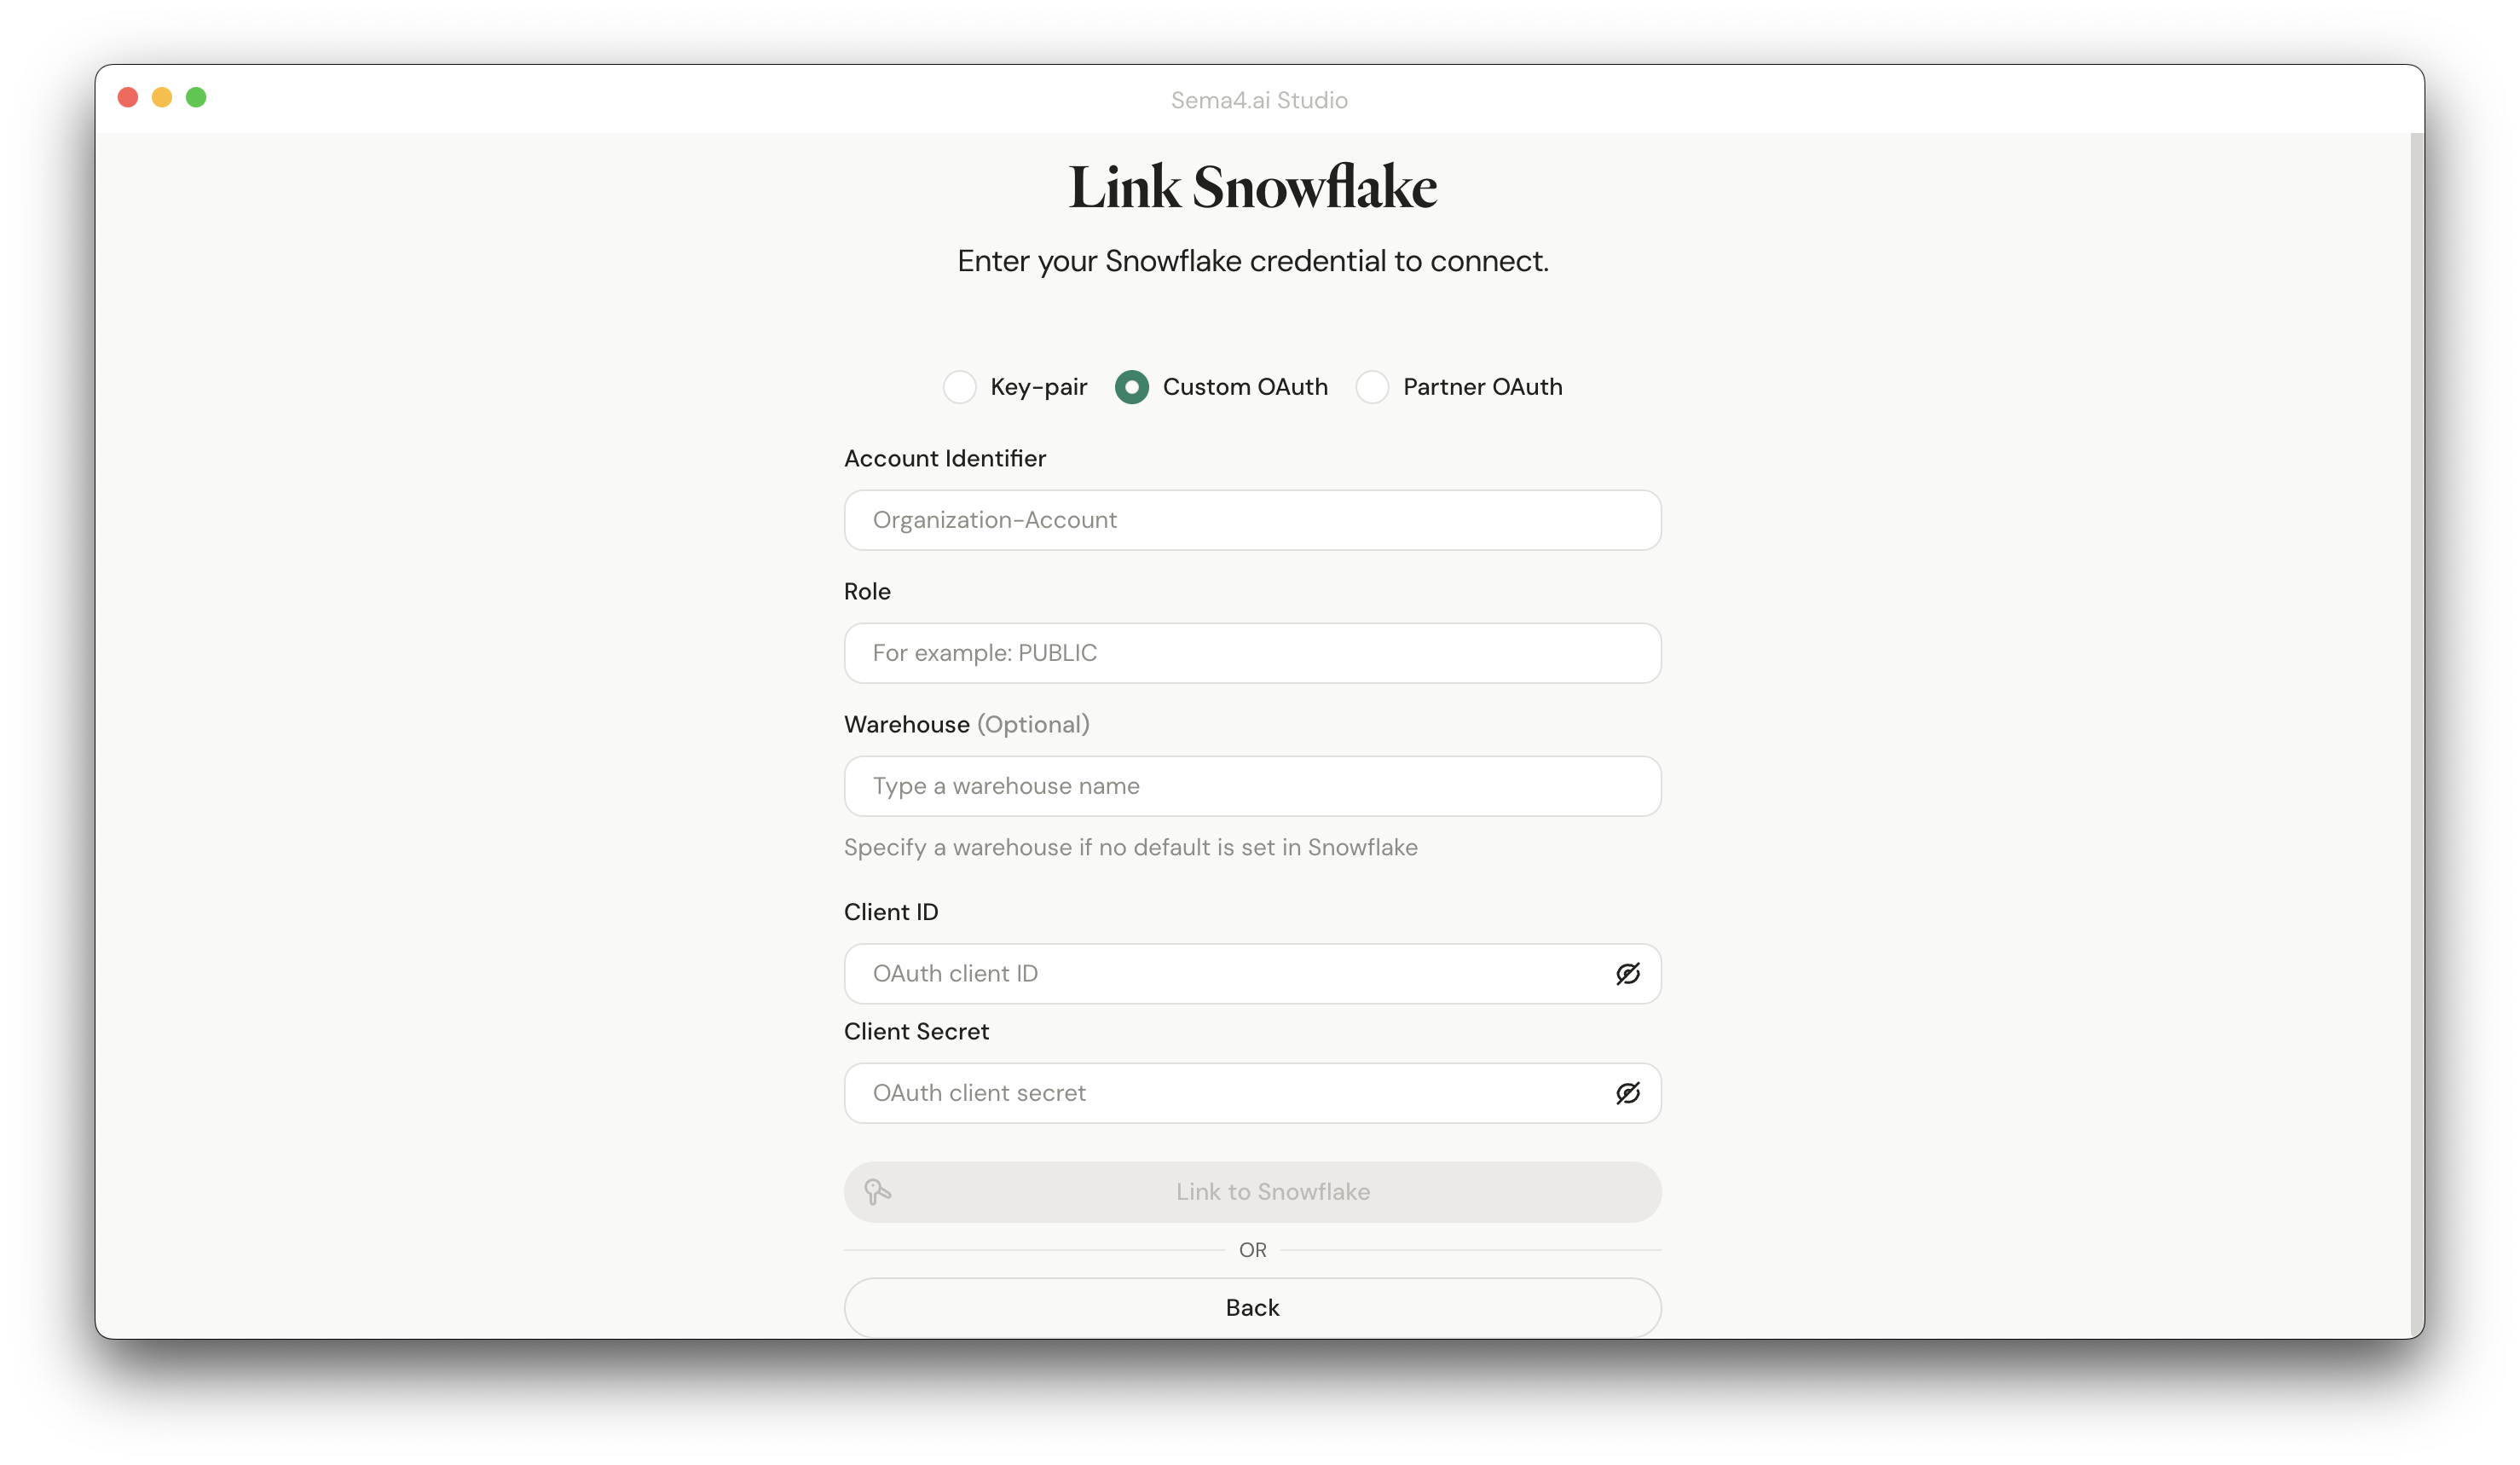
- Choose Custom OAuth from the selector at the top.
- Enter your Snowflake account details:
- Account identifier (e.g.,
ZVZWMYO-HP00956) - Role you want to use for the connection
- Account identifier (e.g.,
- Provide the Warehouse you want to use (optional - if not provided, the default warehouse will be used and NEEDS to be set up in Snowflake)
- Enter the
client_idandclient_secretyou received from the administrator. - Click Link to Snowflake button.
- A browser window will open to complete the authentication process. Once completed, you can close the browser window and return to Studio.
Your connection to Snowflake gets verified, and if all works well, you'll see a message confirming that you're connected. Your Studio is now ready to use!
Every time you start Studio again, you will be required to re-authenticate with Snowflake.