Access data
Data is critical to decision-making and accurate responses. Agents can work with data in multiple ways:
- You can upload PDF files to conversational agents using a specific chat conversation to provide ad-hoc Q&A or act as additional context to improve responses.
- You can use Document Intelligence to monitor and process new PDF files using advanced AI to deeply understand the content and structure of business processes that require detailed understanding and accuracy.
- You can grant agents permission to access files directly from applications like Google Workspace and Microsoft SharePoint.
Upload PDFs to a chat
If you have a local PDF file that you want to use with an agent to ask questions or provide additional context, you can easily share it by uploading it directly to your conversation. Agents use these files to add context to your conversation and support ad-hoc Q&A, allowing you to ask specific questions about the information in the PDF.
To upload a file:
- Click on the Files tab.
- Locate the file upload button near the message input field.
- Select the file you want to upload.
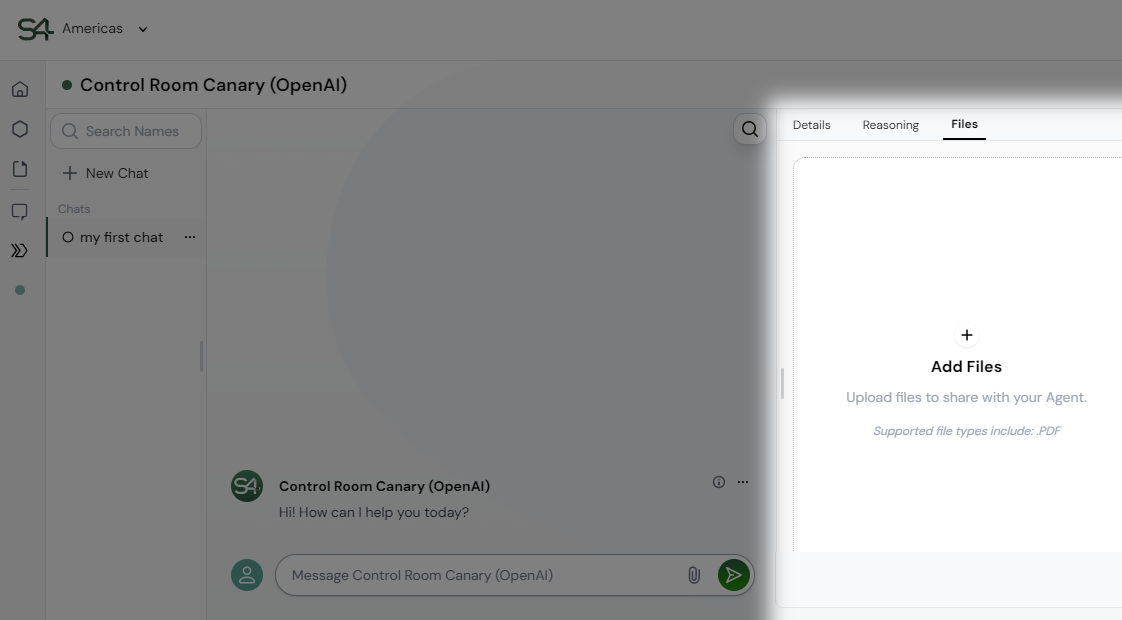
This feature allows agents to provide ad-hoc Q&A or use the uploaded files for context, improving the accuracy and relevance of their responses.
Uploaded files are only available in this specific chat conversation.
Permit agents to access your data
If your agent is configured to access data in external enterprise applications like Microsoft SharePoint, Zendesk, or Google Workspace, you need to permit the agent to access data as you. Giving your agent access ensures they have the data you need their help with. If part of your work requires creating new documents, events, or tickets, this permission enables them to create those artifacts as you.
Permissions
Unlike uploading files directly to agents, when agents are configured to access data using external enterprise applications, they first need to ask you to provide permission to access data. This allows you to review the access they're requesting and approve it. When first using an agent, you'll be prompted to provide your permissions.
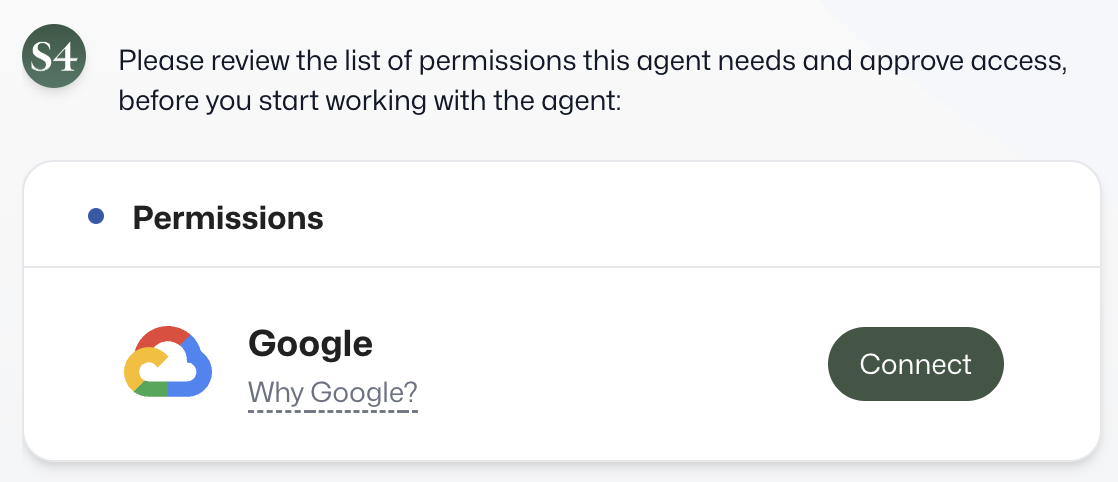
When you see this connection request, click Connect, review the consent page to check the permissions you're providing to the agent, and log into the appropriate account.